Showing posts with label Cottage Cutz Stitched Wide Rectangle Frame. Show all posts

Thursday, October 03, 2019

Holiday Pup

Hello Scrapping Cottage Friends,

It is Pam on the blog creating with you today.  I hope you are all doing well.  I am continuing to make Christmas cards using our new release dies.  The card today is using the Holiday Pup.  I just love dogs so this die is right up my alley!!
Design Steps:
 1.   Using the Holiday Pup die cut out the pieces using red, green, white, yellow, black and brown card stock
 2.  Shade the pup pieces using ink and then assemble
 3.   Shade the gift pieces using ink and then assemble
 4.  I like to lay out the pieces to see how I will arrange them on my card
5.  Use and A2 white card base, a piece of red card stock slightly smaller then the white card front, a piece of green DP 4 x 5 1/4, 2 strips of red DP 1/2 x 5 1/4 and cut a white rectangle frame using the Stitched Wide Rectangle dies second to the largest.  Glue the red card stock to the card front add the green DP along with the red DP strips.  Next pop of the frame with dimensionals.  Place in the pup and gift.  Add the sentiments and snowflakes (I cut the snowflakes out with the Santa Over Christmas Town die)
CottageCutz Products


I am excited that I am getting an early start on my Christmas cards.  And I hope you will get a chance to do the same.  Check out all the dies in our online store!

Blessings

Pam

Thursday, September 26, 2019

Christmas Night

Hello Scrapping Cottage Friends!

It is Pam creating with you on the blog today.

I have another Christmas card today.  I am excited to get a head start on my cards this year.  And what a better way to do it then with this adorable new release.  The dies are just all so detailed and fantastic!  Today I am using the Santa Over Christmas Town die and I just love it!


Design Steps:

 1.  Cut all of the pieces using the Santa Over Christmas Town in white card stock
 2.  Line the back of the windows in a pale yellow card stock.  I just taped the piece behind the windows
 3.  Use a A2 white card base, cut a mint colored large rectangle frame using the Stitched Wide Rectangle Frame die, cut a piece of white for the snow 4 x 1 1/2 and a piece of DP with snowflakes
3 1/2 x 4 1/2
 4.  Attach the Snowflake DP to the center of the card base front and then add the frame using dimension tape
5.  Place the snow at the bottom of the frame and then arrange the trees and then the house.  Last place Santa and the snowflakes at the bottom of the frame


CottageCutz Products


I am so glad that you dropped by to take a peek!  Please check out the fabulous dies we have for Christmas.  It is an awesome collections!
Blessings
Pam


Friday, June 28, 2019

Wishing You Well

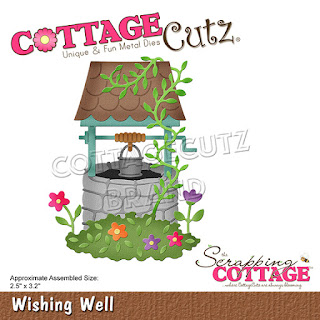
Happy Friday!!!  It's Jeanne today with a card that is great for multiple occasions - birthday, retirement, new job, even get well. This wishing well die is the perfect image for all of those.
Just changing the sentiment to any one of a number of "wish" sentiments changes the card instantly.  And it is gender neutral - I love having cards on hand that I can give to my male or female friends!
I started by cutting all the pieces from white card stock.  I used a combination of Distress Oxide inks and Copic markers to color them.  I used the Copics on the small flowers as I find that easier than using a sponge dauber and ink.
I assembled the well on a silicone mat.
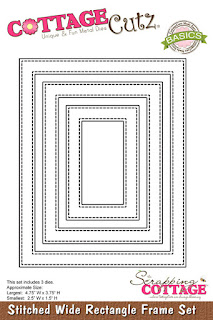
 Next I chose the paper for the background, frame and sentiment.  The various shades of green in this patterned paper really sets off the wishing well.  I cut it to 4 1/4 x 5 1/2 inches.  I also cut a white panel 3 1/2 x 4 1/2 inches, a dark green frame using the largest of the Stitched Wide Rectangle Frame dies and a light green sentiment panel using the tag shape from the Fancy Pocket Plus dies.
The white panel is glued behind the frame with the wishing well adhered to the panel.  I wrapped linen thread around this framed piece several times before gluing the panel to the patterned paper.
This was then put on a white card A2 base. I added the sentiment using foam dots for dimension and some small floral trinkets I had in my stash.
I hope you enjoyed my card today.  The Wishing Well die is part of the new Magical Garden release and is on sale for a limited time.  Stop by the online store and see the other great dies that are part of this beautiful release!

Dies used:
http://www.scrappingcottage.com/cottagecutzwishingwell.aspx
http://www.scrappingcottage.com/cottagecutzstitchedwiderectangleframesetbasics.aspx
http://www.scrappingcottage.com/cottagecutzfancypocketplus.aspx

Thanks for stopping by today.  I hope you have a fun and creative weekend!


Friday, November 02, 2018

Congratulations on Your New Fur Baby!

Hello Cottage Cutz fans!  It's Jeanne today with a card featuring Dakota the Husky, a die exclusive to the Scrapping Cottage website.  He has been featured several times this week.  The die comes with reindeer antlers and a Santa hat for use at Christmas but you can also use him anytime of the year!
What a fun way to say congratulations to a friend on their new fur-baby!  This is a simple card to make but is adorable.
I started by die cutting Dakota from white and grey card stock and my frame from red.  I used a black marker to color his nose and eyes.  I decided to make this a very graphic card using minimal colors.  Since Huskies are grey and white I opted for a black (grey), white and red theme.

Next, I cut a panel of black card stock slightly smaller than my frame and heat embossed the sentiment in white.
I glued the frame to the panel along with Dakota.
Then I dry embossed a white panel that is 5 3/8 x 4 1/8 inches using a paw print embossing folder.  I tied a hounds tooth ribbon around the panel.
The frame with Dakota is popped off that panel using foam tape and I glued the whole panel to a red top folding A2 card base.

Dakota is only available at the Scrapping Cottage and the new Autumn dies are on sale for a limited time, so be sure to visit the website!

http://www.scrappingcottage.com/cottagecutzdakotathehuskyexclusive.aspx
http://www.scrappingcottage.com/cottagecutzstitchedwiderectangleframesetbasics.aspx
Thanks for stopping by today.  I hope you have a fun and creative weekend!

Thursday, August 24, 2017

Garden Wedding!

Good Morning Scrapping Cottage Fans!

Hello everyone it is Pam on the Blog today! I have another very special wedding die to share with you today and I paired it with two additional dies!

Design Step:
1.  Start by using the Cottage Cutz Garden Bride and Groom die and cut it on white card stock.  Color the flowers with Copic markers.
 2.  Using the largest Cottage Cutz Stitched Wide Rectangle Frame cut out a white card stock frame
 3.  Using Cottage Cutz Wildflower2 and Wildflower 5 cut out 6 flowers and color with Copic markers
 4.  To give the flowers some dimension use a stylus and round out the blooms
5.  Cut out a piece of pale pink Bazzill card stock 4 1/8 x 5 1/4 and pop up the frame and then glue the bride and groom flat.
6.  Add three flowers on each side and glue dot a ribbon to the flowers as shown
7.  Mount the pale pink card stock to an A2 white base.  Add a small butterfly from the Cottage Cutz Wildflower 5 die.

Cottage Cutz Products


These dies paired together make a wonderful garden wedding card! Hope you will visit our store and look around!

Blessings
Pam