Showing posts with label Cottage Cutz Stitched Square set. Show all posts

Friday, June 11, 2021

Tickled Pink

Happy Friday!  It's Jeanne posting today.  I am in love with all the little pigs from the new Country Farm release.  This release features the most delightful dies.  Everything from Tractors to Chicks to Cows!  Each die is just full of awesome details and can be used for so many different occasions. 

I started this card by cutting out the Piggy w/ Crate from white cardstock and used Distress Oxide inks to color.

I colored the pig using the Tattered Rose and then used a sponge dauber to add some shading with the Vintage Photo.

I cut a panel 4 1/4 x 5 1/2 inches from floral designer paper.  Using the largest of the Nested Stitched Scallop Squares and Stitched Squares I cut out two white squares.  I used the banner from the Windows Slimline die to cut the striped banner.

I stamped my sentiment centered on the bottom of the plain stitched square and then ran it through an embossing folder to add texture and contrast with the scallops.

I mounted the floral paper on a card base and added the squares.  I tied a coordinating ribbon around the center.

My last step was to add the banner and pop up the pig using foam dots.

This little pig is super cute and can be used for many occasions.  I picked this sentiment since I could used it as a congratulatory or birthday card.

Be sure to visit the online store where the new release is on sale for a limited time.

Dies used:


Thanks for visiting today. I hope you have a fun and creative weekend!


Saturday, March 27, 2021

Spring Bicycle Shaker Card

Happy Saturday!  It's Jeanne with the Saturday edition of the blog.  I have an easy card that is sure to delight your recipient.  I don't know anyone who doesn't like a shaker card.   And while they can be intimidating, this one is pretty straightforward to create!

I started by backing the cardstock for my bicycle with an adhesive sheet.  This allows the bike to stick to the background of the shaker with no gaps.

Because the die is intricate I used a special tool I have to help separate all the pieces of the die.

My card is A2 in size so I cut a background panel and a front panel 5 1/2 x 4 1/4 inches along with a coordinating patterned paper.  Again, I used the adhesive sheet to adhere the paper to the card front.

Using the largest of the Stitched Square dies I cut a square centered side to side and up and down in the front panel.

I placed the top panel on the bottom and drew a light pencil line where the opening will be.  This allowed me to know where to stamp my sentiment.

Using a blending brush, I blended a medium purple and darker purple up from the bottom.

I glued an acetate window sheet to the opening on the front panel and added foam strips to the outside of bottom panel and just to the outside of the pencil lines. Then I erased the pencil lines.

Next I filled the inside of the shaker with sequins.  I would love to be able to say use a certain amount, but filling a shaker is really just by eye.

I put the top panel on the bottom panel and the shaker panel was finished.  All that was left was to add some embellishments and glue it to the card base!

I hope you've enjoyed my card today.  Be sure to visit the online store where the Spring release is on sale for a limited time!

Dies used:


Thanks for visiting today.  I hope you have a fun and creative weekend!

Saturday, March 20, 2021

Some Bunny Loves You

Hello Scrapping Cottage friends! Thanks for taking the time to stop and visit with us today. It's Mary Marsh here bringing you the Saturday edition of the Blog.

We have a brand new release of dies in the online store. It's our Spring Release with 22 new designs. Everything you need to create Spring, Easter, Birthday, Mother's Day, Father's Day, Thinking of you cards and so much more.

The Design Team has been showing samples using these new dies. So if you haven't seen them check back on the blog for lots of great ideas. The dies are currently on sale at 25% off so check all the new designs in the online store for some great selections. The Safari & Circus releases are still available at 25% off as well.

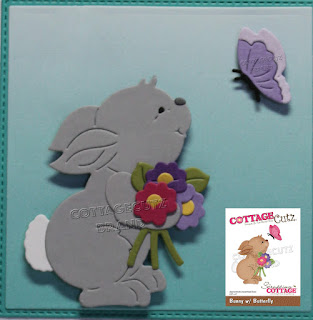
Now onto my card for today. I am featuring the new Bunny w/Butterfly die and created an Easter card for the two little ones that live next door to me. So let's get started with some details on how I created my card. 

Design Steps:
 I started my card this week with my layout. I found this sketch #845 over on Splitcoaststampers and decided to use it. The layers would allow me to use designer paper to create a festive Spring card. 
I looked through my designer papers and decided on these two coordinating patterns. I used the largest Stitched Square die for layer #2 and the largest Square die for layer # 3. For the background layer #1 I found this piece of light card patterned paper. I cut it to 4 1/4" x 5 1/2" and secured it to a white card base. 
For layer # 4, I used the 3rd largest stitched rectangle die. The width was fine but the height needed to be re-sized to 1 3/4".  I forgot to take a photo during the cutting process of the designer paper. So I repeated the process for you to see with cardstock. I cut the shape first 
and then measured at the 1 3/4" mark 
and placed it back in the die and ran it through my BigShot.
Here is the finished size. 
For layer #5 I used this piece of light purple cardstock and resized it to 3/4" x 3 1/2"using the same method.  I stamped my sentiment in a grape ink on this panel using my Stamp-a-ma-jig to get the placement.  
Next, I cut the bunny and butterfly images. I used colors that complimented my designer paper.
Now that all the card elements are prepared I am ready to start assembly. I secured the gray patterned paper to the card base first with double sided tape. Next, I attached layers 2, 3 and 4 secured to the card base. 
Added the sentiment strip with double sided tape.
I attached the bunny image using dimensional adhesive. I scattered a few enamel dots to finish off this card. 
I hope I have given you an idea with the image + the sketch for this new die.  See you next Saturday!

dies I used to create card: 


Friday, May 29, 2020

Grown with Love

Happy Friday!  I hope everyone had a great "short" week.  I love holiday weeks - they seem to fly by.  Today I used the Gardening Cat from the new Gardening release, the Stitched Squares dies and a sketch from Splitcoaststampers to create my card.
The sketch this week reminded me of a garden trellis.  When I lived in Oklahoma we had one with clematis on it that bloomed a beautiful purple.
I chose paper that had a leafy feel without being an actual leaf pattern and cut 10 squares using the fourth smallest die from the Stitched Squares set.  On a 4 1/4 x 5 1/2 inch white panel I vey lightly drew a line down the center.
I placed the panel on grid paper aligning the center line, then laid out the squares set an angle.  I left 1/4 inch between the points.  After these were glued down it was very simple to add the extra squares, aligning them by eye.  I used scissors to clip off the extra and could use those points to fill in the small sections.

I went to work on the kitty next and cut all the pieces from various colors of cardstock.
Although hard to tell in the photo the watering can is a "galvanized metal" foil cardstock.  In person it contrasts nicely with the cat.
I assembled the basket.  All pieces were edged with just a little bit of gray ink to give some shading.
I wanted my sentiment to be a stitched strip.  I originally planned to fishtail each side so I used the largest of the Stitched Squares and heat embossed my sentiment near the bottom, centering it.
Then I used the same square to cut the top.  Because I was planning on cutting off the sides I  did not worry about that stitching.  Had I wanted the stitching on the sides all I needed to do was use a larger die (a Stitched Rectangle) and that would leave the side stitching intact.
As it turned out, on one side the stitching lined up perfectly so I left it and trimmed off the other end.  I was covering that end with flowers so it wouldn't show.
I glued the sentiment directly to the panel on the upper part of the card.  Using alot of foam tape I popped the cat up off the card.  I probably use more foam tape than most but I like it when the die cut has a solid feel underneath.
Finally I added a few extra flowers to the sentiment and near the cat's gardening boots.

Dies used:
http://www.scrappingcottage.com/cottagecutzgardeningcat.aspx

http://www.scrappingcottage.com/cottagecutzstitchedsquaresetbasics.aspx

Thanks for visiting today!  I hope you have a fun and creative weekend!