Showing posts with label Christmas card. Show all posts

Sunday, November 28, 2021

Peace On Earth Christmas Card

Happy Sunday Scrapping Cottage friends! Melinda here with another project share. Today I am sharing a Christmas card I created with the new Black Friday Release Dies and one of the new Christmas Die releases.

Here is a look at my finished card.

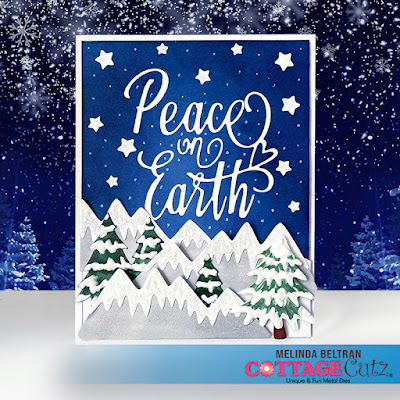
My card size is an A2 top folding card. I started with a white card base.

I used a piece of blue cardstock for the mat. I then used some Sapphire ink to ink the edges of the blue cardstock to create some depth. 
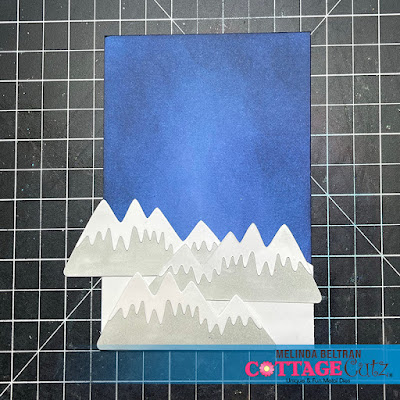
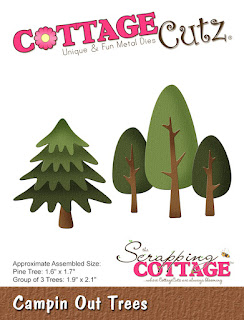
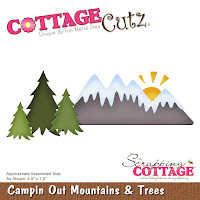
I then used the Campin' Out Mountains and Tree Die. I cut them out in white. I used a gray marker to give the mountains some color. I then layered them onto a piece of white cardstock for a white base.


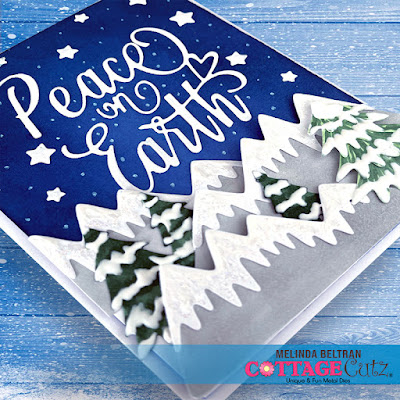
I then added in some of the trees from the same die as well as a large layered tree from the die set.

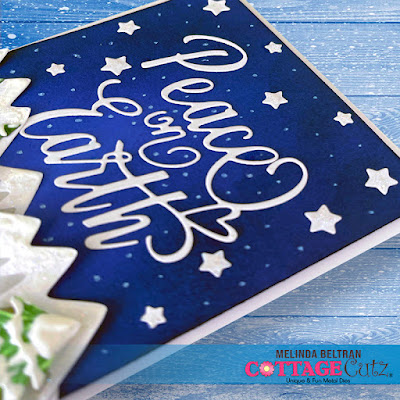
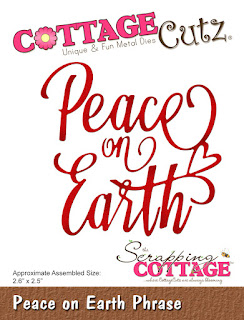
In this shot you can see where I used the stars from the Moon Stars Die. I added them randomly along the edges of the card. I then added in the Peace on Earth Die to the center. I then used my gel pen to add some dots to give the night sky more stars.


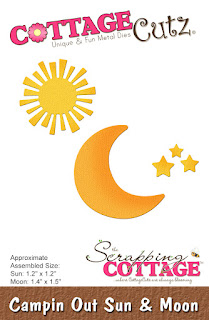
The Dies I used to create these projects:


In case you didn't hear, The CottageCutz YouTube channel is up and running. We are featuring videos every Wednesday. Drop by and subscribe so you don't miss one and give us a thumbs up on our videos.

Make sure to come back by each day for some more great crafty inspiration from the super talented team. Don't forget to head over and take advantage of the great savings on these and more of the fabulous Sale!

Be sure to head over and check out the fantastic
CHRISTMAS PART 2 RELEASE!!!!
SOME AMAZINGLY CUTE DIES! 
This release has the Merry Christmas with Shadow die.

CHRISTMAS PART 1 RELEASE!!!!
SOME MORE AMAZINGLY CUTE DIES! 


Until the next time, have a wonderfully crafty day!

Sunday, October 10, 2021

Christmas Farmhouse Floral Card and Mini Gift Bag Set

Hello Scrapping Cottage friends! I'm so glad you stopped by. Melinda here with another fun project! Today I am sharing a pretty card and little gift bag set. It features the fabulous Farmhouse Christmas die. It is one of the new dies in this month's new release. Now is the perfect time to pick them up! They are 30% off and they are FANTASTIC! They will help you get your Christmas projects done in style!

Here is my project. I created this pretty card and little gift bag set. It is the perfect set for a co-worker or teacher gift. It features the Christmas Farmhouse Floral die. 

The card is an A4 top folding card. The base is from black cardstock. I cut a mat from some plaid digital paper I created. I then used the largest Double-Stitched Oval die from the Nesting die set. It is part of Cottage Cutz Basics line of dies.


I then cut the Christmas Farmhouse Floral die from some white cardstock. I set about coloring all of the images. I picked up some markers on Amazon to give them a try. I then used some of my chalks to blend the colors.

I then used this sponge applicator to ink some dark gray ink all over. This gave the can some pretty good texture.
Here is a closer look at all the beautiful foliage and flowers you get with this one die! I layered the poinsettias and then added some touches of stickles and scattered some sequins for a little extra bells and whistles. Of course I finished off the can with a cute little organza bow.

Here's a look at just the little bag. I created the file for the little bag. I cut it out of some black cardstock. I used some more of the plaid paper I created to cut a mat for the front and back of the bag. It matches nicely with the card. I used another double stitched oval die from the set and then created a couple of mats. I layered that all underneath another of the beautiful Christmas Farmhouse Floral die set.

To finish off both of them, I added a sentiment to the smallest scallop stitched rectangle from that basics set. 
Here is one last look at the set. I think it turned out super cute and it was simple enough, that you can re-create it in multiples.

The Dies I used to create this banner:


Well that about covers it for today! Be sure to head over to the Cottage Cutz You Tube Channel where some of the designers will be posting videos! Make sure to come back by each day for some more great crafty inspiration from the super talented team. Until the next time, have a wonderfully crafty day!

Thursday, November 09, 2017

Christmas Town!

Hello Scrapping Cottage Fans!

It is Pam on the blog today and ready to show you my card for today!  Making Christmas cards is a fun way to show your family and friend your crafty side!  It is also a way to make cards that specifically fit someone's personality.  The card I am sharing today is going to a friend who lives in California.  She doesn't get any snow for Christmas so I thought I would send her some on my card!


 Design Steps:
1.  Using the Christmas Town and Season's Greeting w/Banner die cut out both of them in white.  On the Season's Greeting die cut off the deer and glue down the Season's Greetings
 2.  Use an A2 white base and cut out a piece of silver 4 x 5 1/4, a piece of white embossed with dots 3 3/4 x 5.  Then use the Double Stitched Rectangle die and cut out a piece of navy DP
 3.  Glue the silver and embossed paper to the card front
 4.  Glue the Season's Greetings to the banner and the Christmas Town to the navy DP
 5.  Place dimensional tape to the back of the navy DP and attach to the center of the card front
 6.  Add the sentiment banner as shown
 7.  Using the Snowflake Set cut out silver snowflakes
8.  Attach the snowflakes as shown below.  I glued the larger snowflake to the inside of my card

Cottage Cutz Products:


Hope you are started on your Christmas cards! If not stop by our store we have a ton of wonderful dies and stamps to inspire you!

Blessings
Pam


Thursday, November 02, 2017

Let it Snow!!

Good Morning Scrapping Cottage Family!

It is Pam crafting with you today! Cottage Cutz has released a number of wonderful stamps sets.  And I decided to work with the Snowglobe Fun set which has a tiny snowglobe and little images to go inside the globe plus some small sentiments.


Design Steps:
1.  Using the Snowglobe Fun set stamp the images with an ink that works great with Copic markers.  I used Memento Tuxedo black.  Color the images with your markers

2.   Use the coordinating dies from the Snowglobe set to cut out the images.  Use the Cross Stitch Circle dies to cut out 2 blue card stock circles.  Stamp the smaller circle with the sentiment
3.  Cut two strips of DP 1 inch and the other 1/2 inch.  Cut a 4 x 5 1/4 piece of designer paper and 4 1/8 x 5 3/8 piece of blue card stock.  Glue the DP to the blue card stock then mount on an A2 white card base.  Add the strips and circles as shown.
4.  Pop up the stamped images onto the larger circle and add the sparkle ribbon

Cottage Cutz Products Used:

I hope you get a chance to be crafty this week and we would love to hear your comments!

Blessings

Pam

Thursday, October 05, 2017

Gingerbread Man!

Good Morning Cottage Cutz Friends,

It is Pam sharing with you today on our blog!
Our store is open and ready for you to check out all of the new release dies and stamps!

I am working with one of our new release dies and it is the cutest gingerbread man I have ever seen!

 1.  Use an A2 white card base cut a slightly smaller piece of DP dark brown and a piece of designer paper 4 x 5
 2.  Use the Gingerbread Baking Set die and cut the gingerbread man out of DP and the other pieces from white, blue, silver and red
 3.  Glue the pieces together add small rhinestones for the eyes and real buttons.  Ink the edges of the pieces using TH inks.  Cut out a white circle using the Nested Stitched Scallop Circle set
 4.  Add a ribbon to the DP and glue to the front of the card as shown
5.  Pop up the gingerbread man and his mixing bowl as shown below and your card is complete

Cottage Cutz Products


Thanks so much for stopping by and be sure to check out all of the new dies and stamps!

Blessing 
Pam