Showing posts with label Christmas Tree Peekers. Show all posts

Sunday, October 23, 2022

HoHoHo Screen Divider Card

Hello CottageCutz friends! Thanks for taking the time to stop and visit with us today. It's Mary Marsh here bringing you the Sunday edition of the Blog. 

It's new Christmas release time!!! We have new dies in the online store. Our Christmas Part 2 release with 36 new designs is available and ready for shipment. The individual dies are on sale for 30% off. It's only for a limited time so don't delay. You are going to love all the whimsical designs that are available in this release. There is something for everyone to make your Christmas cards extra special this year.

We also have Christmas Part 1 in the store and those dies are also available at 30% off.  There is a great selection of religious, whimsical and some super cute birds and animals. All of your Christmas card making ideas are covered in this release. 

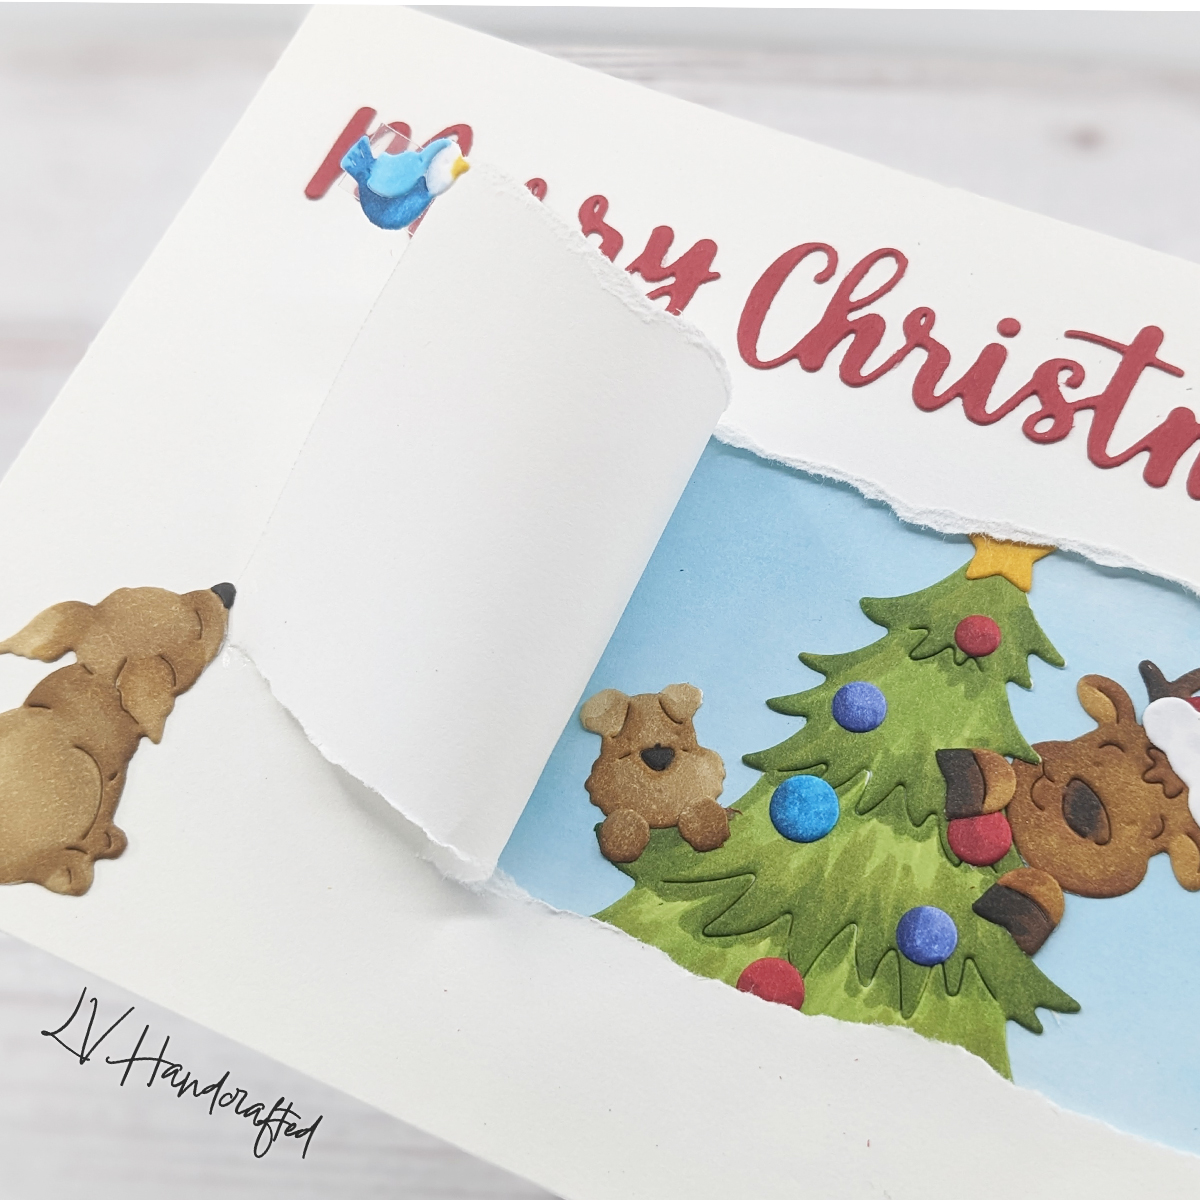
Today for your viewing pleasure, I am using dies from the Christmas Part 1 release - Happy Reindeer & Snowman, Snowman w/Tree and the Christmas Tree Peekers. I also used an older die- Happy Ho Ho Ho for my sentiment from the 2019 release. 

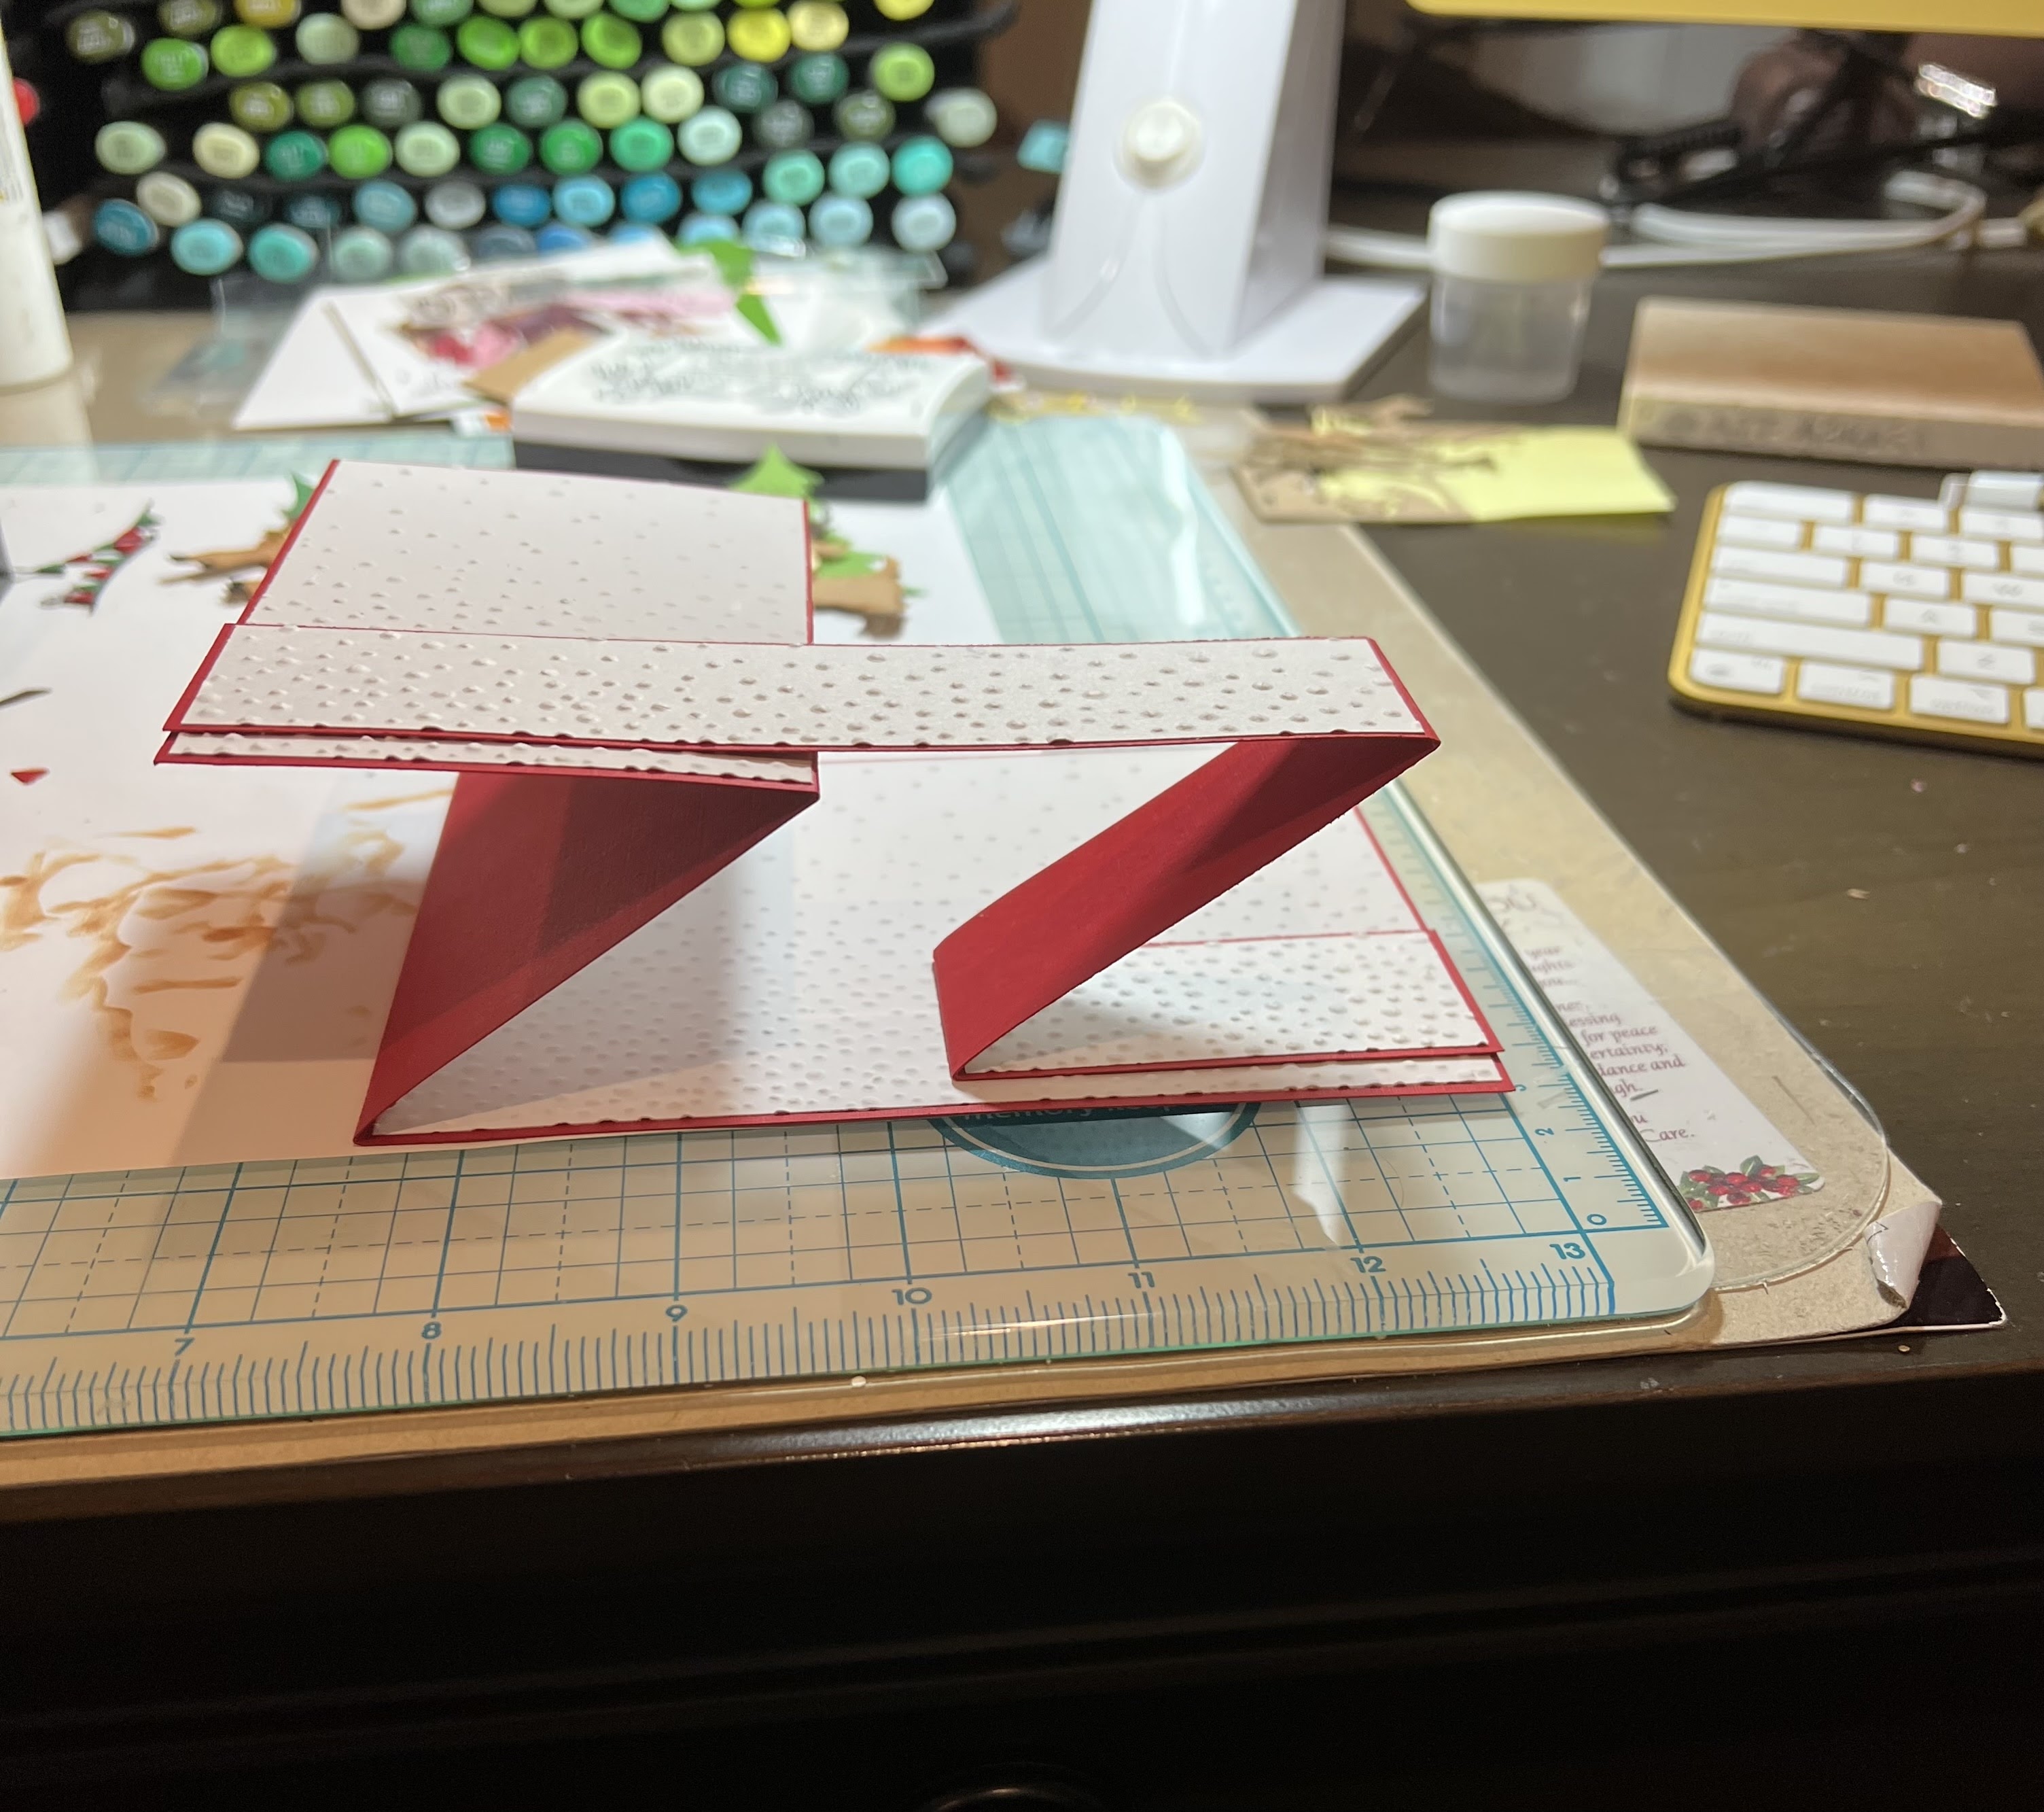
I created a fun fold card called a Screen Divider. I made a card with this fold previously. Check here on this post for all the details. If you would like a video tutorial check this one from Splitcoaststampers. 

I used some non-traditional colors for my card. They are from the Splitcoaststampers color challenge #914.  We were to use granny apple green, melon mambo and highland heather for the color trio. I thought I would try these non-traditional colors for a Christmas card.
granny apple green, melon mambo, highland heather

I embossed the background panels with a "softly falling snow" embossing folder. On the first panel I used the Snowman w/Tree, the 2nd panel is the Christmas Tree Peekers and the 3rd panel is the Happy Reindeer & Snowman die. The "happy ho ho ho sentiment " was spread across the 3 panels.  The last panel I used for my stamped greeting.

That's it for me for this post. The team will be featuring dies from the newest Christmas Part 2 release all week so check back every day.

Reminder: Our YouTube Channel has a new video from Linh Van. There is a giveaway for being a subscriber, liking the video and leaving a comment. Click here.

Dies I used to create card:


Friday, September 23, 2022

Tear Away Peek-a-Boo Card


Hi everyone! Linh here and I have a new video up on the Cottage Cutz YouTube channel. The holidays will be here before you know it!  The first Christmas collection has just released and there are some really fun sets to play with.  On this card, I'm featuring the the Christmas Puppies, a bird from the Snowman and Tree and the Christmas Tree Peekers to create a Tear Away Peek-a-Boo card.


Thursday, September 08, 2022

Last Day for the Labor Day Sale - Christmas Reindeer

Hello Scrapping Cottage Friends

It is Pam crafting with you today!

TODAY IS THE LAST DAY FOR THE LABOR DAY SALE WITH SAVINGS UP TO 65% OFF!  It ends tonight at 9:00 PM Pacific Time.  Click HERE to grab your savings before it is to late.

Included in this fantastic sale is our  NEW RELEASE!!!  THIS COLLECTIONS IS PERFECT FOR AN EARLY START ON YOUR CHRISTMAS CARDS!!   The release is Christmas Part 1 and has 21 fantastic dies. The release includes everything from Gnomes to Reindeer!! 

Today,  I am sharing a card with Jolly Reindeer w/Sleigh and the Christmas trees from Christmas Tree Peekers.  


Design Steps
1.  For the base of the z-fold card I used a red piece of card stock 4 1/4 x 11.  Fold the card in half and then fold the front fold in half again.  Cut 2 white panels at 2 5/8 x 4 1/8 and one at 5 3/8 x 4 1/8
2. Run the panels through an embossing folder for the snowy effect.  Glue the panels to the red base
3.  For the little z-fold cut a red strip 1 x 11 inch strip.  This strip is scored at 2 3/4 x 5 1/2.  The white pieces measure 5 3/8 x 3/4 and two pieces 3/4 x 2 5/8.  The white pieces are then embossed and glued to the red strip
4.  Glue the z-fold strip to the card.  I find the best way to do this is to close the card. Place the glue on the first portion of the long strip and on the last flap.  Lay the strip which is fold down on the closed card
5.  The card should look like this if the strip is placed correctly
6.  Using the following dies Jolly Reindeer w/Sleigh and Christmas Tree Peekers cut out the pieces in: red, brown, dark brown, silver, tan, blue, gold and green.  (The trees are not pictured)
7.  Use ink to shade the reindeer and bag.  Assemble the pieces using a fine tip glue

6.  Add the two reindeer and the sleigh to the front of the card on the 1 inch strip using a fine tip glue as shown above
7.  Open the card and add the third reindeer and a tree.  To finish the card off I added another tree on the back panel,  Merry Christmas, topped the trees with gold stars and added a few snowflakes


CottageCutz Products


Don't forget to check out all of the new release Christmas dies! You don't want to miss out on the great prices!


We have more inspiration on our YouTube Channel check it out HERE

Thanks so much for stopping by!  And I will see you next Thursday.

Blessings and Take Care