Showing posts with label Christmas Puppies. Show all posts

Monday, May 08, 2023

Car and Balloons

Hi and welcome to a new week of crafty inspiration!! 

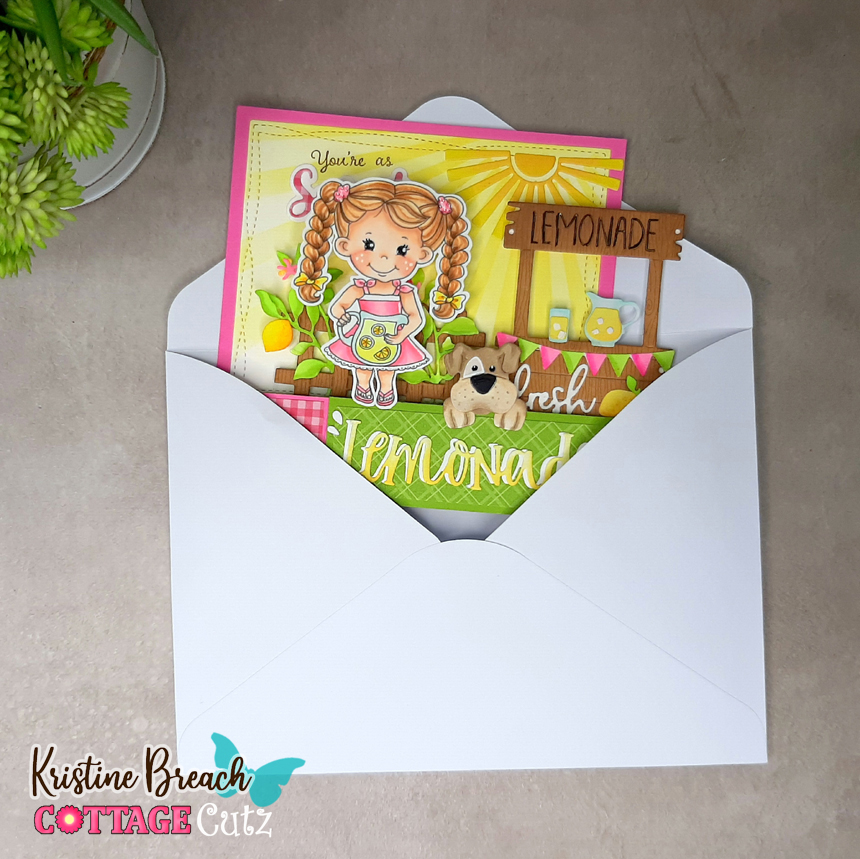
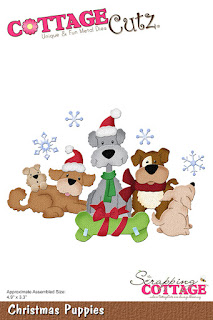
Kris here to share with you a cute and simple card featuring the car from the Spring Bunny Car, the balloons from the Spring Party Car, (both from our latest Spring Release!) and I added some previously released dies such as a dog from the Christmas Puppies, and the Slimline Clouds and Slimline Grass to help create my scene.  ☺


I started with this week's Color Challenge at SCS (CC946)
Cherry Cobbler
Pacific Point
Old Olive
Bermuda Bay
+ the dessert option= masculine


also used last week's Ways to Use It Challenge (WT946):
Feature a cloud/s - I stenciled them AND used a cloud border die!


Design Steps:

• I cut my card base 5-1/2" x 8-1/2" and scored at 4-1/4" for a top folding A2 card.

• I cut a scrap piece of white cardstock to 5-1/4" wide and shorter than 4" which is what I would have cut it to if it wasn't a scrap.  I then sponged clouds on it using Salty Ocean Distress Oxide ink.

• I cut a piece of Old Olive c.s. at 5-1/4" wide & die cut the top with the Grass Slimline die, then I stamped a sentiment in bottom right corner.

• I cut a piece of white at 5-1/4" wide and die cut the bottom with the Clouds Slimline die. 

• I cut a piece of road patterned paper (from La-La Land Crafts) at 5-1/4" wide.

 • I then die cut my car from Pacific Point, Bermuda Bay and white cardstock and used Copics to color the white pieces.  I cut the dog from white and the balloons from each of the challenge colors.  

• I then layered them onto my card front as shown below:


• I added some baker's twine in the Bermuda Bay color behind each balloon, then loosely tied them together (I removed this tie later).


• I then added a pop dot behind each balloon and attached it where I wanted them on my card front.

• I then added a strip of Scor Tape where I wanted to tack down the strings (behind the car) and removed the tie.


• I pulled the strings kinda tight and attached onto the tape, then added another strip of Scor Tape over the strings, then a piece of scrap paper to hold in place (and to keep from sticking to the car).

• Next, I added some mini dimensionals (foam hexagons) to pop the car up.  This is needed so there won't be that hump where the strings are bunched up.


• Lastly, I added my car and done!  Easy peasy! 


PRODUCTS I USED:

30% OFF!

30% OFF!

30% OFF!


Thanks so much for looking!  I hope this fun li'l card inspires you in some way to use your favorite CottageCutz dies!  

Reminder - We're having a Design Team Call!!  See this post for details!
View more design team creations on our YouTube channel here

~Kristine

Monday, February 27, 2023

Sweet as Lemonade

Happy Monday crafty friends!

Kris here with a cute Box Card!  I really love to make box cards like this because they are easier than they look and you can fit more dies/images on them to create cute scenes and really gives your recipient a fun surprise!  ☺ 

I've used several brand new sets from the Flowers & More Release -- which are all 30% off for a limited time!


*The girl is an image I drew as part of my own  digital stamp collection (2015) and is not currently available, however this boxcard would also be cute with only the CottageCutz dies listed or add your own favorites from the shop!


Design Steps:

1.  I cut all my cardstock and patterned paper pieces:

Pink Cardstock:
• 4-7/8" square
• (2)  2-1/2" x 1-1/4" - scored 1/2" in on each end;  mitered top flaps

White Cardstock:
• die cut the largest Nested Wacky Stitched Rectangles

Lime Green Cardstock:
• 1-1/4" x 4-7/8"
• (2) 5-5/8" x 1-1/4" - score 3/8" in from each end; miter top flaps

Patterned Paper (green):
• 4-3/4" x 1-1/8"

Patterned Paper (pink):
• 1-1/8" x 1-3/8"


2.  I stenciled sun rays onto the Wacky Stitched Rectangle with Squeezed Lemonade Distress Oxide ink.


3.  I mounted my patterned papers and sun rays to their corresponding pieces as shown below.


4.  To assemble the shelves, I used the same technique as my cow box card HERE (follow steps 8-14).


5.  I die cut all my decorative pieces, then colored and assembled them.  

*Note:  I die cut 2 of the lemonade stand, one in a wood pattern and one in white and glue together to make it more sturdy.  

6.  I attached all my pieces!  

*Note:  I stamped "You're as" onto the sun rays panel.  Then glued the Sweet w/ Shadow in place.  I attached the stand, fence and my stamped girl with a piece of heavy acetate that extended an inch below the die cut/image and attached that to the shelves.  You could use cardstock, but the acetate I used is sturdier than c.s.  Here's a couple of process photos.


One more look at my finished card.


It folds to the side and fits into a 5" x 7" envelope.


Products I Used:


Saturday, January 28, 2023

Vertical Easel Shaker Card

I WOOF U ♥ No bones about it

Hello CottageCutz friends!

Kris here, bringing you the Saturday edition of the blog (filling in for Mary today).  I have a fun-fold card FUR the puppy lover in us all!  This fold is called a vertical easel card (with a pop out shaker!) and I'm going to have the full tutorial for this style card, along with another version of this card right here on the blog this Monday! For now, enjoy this cute eye candy and have a craftastic weekend!

Today's card features the Christmas Puppies die from the Christmas 1 Release (which are all 30% off right now!).  I also used a few other dies as shown at the end of my post.  

-Front when closed / pulled out of envelope-

Aren't these puppies ADORABLE!  

I used the Stitched Alphabet die for the letters.

-Inside- 

The sentiment is printed off computer.  For the paw, I used a heart from the Stitched Hearts and the raindrops from the Stitched Sun, Clouds & Umbrella die.  You can see on the far left, there's a white panel for writing a message.

-View from the top-

The top folds and tucks under the bone panel just like a normal easel card :) 

And before I go... since this post is about the pups... I thought I'd share a pic of my absolute LOVE BUG (and bestie), Ava.  She's a Street Dog Hero rescue from Guadalajara and she brings so much joy and cuddles ♥  


Thanks for visiting today ~ see you back here on Monday for the full tutorial!

~Kristine


PRODUCTS:


Saturday, January 07, 2023

Valentine Wishes From the Puppies

Hello CottageCutz friends! Thanks for taking the time to stop and visit with us today. It's Mary Marsh here bringing you the Sunday edition of the Blog.

Hope you all had a great Christmas and holiday week. Now it's time to settle in for the winter months. It's a perfect time for cardmaking, scrapbooking and other crafting pursuits. I am onto my Valentine cards. I send them out to family and friends. 

For your viewing pleasure today, I am featuring a slimline card using the Christmas Puppies and the Heart XO Windows Slimline dies. I like taking dies intended for one season and move them to a different holiday. It allows you to get more use out of your dies that way. 

card details: 

I started my card by using the Heart Xo die and cutting it in red cardstock. For the background for the hearts, I am using designer paper. I only had a small piece of the heart paper, so I decided to do something different with the middle heart window. I used another paper that I only had a small piece of, but it complements the other paper. 

The slimline panel is 3 1/2" x 8 1/2". I cut red cardstock in the same size for the card base. 
Next, I cut the puppy images I used different colors of cardstock. You could also cut them in white cardstock and use the medium of your choice to color them. 
I started some card assembly at this point. Attached the designer paper inside the hearts with double sided tape. For the puppy images I used dimensional adhesive to lift them off the background slightly. 
I wanted a phrase for the middle heart window. I thought about stamping something but then I decided to use the "be my Valentine" phrase from the 2019 Valentine Puppies die. For the bottom heart window, I used the XOXO from the Valentine Phrase & More die also from the 2019 release. 
Now I am ready to finish off the card. I attached the phrases with clear art glue. In the middle heart, I added some hearts cut from the Valentine Puppies die. On the top heart, I added the puppy paws. And then scattered some white hearts on the card front. I had those saved from another project. I am not sure which die they came from. 
Well, that's it for me for this week. I hope I have given you a way to use this Christmas die for another holiday. See you next Saturday! 

dies I used to create card: