Showing posts with label Celebrate Phrase. Show all posts

Friday, January 26, 2018

Celebration!!!

Good morning!  It's Jeanne today with a birthday card.  I don't know about you, but I can never have too many birthday cards on hand.  And if they are good for either male or female, young or old that's even better.  This card is great for anyone.
I found some patterned paper that reminded me of birthday candles and got my colors from that - Bermuda Bay, Calypso Coral, Daffodil Delight and Night of Navy.  I wanted some fun bright colors.  Then, I used the Layered Cake & Stand die and cut it out of all colors so I could see what combinations I liked for the cake. (And now I have extras for other cards in complementary colors!)
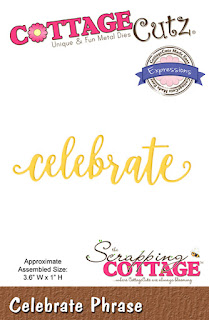
I also die cut the cake stand from silver cardstock and the word "Celebrate"from the navy.  I cut an A2 card base out of white, a strip 1 x 5 1/2 inches from the pattern paper and a strip 1 1/8 x 5 1/2 inches from the navy.  I also die cut two rectangles using the second largest die from the Nested Wacky Stitched rectangles - one white and one Bermuda Bay.
I then stamped confetti on the white die cut rectangle.

I used snail adhesive to attached the pattern paper over my navy strip and then glued it to the left side of the card.  I angled the Bermuda Bay panel on the card and glued the white panel on it but just a little offset to give a "shadow".
My final step was to add the cake, the sentiment and some sequins.

Dies used:
http://www.scrappingcottage.com/cottagecutzlayeredcakeandstand3x3.aspx
http://www.scrappingcottage.com/cottagecutznestedwackystitchedrectangleset.aspx
http://www.scrappingcottage.com/cottagecutzexpressionspluscelebratephrase.aspx

I hope you enjoyed my card today.  Thanks for stopping by and have a creative weekend!


Sunday, December 10, 2017

Celebrate

Hi!

It's Anja again. We are all snowed in here. It's such a nice Sunday to spend inside with a cup of tea and all my crafting supplies out. I'm on a mission today to make all my Christmas cards. I have my mum to help me, so I hope will be able to do them all.

For today's post I made a card with Christmas florals.


For this card I used:
- Cottage Cutz dies (Christmas Floral, Pierced Circle Set, Nested Stitched Scallop Circle Set, Celebrate Phase),
- Distress Inks (Peeled Paint, Pine Needles, Forest Moss) and Oxide (Fired Brick),
- white card base (14,5x11,5 cm),
- craft paper for background (10x13 cm) and die cuts,
- white card stock for die cuts (300 g),
- texture plates with bricks,
- white pigment ink,
- red and pearl liquid drops,
- brush,
- Wink of Stella glitter brush pen,
- adhesive foam pads,
- paper glue.

First I made the background. I used craft paper and texture plate to make it look like a wall.


I added a bit of white. I just brushed the paper with the whole ink pad.


Then I die cut the greenery and colored it with Distress Inks, a bit of water and a water brush.


I die cut Celebrate phrase and colored it whit red Distress Oxide.


I die cut two circles for the middle of the card. I glued both together. On the backside I added a few adhesive foam pads to glue the circles on top of the greenery.


When all the greenery was dried I glued it together with the brick background to the card base. I added some liquid drops on top of the leaves.


I decided to add a bit of glitter to the celebrate phrase, before I glued it on the card.


And this is my finished card.


Have a beautiful Sunday and thank you for visiting.
Anja Z.


Monday, August 21, 2017

Holly Swag

Hi, Lois here with a little change of pace card.  It's 90 degrees outside, but I'm here to cool you off a bit with a Christmas card today.  I'm still playing with the new Nested Shapes release from CottageCutz -- this time the Nested Stitched Eyelet Square set, as well as one of the Expressions Plus sentiments.


A little twist to this card is that the "Happy Christmas" sentiment is actually on the inside of the card.  It shows through a strip of acetate on the front.

To start my card I cut the 8 1/2" x 5 1/2" card base from some heavyweight white cardstock.  In addition I cut two strips of red (1" x 5 1/2"), two strips of green (1/2" x 5 1/2"),  a white 2 1/2" x 2 1/2" square and a strip of clear acetate 2 1/2" x 5 1/2".


After scoring the card base at the 4 1/4" mark, I trimmed a 1 1/2" strip from the bottom and adhered it to the acetate strip.  I trimmed that same side of the card 1 1/4" from the top, adding Scor-Tape to the top of the acetate and the edge of the card.


After removing the Scor-Tape, I lined up the acetate/cardstock piece to the bottom of the card and pressed down on the taped sections -- creating the card base.


Next I cut the die-cut pieces from red and green cardstock . . .


. . . adding some darker color to the pieces.  I sponged around the edge of the white square with red distress oxide ink.


Using a scallop punch, I trimmed down the red strips, adding some 1/8" Scor-Tape to the backs.


I then constructed my holly swag, using small foam pop dots to give dimension to the swag.


I then stamped the inside of the card, making sure that the sentiment was placed so that it would show through the acetate strip.


I then added the red/green strips to the outside of the acetate and constructed the swag panel and glued it on either side of the acetate strip.  The "celebrate" sentiment was centered at the bottom of the card front.


CottageCutz dies used on this card are:

http://www.scrappingcottage.com/cottagecutznestedstitchedeyeletsquareset.aspx

http://www.scrappingcottage.com/cottagecutzhollybranchwbow.aspx

http://www.scrappingcottage.com/cottagecutzexpressionspluscelebratephrase.aspx


Sunday, June 18, 2017

Celebrate with Sunflowers

Hi!

It's Anja here with you on this beautiful Sunday. 

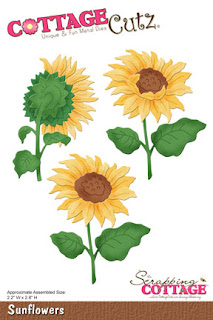
As long as I can remember sunflowers have been my favourite flowers. I love their bright colors and I often give them to others on their birthdays or other special occasions. And sunflowers made of paper can also be a beautiful gift. So I couldn't resist getting this gorgeous Cottage Cutz die and making a bunch of sunflowers. This is  my finished card.


I used:
- Cottage Cutz dies (Sunflowers, Celebrate Phrase, Pierced Circle Set, Picket Fence Border),
- Distress Oxides (Fossilized Amber, Spiced Marmalade, Peeled Paint, Vintage Photo, Walnut Stain, Iced Spruce),
- white card base (15 x 15 cm),
- Nuvo Crystal Drops (Dandelion Yellow),
- Wood veneer,
- Wink of Stella glitter brush pen,
- white card stock for die cuts,
- double sided adhesive tape,
- paper glue.

First I die cut the sunflowers and other parts for the card. I used Distress Oxides to color them.


Then I cut two squares (13x13 cm) from wood veneer. I have this roll that looks like wood on one side and has fabric on the other. It is not so easy to cut and I was struggling to make even edges. But I love the color and real wooden look of it. I adhere it with wide double sided adhesive tape.


Then I glued on all the sunflowers and added some enamel dots. I finished the phrase with some glitter using Wink of Stella brush. 


And this is how I decorated it inside.


I glued the fence only on the sides so it can be used as a gift holder.


Thank you for stopping by.
Anja Z.