

Welcome back to the CottageCutz blog. It's Marla back again today with a sweet Christmas card. Baking and decorating gingerbread houses is such a fun tradition. While my children are grown, I wait expectantly to share this tradition with my two grandkids. In the meantime, I will settle for decorating this adorable Gingerbread Cottage. Isn't it the cutest?

I used three different CottageCutz dies on my project today. Let me share my process with you.
- Die cut your pieces using white card stock and the Gingerbread Cottage, Holly Frame, and Vintage Holiday Lantern dies. I cut the Gingerbread Cottage twice to add dimension to the pieces.
- Ink your die cuts pieces from the Ginterbread Cottage and the folliage and bow from the Vintage Holiday Lantern die.
- Assemble the Gingerbread Cottage. Double up the cottage, roof, windows, door frame, hearts, candy canes and frosting swirls for dimension.

- Cut two pieces of pattern paper to 4.25" x 5.25" and 4" x 1.5".
- Adhere the large piece of pattern paper to an A2 top folding card base
- Adhere the Holly Frame to the top of the pattern paper.
- Adhere the smaller piece of pattern paper to the lower portion of the open frame.
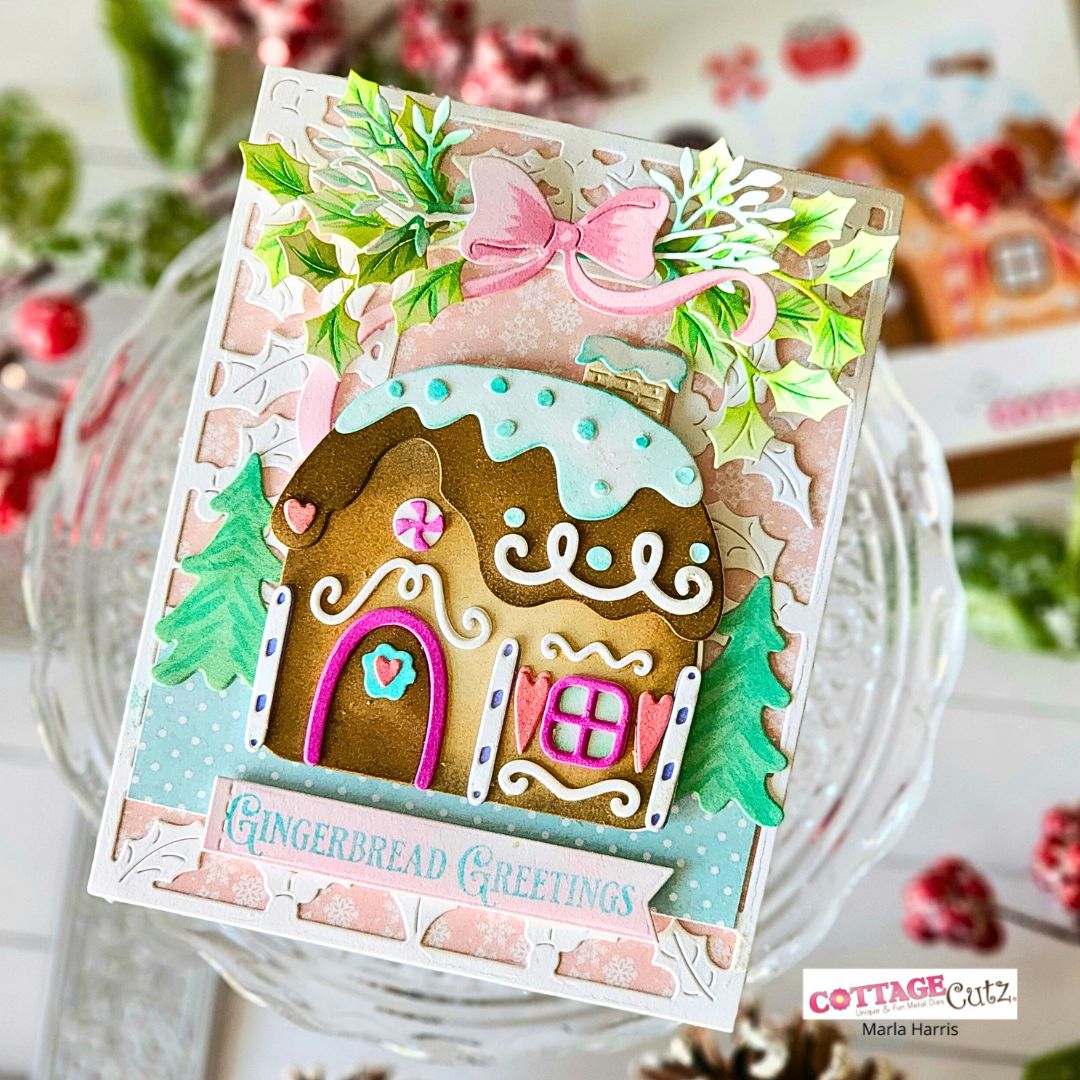
- Add texture to the pine trees, foliage and bow with Copic Markers
- Adhere your Gingerbread Cottage scene and bow to the card front. Add foam to the cottage and bow.
- Tuck your foliage piece from the Vintage Holiday Lantern die behind the bow.
- Stamp a sentiment and use a die to cut it out. Add foam tape behind the sentiment before adhering it to the card.

That completes our card for today. Thank you for stopping by to check out my tutorial. Until next time.... Marla


3 comments:
❤️❤️❤️❤️❤️
Super cute
Gorgeous card!
Post a Comment