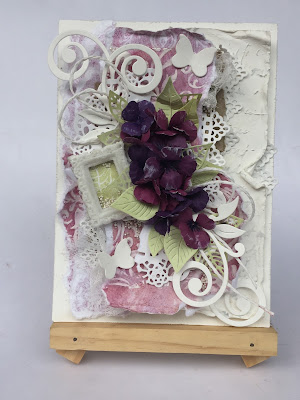
This is Anita here and I hope you are all set to have a wonderful time crafting with me. Today, I am going to share a shabby chic card with you. I have made this card using various CottageCutz dies , the details of which you can find below.
Here is also a video tutorial on making 3D flowers and arranging them on the card.
Here is my card.
To prepare the base of the card, follow these instructions.
1. Cut a white card stock measuring 7.5 inches x 5 inches.
Score at 0.5 inch on the 7.5 inch side and fold. Cut another piece 7 inches x 5 inches and adhere to the folded card.
2.Cut a mat layer out of white card stock measuring 6.75 inches x 4.75 inches and curl the edges. Add texture using modelling paste and script stencil.
3. Cut a pattern paper a little smaller than the second mat layer. Add texture using stencil and modelling paste. Let it dry. Tear in several layers as shown and combine with the CottageCutz dies and add to the card.
After finishing the base, make the flowers and arrange it on the card. Follow the video tutorial here.
List of dies used
So I hope you liked my card and the tutorial. Please do leave your feedback. We are also having a contest at our blog. So do share your entries here
See you next week.


11 comments:
Красота!
Beautiful card, I like all the details. Nice job.
This is gorgeous! xx
So many details, very beautiful.
Great process video Anita- and a beautiful shabby chic design
Thank you
Thank you Janja
Thank you Cebelica
Thank you
Thanks Mary
Beautiful love all the details!
Post a Comment