Friday, October 21, 2016

Whimsical Christmas Star w/Peachy Keen Face Stamps

Hello Scrapping Cottage friends! Thanks for taking the time to stop and visit today. It's Mary Marsh here bringing you the Friday edition of the Blog.

We have been having some great fall weather here in the East. In fact, it was so warm today that when the rain came we actually had a thunderstorm along with it. Who would of thought on October 21?

Normally our autumn days are colder and perfect for staying indoors and creating Christmas cards. But regardless of the weather Christmas is only 2 months away and I still have a lot of cards to make. So for today's card I went a little whimsical with my card design.

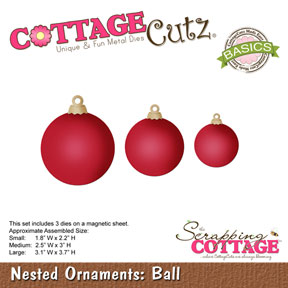
Our design team partnered with Peachy Keen Stamps to celebrate their new release of face stamps that work perfectly with the CottageCutz Christmas ornament dies. Just a little way to bring some whimsy to your holiday crafting. Check out the site because Kathy is offering some promotional pricing on her new stamps + the CottageCutz dies.

Let's get started with my card and some details on what I did. I started my card this week with the idea of using the Nested Star Ornaments. I had a layout in mind that I wanted to use as well so I just needed my card colors and patterned paper.
Vanilla card base: 4 1/4" x 5 1/2"
Cherry layering piece: 4 1/8" x 5 3/8"
Patterned Paper: 4" x 5 1/4"
Vanilla Sentiment Panel: 2 3/4" x 3 3/4"
Olive green layering panel: 2/ 7/8" x 3 7/8"

I searched through my Christmas patterned paper for a fun pattern to show off my whimsical star image. I thought dots and stripes would work together well. I was on a definite roll to get my card completed. Dots on the patterned paper and stripes in the way of ribbon for the bottom rectangle piece on the sketch.

My sentiment is computer generated using Word to set it up and then print on vanilla cardstock. After I printed it I used the CottageCutz Rectangle dies to cut it to the size I wanted for my card. I used the 2nd largest die on this one.
I decided to die cut my star in the cherry cardstock for some contrast on my card. I used the Peach Keen 1 1/8" Face Set and stamped in Memento tuxedo black ink. I think these are just the cutest face stamps.
From here I assembled my card. I added some stars to the sentiment panel and also to the striped ribbon panel. The stars are from the CottageCutz Merry Christmas Ribbon die. Used a wink of stella clear pen for a little sparkle.
 
Well that's it for me for this week. I hope I gave you some additional inspiration for Christmas. Also don't forget about our newest challenge going on right now. The theme is fall. Here is the link for more info.
 
So until next week........inky hugs.
 
http://www.scrappingcottage.com/cottagecutznestedornamentsstarbasics.aspx
http://www.scrappingcottage.com/cottagecutzrectanglesetbasics.aspx
http://www.scrappingcottage.com/cottagecutzmerrychristmasribbonelites.aspx


Thursday, October 20, 2016

Woodland Mailbox


Hi, Vladka is here!

Today I have another Christmas card for you with this cute Holiday scene. Let me show you how I created this card.


Basics:

White card base: 5 1/2 x 5 1/2 inches (cut 5 1/2 x 11 inches, fold in half)
Additional piece of white cardstock and some white and red cardstock to cut out the die cuts

Other Supplies:

CottageCutz Dies: Listed Below
Distress Ink: Fired Brick, Peeled Paint, Brushed Corduroy, Blueprint Sketch
Other: Scissors, Paper trimmer, Sizzix machine, Scor-buddy, White watercolor in tube, paint brush


1. With the Woodland Mailbox cut all pieces out of white cardstock and. Color them with distress inks and if you want, distress edges with darker shades of distress inks. Then glue all pieces together.


2. Apply some Tumbled Glass and Blueprint Sketch distress ink on the acrylic block and add also some water. Mixed with the paint brush. Use large paint brush and apply color on the additional piece of paper. Let it dry or use heat gun to speed the process.


2. Mix some white watercolor or acrylic paint with water and use thin paint brush to flick some droplets of the mixture on the previous colored surface. Let it dry.


This is is for today. Have a nice day. And don't forget, seventh CottageCutz challenge is waiting for you. This time theme is FALL. You can linked your project here. And please, use only Scrapping Cottage dies.

Wednesday, October 19, 2016

AUTUMN THEME CARD WITH ANITA KEJRIWAL

HELLO,

How is everyone doing ?? Are you all busy with preparations for Christmas or still basking in the beauty of Autumn ??
I am really enjoying myself doing both and believe me !!! It is so much fun creating these cards. CottageCutz has released some awesome Autumn theme dies that you can check here.
Today , I have a card for you where I have used a very innovative way to use negative of die cuts as stencils.
Here is my card .


To create this card, Cut a card A2 size that is 5.5 inches by 4.24 inches in white card stock.
Using the CottageCutz Feathers die, cut out the diecuts and use the negative of the die cuts as stencil to create a background. I have used the Distress inks Rusty Hinge, Spiced Marmalade, Peeled paint and Gathered Twigs.

Cut out a window frame from the CottageCutz Stitched Square die and distress with Espresso Distress ink. 


Cut out the feathers from the CottageCutz feathers die and colour them using the above colours. Tie together using a twine.
Stamp a Thank You sentiment and layer all the square dies together.


Products used from CottageCutz dies.


`

The CottageCutz challenge 7 is Fall Theme. Do share your entries with us. See you soon with more CottageCutz goodness. 


Tuesday, October 18, 2016

Christmas fireplace card

Hi, Janja here!

Warm fireplace and laughter in the eyes are the words with which I describe the card that I share with you today.
Let's see how it is made.


For the card we need:
- white card base: 4.3 x 5.5" (11 x 14 cm), folded
- kraft cardstock: 3.9 x 5.2" (10 x 13 cm)
- patterned paper: 3.74 x 4.9" (9,5 x 12,5 cm)
- white and color cardstock

Trim and fold white cardstock in half for the card base. Place patterned paper on kraft cardstock and fasten both together on the card front. Stamp Marry Christmas on upper part of patterned paper.


Cut out all pieces from different colors of cardstock with the CottageCutz die - fireplace with accessories. Shadow them around the edges with Distress inks. Some pieces are small, so it is the best to compose them immediately together.


And as they say .... there's no smoke without fire .... yet a little smoke. 
With a brush apply Distress ink Iced Spruce on a white piece of watercolor paper. When it is dry, attach it to the back side of the fireplace.


Completed card.
 

And don't forget on our challenge #7 - fall. You still have time to share your projects with us. 

I hope you have enjoyed this card. Thank you for coming over and have a great day. 

Sunday, October 16, 2016

Happy Halloween

Hello everyone,

It's Donna here sharing another one of the newest Fall CottageCutz dies that was released in August. If you missed it, you can find the collection of Fall dies here. I am using the Haunted Castle that has so many possibilities. If you have not looked through the blog, please do there are so many wonderful projects by the talented design team.

 Here is my card:


Closer look from the side. I used pop dots to give the house some dimension. I also cut the ghost out in white so they would stand out. I cut yellow paper so the house looks like there is light inside the house.

Closer look of the ghost and the house. 

How I created my card:

1. A2 size card 4 1/4 x 5 1/2,

2. I cut all my pieces out,

3. Also used water color paint to make my background on water color paper,

4. I cut the water color paper down to 4 3/4 x 3 3/4,

5. I die cut the largest Stitched Wide Rectangle Frame, and adhered it to the water color paper,

6. I cut a 1/2 inch stripe of paper and a thin piece of orange paper and adhered it to the back of the Rectangle Frame,

7. I added the haunted house and the sentiment to the water color paper,

8. I added the frame to the base of the card.

9. I finished the card off by adding some clear sentiments.

Thanks again for stopping by, please stop over at the Scrappin Cottage blog to see all the beautiful designs from the other design team members. Don't forget about our newest challenge that is running right now. The theme is holiday and here is a link for more information.

CottageCutz Dies used:


Saturday, October 15, 2016

SHAKER CARD IN NON TRADITIONAL CHRISTMAS COLOUR

HELLO !!!

It's Anita here !!! Have you started making your Christmas  cards ? The CottageCutz store has a wide range of Christmas and Fall theme dies and you can create simple and also heavy layered cards using these. You can check them out here:
Christmas 1, Christmas 2 and Fall Theme
Today I have a new card for you with Christmas theme but there is a twist in it. Its a shaker card and it's in non-traditional Christmas colour.
Do check it out here.


To make this card---

Cut out die cuts in white card stock from CottageCutz Stitched Circle die.
Cut out one from the largest die and this will form the base.
Stick together the largest and the smallest die with a 1/4 inch gap and cut out 6-7 circle frames.
Use the CottageCutz Snowman with lamp post to create a scene with a 3d effect. Layer two die cuts with 3D foam tape and distress the top one with scattered straw distress ink.


Adhere the frames in between each layer. I have used 4 frames . Add sequins and cover the top with OHP sheet cut to the same size as the circle. Put the final circle frame on top   and add another stitched frame. Place the whole thing on a brown Christmas Nested Ball Ornament. Add a string.


Apply distress ink Fossilized Amber, Rusty Hinge and Spiced marmalade on a craft mat, spray water and swipe a 7"/5" card stock to colour. Dry with a heat gun.


Cut two CottageCutz Snowflake doily and colour it with Evergreen Bough Distress ink. Apply clear adhesive and sprinkle Rangers Clear Rock Candy Glitter.


Create a circle label with CottageCutz Stitched circle die and add a sentiment.
Arrange all the elements as shown.


Matte on teal coloured card stock and finally adhere to a white card stock.
The finished card measures 7.5" by 5.5"


A challenge is up on the blog. the theme is Fall. We have an amazing collection of Autumn themed dies. So do share your entries. See you next week.


.