Friday, June 17, 2022

Birthday Wishes Card

Hello Scrapping Cottage friends!  
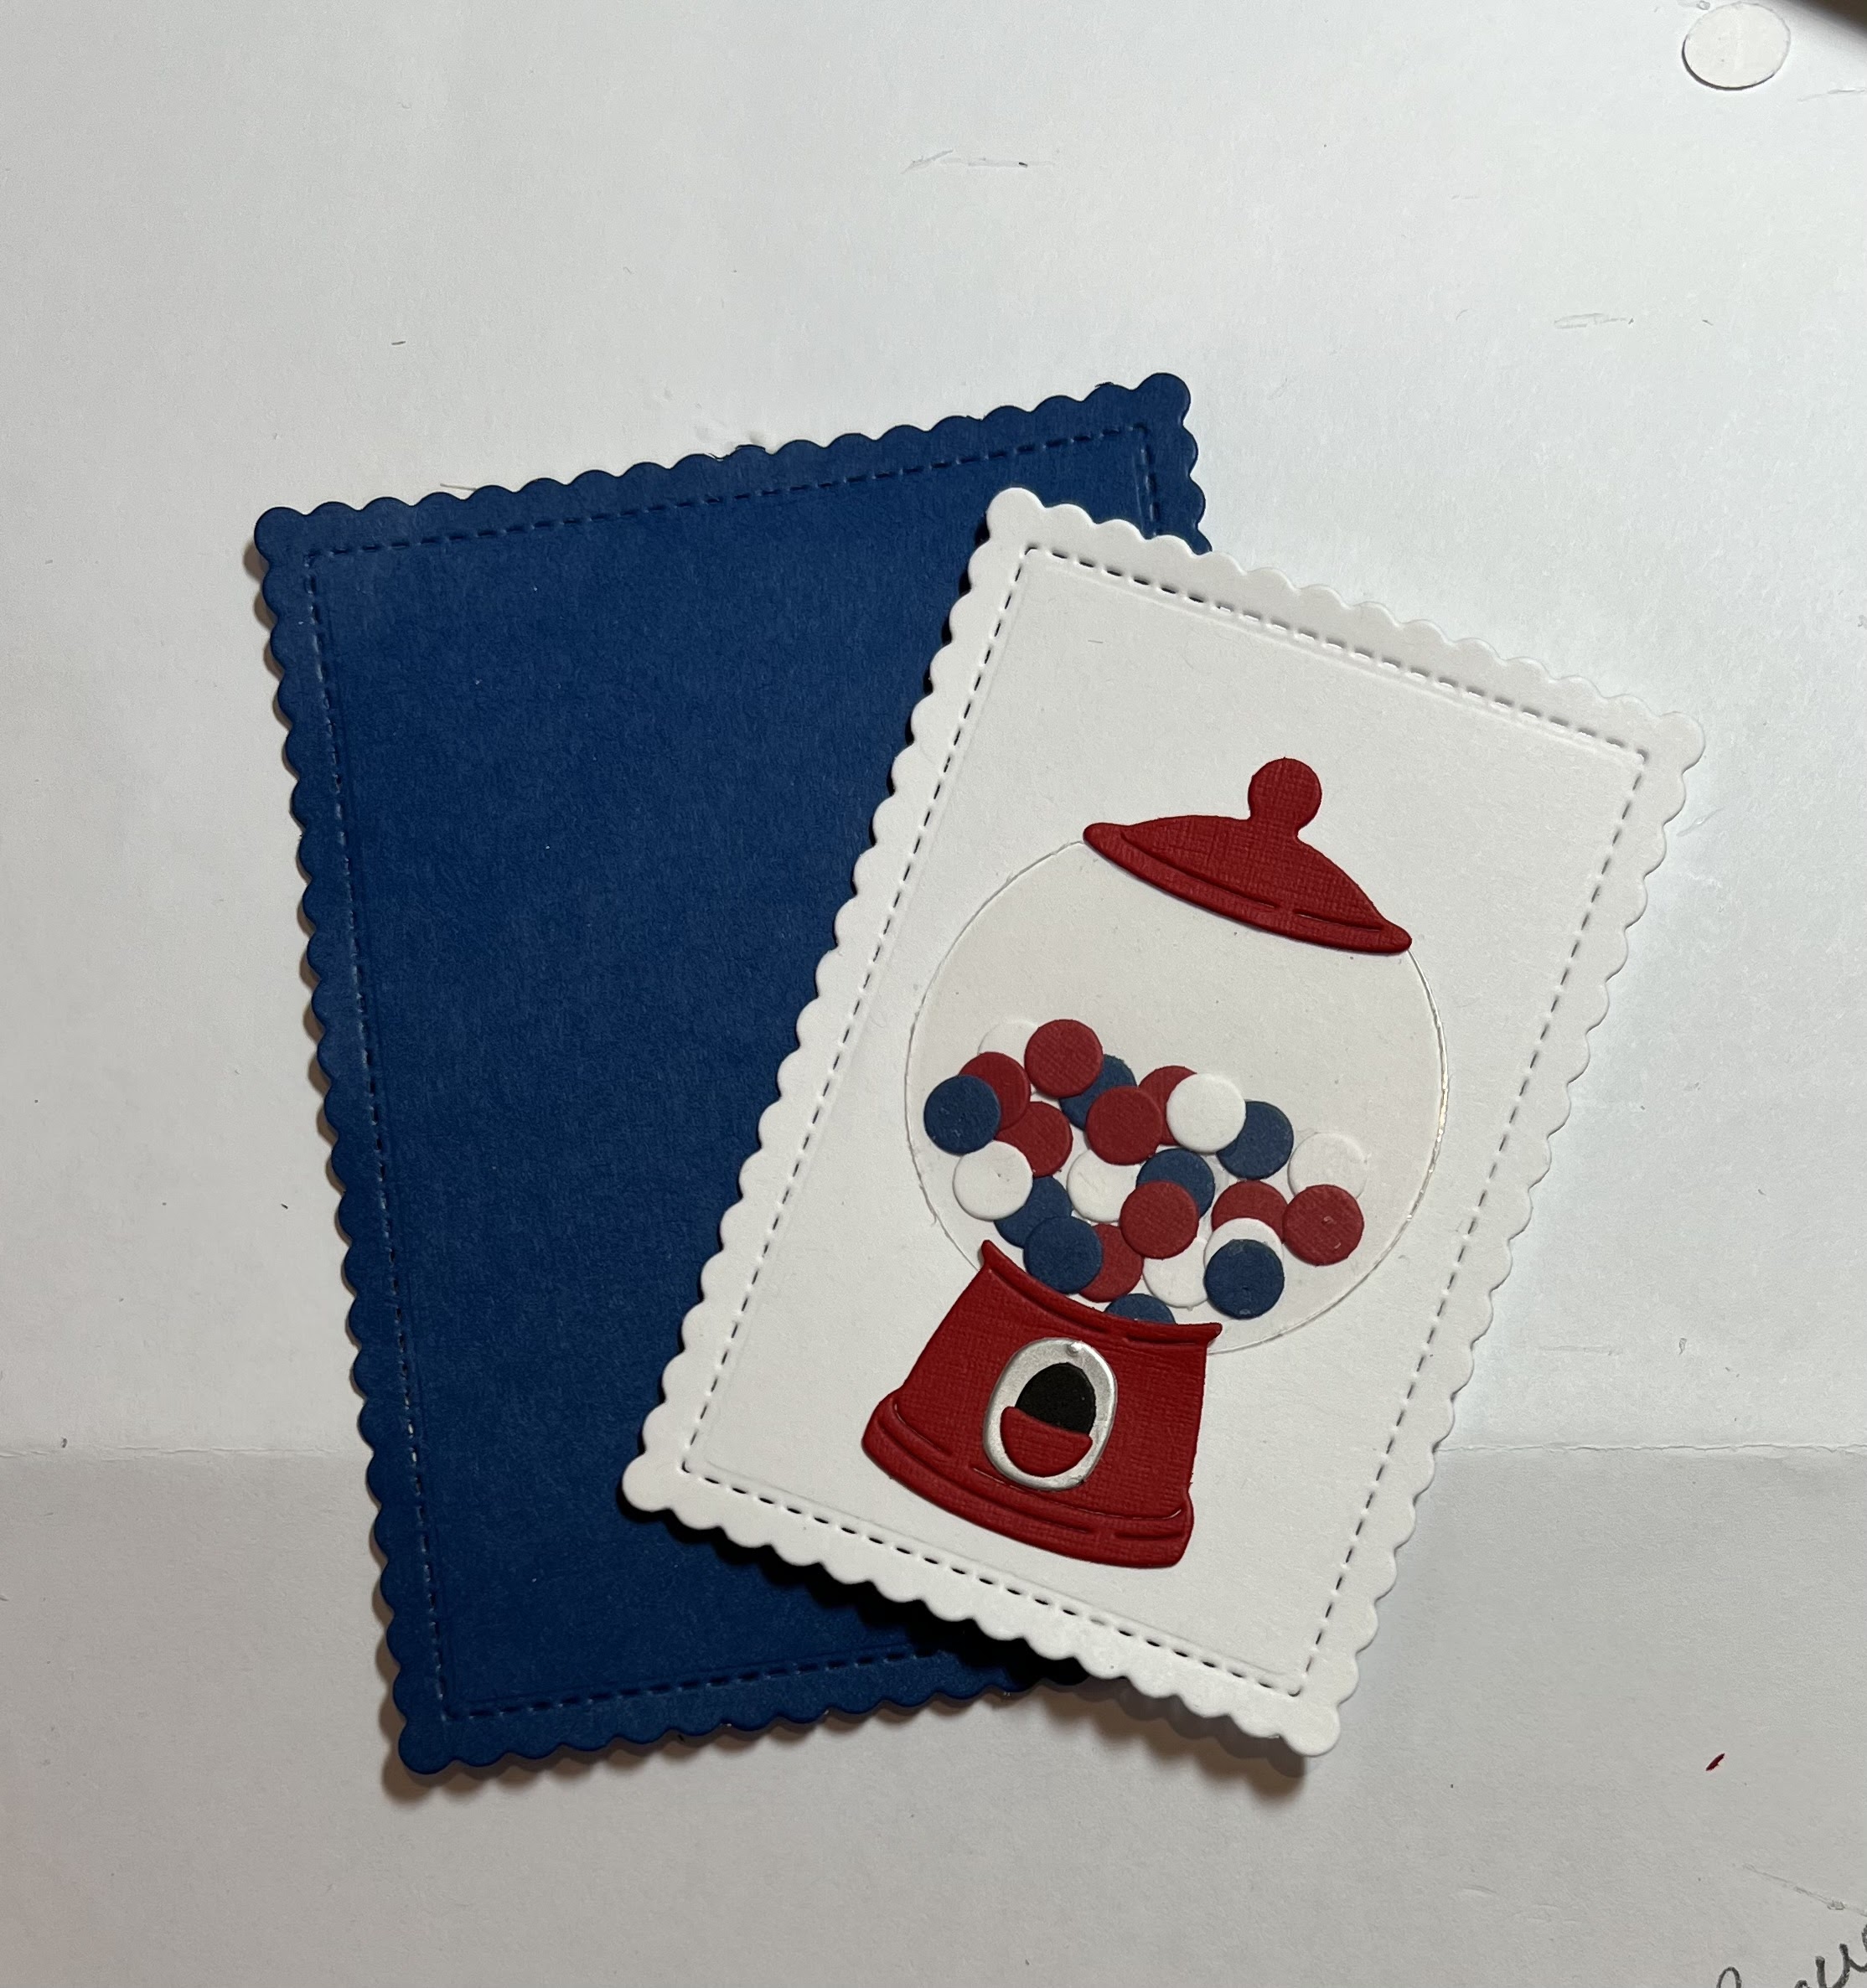
Melinda here with you on this Fabulous Friday!  Today I am sharing another tastefully fun birthday card. It features some cool treats created with dies from the New Sweet Treats Release! Here is my card.
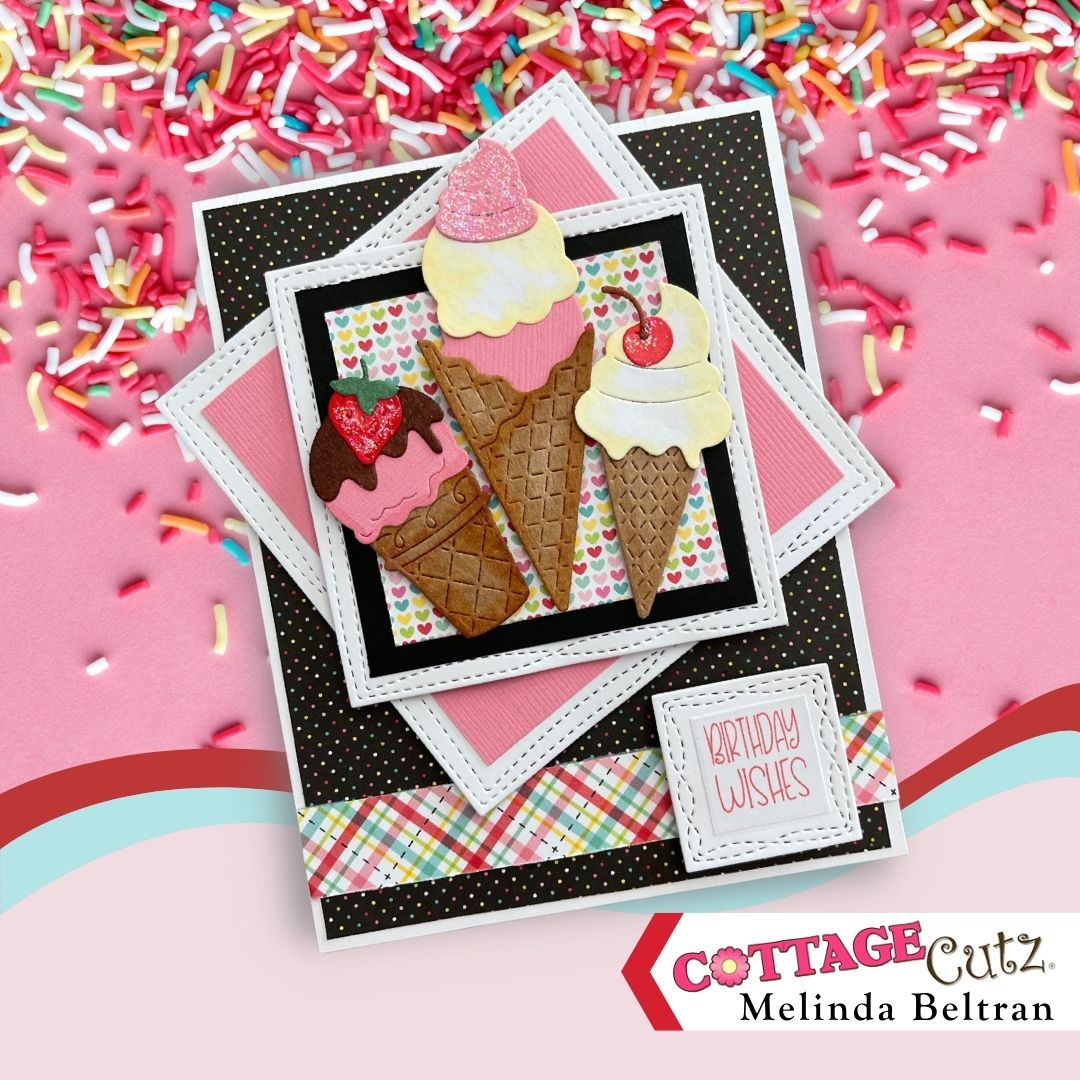
I started with a top folding white cardstock base. It is a standard A4 size. 4.25 x 5.5". To the base I added some cute patterned papers from Doodlebug. I also added a strip for the bottom border.


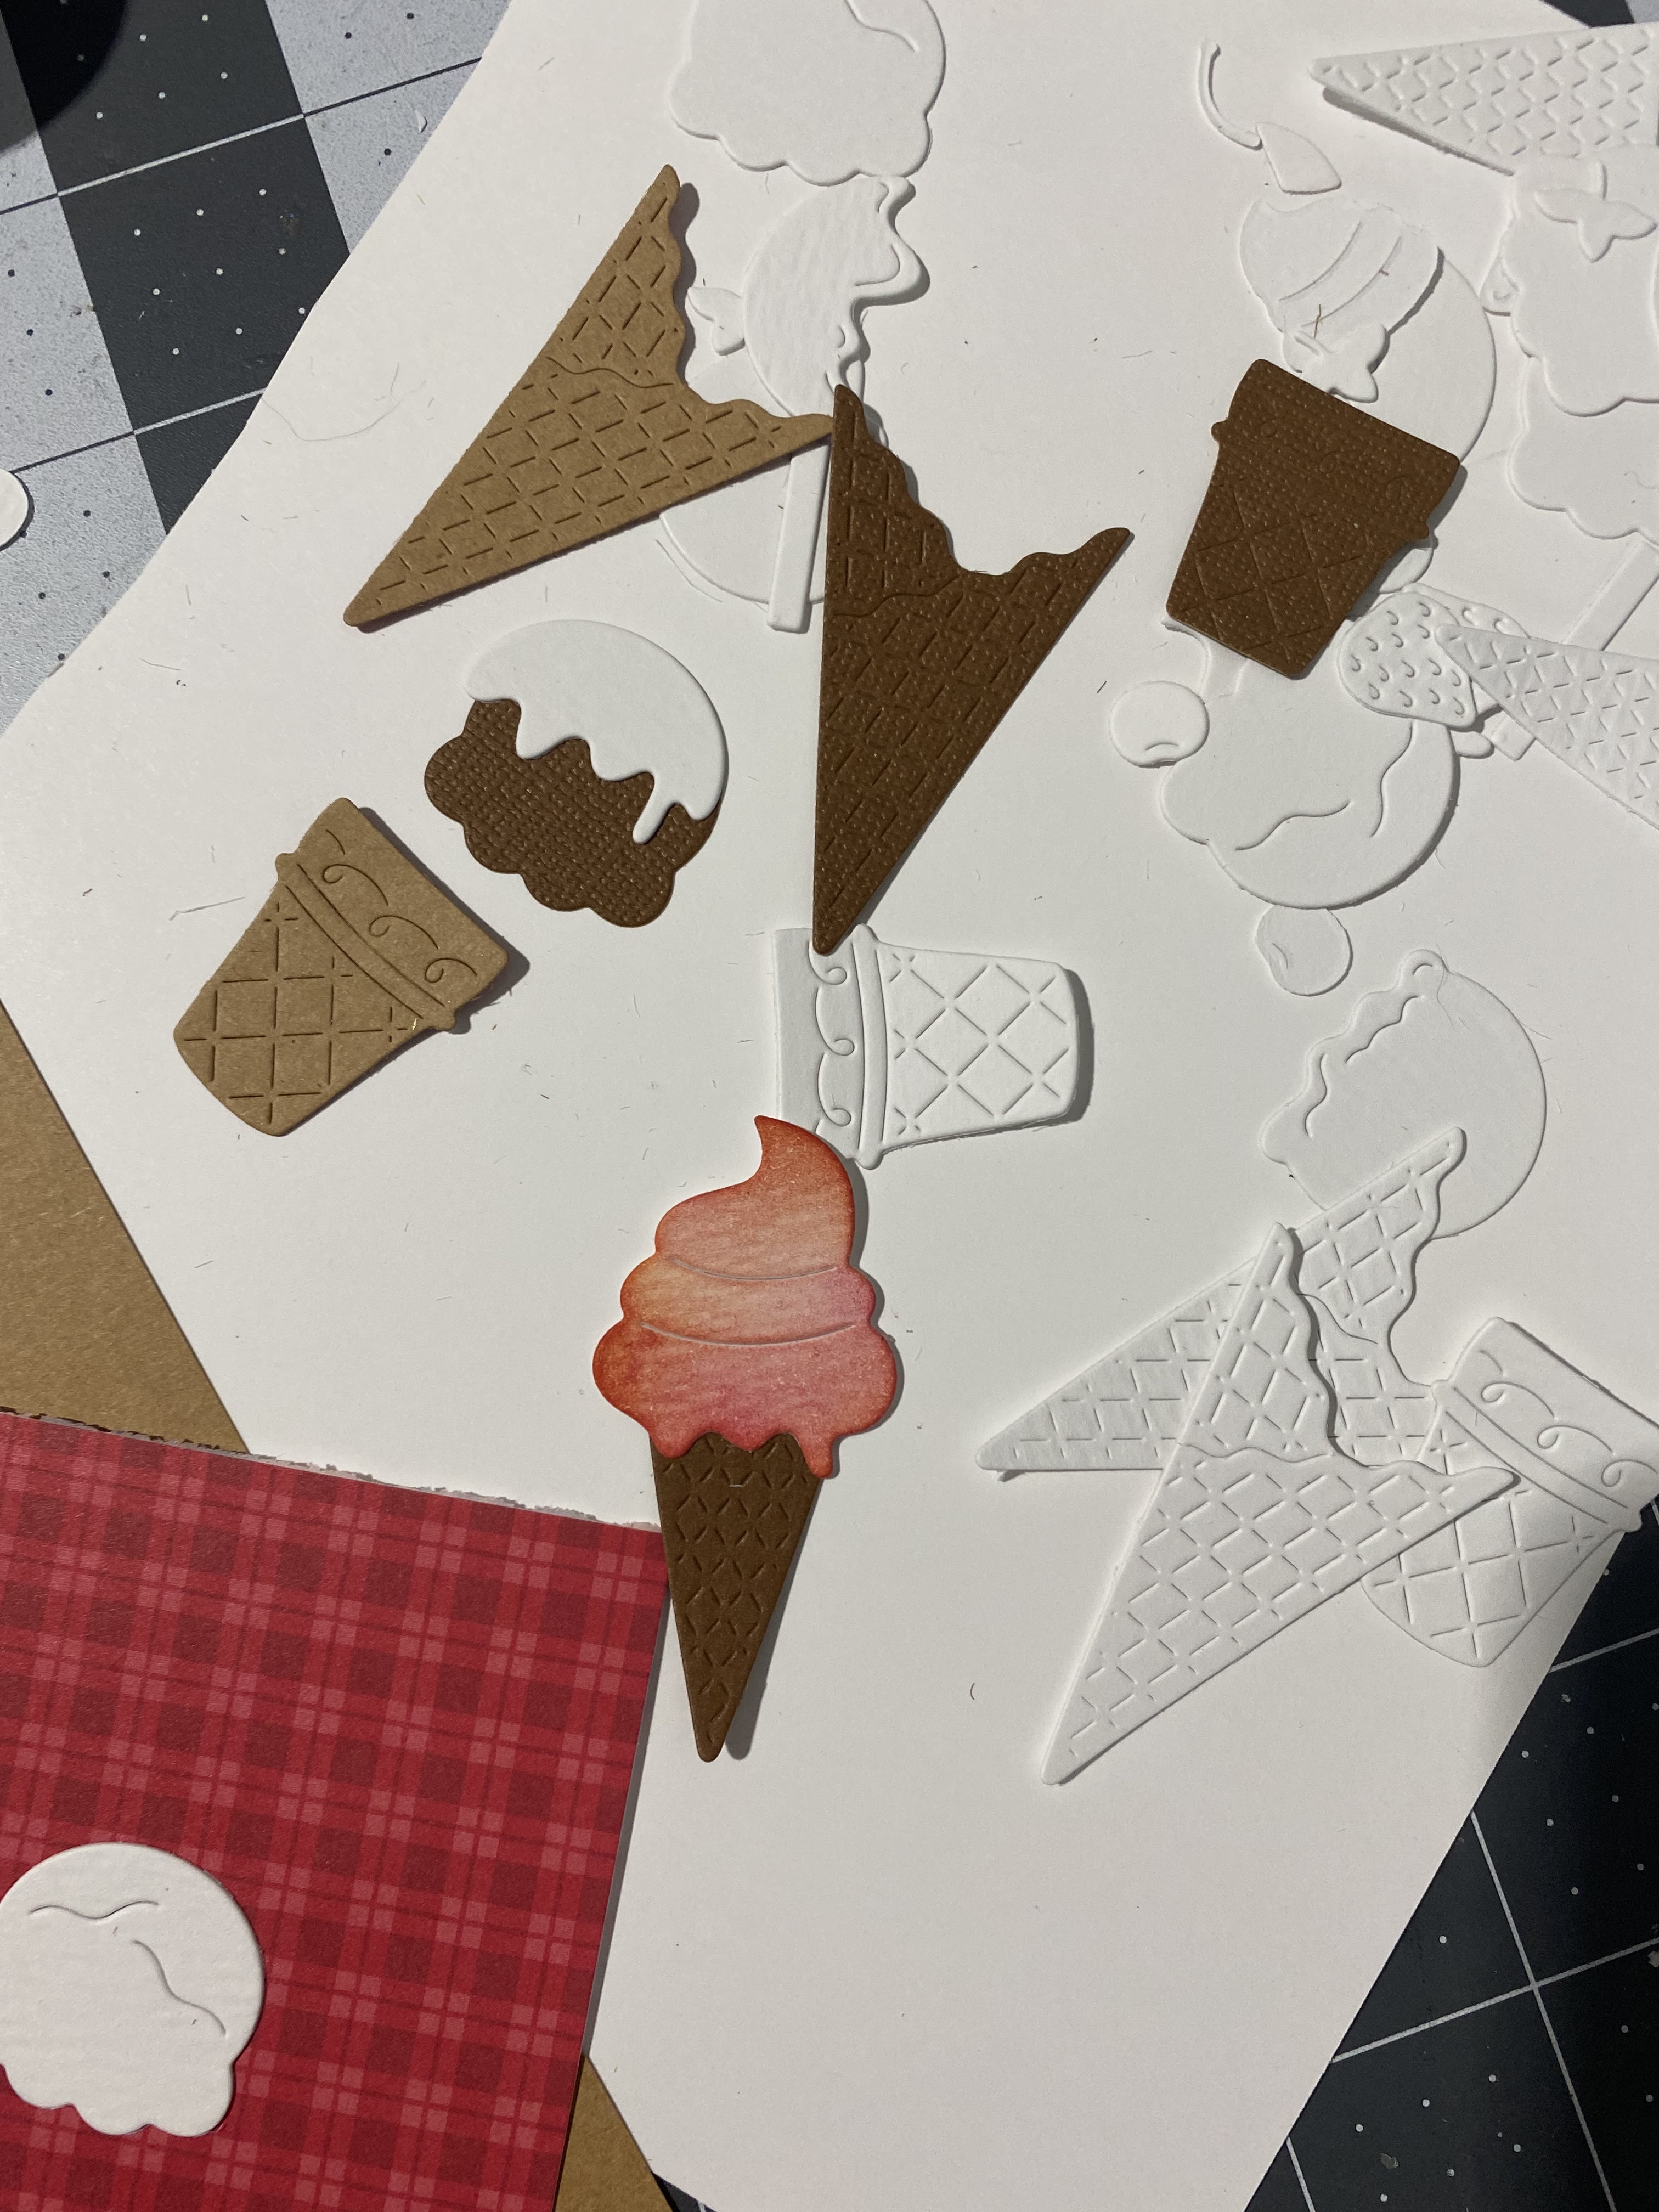
Here's closer look at the sweet and cool treats I used to adorn this card. They are from the Build An Ice Cream Cone die. I cut the pieces out of Pink, Kraft and White cardstock. I used my markers to give them some color. To the strawberry, cherry and topping on the center cone, I added some stickles to give them some extra sparkle and shine.

Here's a closer look at the sentiment. I typeset it and printed it off my computer. I added it to the smallest Nested Wacky Stitched Square  from the same set. I mounted that with some foam tape onto the colorful border at the bottom of the card.


Here is the new sweet treats release.

Sweet Treats Release


The Dies I used to create this project:


Make sure you head over to the CottageCutz YouTube channel and check out all of the amazing projects on there. Our video team is doing a wonderful job of filling the channel with all sorts of creative content! You don't want to miss it!

Well that about covers it for today! Until the next time, have a wonderfully craft-die day!
Melinda Beltran


Thursday, June 16, 2022

Happy 4th of July!

 Hello Friends

It is Pam sharing with you today!

I make a few 4th of July cards for friends and family so I thought I would get a little head start.  Even though time just seems to fly!   I think this release is perfect for the old red, white and blue!!

I am using the Candy and Gumballs die to create this little mini slimline card. (I did get a little glare off of the ascetate that I used for the glass.)


Design Steps:

1.  Use the Candy and Gumball die and cut: red, white, blue, silver, acetate and black.  Next use the Scallop  Rectangle die third from the largest and cut white card stock.  Use the second from the largest Scallop  Rectangle die and cut out a blue rectangle
2.  Assemble the Gumball machine on the white rectangle using a fine tip glue (careful not to get the glue on the acetate.) 
3.  Card base is white card stock 3 1/4 x 6 1/4.  Red is 3 1/8 x 6 1/8 and the DP is 3 x 6.  Glue the red to the base and then add the DP
4.  Glue the blue rectangle flat to the card. Add the white rectangle using dimension tape.  Stamp the sentiment on blue and emboss in white then layer onto red card stock. Add dimension tape to the sentiment and adhere to the front as shown below.  Add a few stars and your card is complete

CottageCutz Productions


We have more inspiration on our YouTube Channel check it out HERE
Thanks so much for stopping by!  And I will see you next Thursday.

Blessings and Take Care


Wednesday, June 15, 2022


Hey Krafty Friends, Jen from Katahdin Krafts, back with another  CottageCutz YouTube  video on the CottageCutz Channel.  This week, I am sharing my "Sweet Thanks" gift card holder.  We own a seasonal seafood and dairy bar here in Maine, and I thought this project was a sweet way to present a thank you note and gift certificate.  


The card dimensions are:
  • Light Weight Cardstock - 5.5" x 8.5", scored at the 1.25" and 4.25" marks
  • White Cardstock - 2.75" x 5.25" (x2), 1.5" x 3"
  • Patten Paper - 2.75" x 5.75", 1" x 5.14" (x 2)
  • Solid Coordinating Cardstock - .75" x 5.75"
Please head over to the channel to watch my video and learn how I created this fun project, also enter for a chance to win the "Build an Ice Cream Cone" die!  

The winner of the "Easel Sign w/ Flowers" die from my last video is Dee Wilson, you can find all the details on the YouTube Channel!


Monday, June 13, 2022

Happy 4th

Hi everyone Happy Monday with Simply Monica!❤️  Today my card touches on the Fourth of July a touch.  I had this paper from Doodlebug forever and saw one of the images had ice cream cones so I thought how cool a Fourth full of creamy you scream I scream we all scream for ice cream!

I diecut a couple of the cones from Build an Icecream Cone in a variety of shades
Then I used distress ink in a variety of colors and sponged on some color in fun ice cream shades or at least color I felt resembles ice cream…
Then I used a sheet from the set that had text blocks and added the ice cream cones to each panel and glue them on my card front I thought it was a unique way to showcase the dies
I hope everyone enjoyed my post amd thanks for stopping by 


Product Used


Sunday, June 12, 2022

Ice Cream Truck Slider

Hello Scrapping Cottage Friends!  

Kris here with my debut as Guest Designer!  With the arrival of summer, I'm excited to be working with this new Sweet Treats release as there are so many occasions for these dies!  

I made a super easy Pull Tab Slider card using Ice Cream Truck.  


You find the list of products I used linked to the store at the end of my post.  But for ease sake I'll list them here along with some other tools needed for this project:

Products:                                            
•  Ice Cream Truck die                         
•  Sweet w/ shadow die                        
•  Happy Birthday w/ shadow die     
•  Wishes w/ shadow die                      
•  Clouds Slimline die                                                
•  Hills Slimline die
•  Pierced Circle Frames die
Other:
•  stamps of your choice  
•  patterned paper                  
•  ruler                                              
•  paper trimmer
•  foam strips/tape
•  low-tac tape     

As always... if you need to see my photos up closer, just click on them for a larger size.

Design Steps:  
  • We all know it's more fun to eat our dessert first.... so I started this project with the FUN stuff!  That is... cutting and piecing together my Ice Cream Truck!  I had this fun paper with blue and pink ice cream trucks, so I matched it.  
  • Next, I cut my main pieces of cardstock.  
    • Card base (grey) is cut at 6" x 12" and scored at 6"
    • Another piece in the same color as base cut at 4-1/2" x 5-3/4"
    • and a dark pink cut at 6" x 6" 
  • To make the frame on the front, I measured in 1/2" on every edge (near the corners) and placed a light pencil mark.  You'll end up with 4 "X"s  near each corner.  (if you don't have an "X" then you might need to extend your 1/2" marks/lines a bit until they intersect with the one parallel.)  I then used my paper trimmer to CUT between each of those "X"s to end up with a frame.  
    • Erase mark lines or turn it over to the other side ☺
  • I cut a piece of white to 2" x 5-3/4" and cut the very bottom using one of the Clouds Slimline dies.
  • I then cut (2) pieces of coordinating designer papers at 2" x 5-3/4" and cut the very top of each with one of the Hills Slimline dies.
  • You want to add glue to the (front) sides and top (NOT the bottom)  of your cloud border and attach BEHIND your frame at the top as shown below.
  • Next, we need to cut a notch out of our frame for our pull tab. (You could do this step before attaching your clouds - I just forgot to do it prior).   I used a small circle from the Pierced Wide Circle Frame Set to cut a PARTIAL CIRCLE from the LEFT edge of your frame as shown below.  It's important that you cut from the left side because it you do it on the right, your truck will be driving backwards!  ☺ 
  • Now we need to cut the same notch out of our card base in the exact spot we cut the frame.  SO... you want to lay your notched frame on top of your CARD BASE making sure everything lines up and fold is at the top, then lightly draw the outline of your notch onto the card base and cut the notch using the same circle die as we did in the previous step.
  • I then taped my 2 pieces of patterned paper together and added adhesive to the (front) sides and bottom (NOT the top!), then placed BEHIND my frame at the bottom ***NOTE:  lay your truck in the middle first so you know how far down to attach your patterned papers.  
  • Next, I placed my 4-1/2" x 5-3/4" grey slider piece behind my frame, but FLUSH with the left hand side and centered between the top and bottom.  You can write or stamp "PULL" where the tab dips down, OR draw an arrow going to the left to let your recipient know to pull.  
  • Now remove your slider piece and set it aside.
  • Reminder - our frame is just sitting on our card base - it is not attached yet!  
  • Decide what you want to have revealed when the truck is being pulled!   I stamped a "YUMMILICIOUS" sentiment and some confetti .  To find the placement, I laid my truck onto my card and off to the left - see photo below for placement.  Now you can see how much space you have and decide what you want to fill that space with!  ***It's best not to have too much dimension as it may prevent the truck from sliding back into place.  Flat stamped images are best!

  • Now we can add our foam tape to the back.  Again, line up the slider (from the front) so that your arrow or "PULL" is lined up in the center of your notch and the edge of slider is flush with edge of frame... and the whole piece is centered between the top and bottom edges of card on the back.  To keep it in place, I added some purple low-tac tape.
  • To the BACK of your frame, add foam tape to the 3 sides close to your slider, but not TOO close or it won't slide well.  (Don't tape the edge where your notch is cut out.)  
  • And now we can add our truck!  You'll want to pop it up with foam strips/tape so it goes over our frame on the edge.  Start your strips in a li'l ways as shown below so that our truck will go over the frame a li'l bit.  That way we know it will reveal our whole stamped image.
  • Attach your truck to the far RIGHT of your card but make sure your foam strips/tape does not go onto the frame! I added some fairly flat sprinkles to fill the space on front and added my "Sweet Birthday Wishes" using the words with shadow dies (linked below).

Here are the products I used on my card today:


Click the pic below to shop the whole release!


I hope my card inspires you to create your own interactive card or something else using the fun new release!   I'll be back next week with a simple-but-cute card :)  
Have a CRAFT-astic day!

~Kristine