Wednesday, January 12, 2022

Winter Birthday Card


Happy New Year, Everyone.  Marla here with another CottageCutz YouTube video tutorial.  Today, I am creating a winter birthday card.  

One thing I have noticed about my card designs is that I lean toward birthday cards for my girlfriends.  Not that I can't make a masculine card or find it difficult, but because I have more female friends that I send cards to.  That being said, I am determined to create a few unisex cards for my stash this year.  I will continue to make masculine cards for the special men in my life but having something on hand that works for either sex in a pinch is ideal.

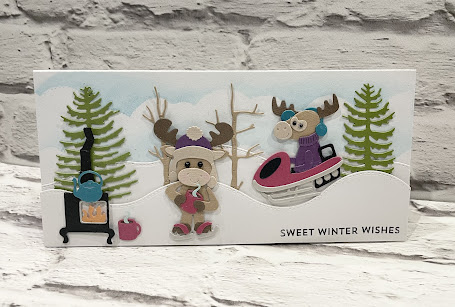
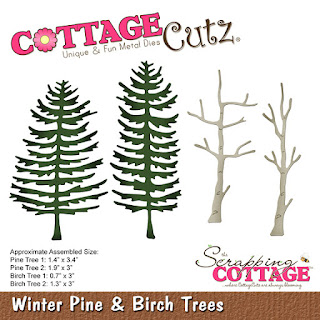
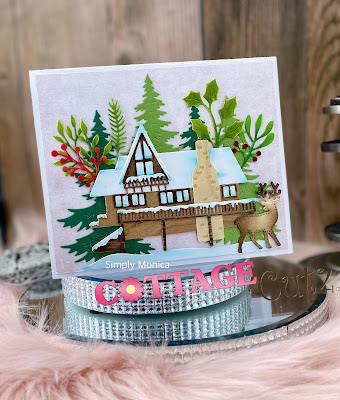
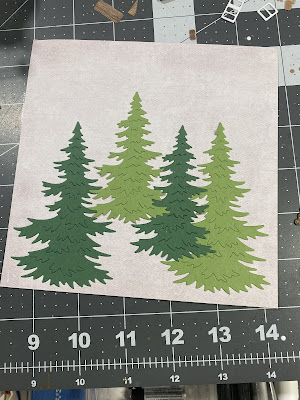
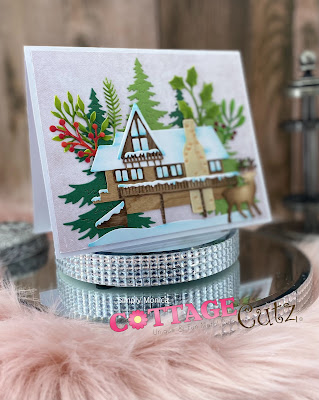
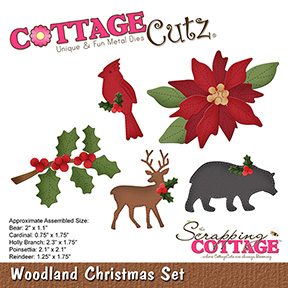
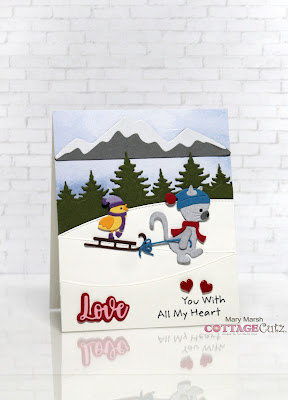
My slim line card features a nature scene, which of course is perfect for anyone who appreciates the outdoors.  I used what I may deem my favorite set of pine tree dies ever.  The "Winter Pine and Birch Tree" dies were part of the "Winter Release" and were so easy to dress up for this blustery winter scene.  I added the deer from "Woodland Christmas Set." to add another touch of nature to the scene.  

Please head over to the YouTube Channel to see how I created this birthday card.  If you have never used Gouache or don't know what it is, I am sharing why I believe it is the perfect medium for winter scenes.  

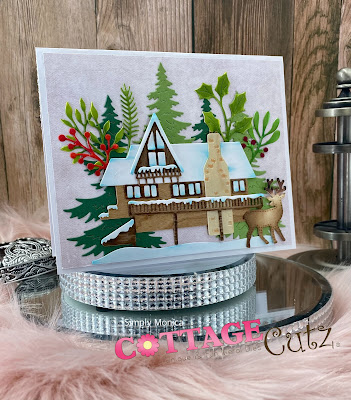
I will also be announcing the winner of the "Winter Chalet" from my last video.  The Scrapping Cottage is generously allowing me to giveaway the "Winter Pine and Birch Tree" die for this video.  I hope you'll join me.

Until next time... Marla


Tuesday, January 11, 2022

Moose waiting for Sledging Friend


Happy Tuesday Cottagecutz fans, I hope you are having a good week so far. It’s Wendy bringing you the blog today with a light touch tutorial, I will bring you a full tutorial at the end of the week

So o begin with, I cut out the 'Clouds Slimline' as  template to make the background clouds. I used 'Tumbled Glass' Distress Ink for this. it's always good to start halg way down the card and then move up

Next I cut out 2 pieces of the 'Hills Slimline' to simulate snow. The first layer was attached with glue and then the next layer with 1mm foam pads at the bottom so that I could slot trees behind it.

Next I cut the remaining elements that I needed for my card, ‘Winter Moose with Hot Cocoa, Winter Pine and Birch Trees, Winter Moose on Snow Mobile and Winter Mouse by Woodstove

I assembled the trees first putting them in the background. The other elements I cut and assembled and adhered to my card with 3D foam pads. The dies are so intuitive and easy to assemble and you can change up the colours, they are your own interpretation.

I thought the card looked like the moose hd had a long day in his snowmobile and was due back for a nice hot cup of cocoa

I reall hope you have enjoyed this card today and it had given you some inspiration either for now or I can see these died working well for Christmas too

Have a wonderful week and I will see you on Friday with a full tutorial and another cute card
Hugs
Wendy

Dies I used:


Monday, January 10, 2022

Woodsy

Hi everyone today I am back sharing a fun woodsy card perfect for the men in your live or just a friend just because...  I used one of the latest new releases Winter Ski Lodge along with a variety of other sets from The Scrappin Cottagge listed below.
I took the trees from the Rustic Sign & Trees set to set behind my Winter Ski Lodge but to add some fun details I took various pieces from the Christmas Farmhouse Floral set and colored them with my copics to give it a different look to the greenery.
Then I used some balsa wood paper to create the ski lodge and colored various pieces with copics but also used colored cardstock for different pieces to bring everything all together.  Then I put a stitched reindeer from the Woodland Christmas set because what is a lodge without a deer around right?!!
I hope everyone enjoyed my post and welcome 2022 looking forward to an amazing year!


In case you didn't hear, The CottageCutz YouTube channel is up and running. We are featuring videos every Wednesday. Drop by and subscribe so you don't miss one and give us a thumbs up on our videos.
Products Used: 


Sunday, January 09, 2022

Winter Banner

Happy Sunday Scrapping Cottage friends! 
Melinda here with another fun project. Today's project is this super cute Winter themed banner!

Here is a look at my finished project. I used several dies from the 2021 Winter collection. I used five of the dies to create these adorable winter characters. I cut and assembled them and then mounted them onto some patterned paper and black cardstock mats. I then mounted each of those onto the scallop stitched rectangle mats. I used my markers to color them all in. 


Here is a closer look at the cute little Winter Bear on Sled


Here is a closer look at the Winter Hockey Bunny


Here is a closer look at the Winter Penguin Snowboarding


Here is a closer look at the Raccoon on Skis


Here is a closer look at the Winter Fox Skating


Once each panel was done, I punched some holes in the top corners. I strung them together with some ribbon and beads and then hung it up. It will make the perfect addition to my winter themed entrance décor.

The Dies I used to create these projects:


In case you didn't hear, The CottageCutz YouTube channel is up and running. We are featuring videos every Wednesday. Drop by and subscribe so you don't miss one and give us a thumbs up on our videos.

Until the next time, have a wonderfully crafty day!
Melinda Beltran

Saturday, January 08, 2022

Love You with all my Heart

Hello CottageCutz friends! Thanks for taking the time to stop and visit with us today. It's Mary Marsh here bringing you the Saturday edition of the Blog.

IT'S NEW RELEASE TIME! The Winter Release with 15 new designs is in the online store. They are perfect for creating cards for all your winter celebrations. You can pick them up on a limited time 30% off sale.

Today, I am using the new Winter Cat & Bird Sledding and the Winter Ski Trip dies to create a scenic mountain lake with pine trees and sledding slopes. This will be a Valentine's card. 

I like to make non-traditional cards for this holiday, and I thought this image would work great as a love style card. I am not sure who I will give this card to as yet. Maybe my hubby or our precious little granddaughter. So, let's get started with some details of how I created this card. 

Design Steps:
I started off my card by cutting the images. I cut the cat & bird in bright colors. For the cat I used somewhat masculine colors and the little bird in more feminine colors. 
The mountains are cut in a dark gray cardstock and also a very pale blue for the snow caps. The pine trees are cut with the Mountains & Trees Slimline die. I cut the pine trees in a dark green cardstock.
For the sledding slopes, I used the Hills Slimline die.  
Next, I stamped my sentiment. I masked off the words I didn't want to use. I used my MISTI since this is a photopolymer stamp and sometimes, they don't stamp well with just one inking. I had to double stamp this one. 
Now that my elements are prepared, I am ready to start card assembly. I used a white card base and for the sky background I used designer paper. I didn't need a full background for the designer paper since the slopes would cover it. 
 
White Card Base: 4 1/2" x 5 1/2"
Designer Paper Layer: 3 1/8" x 4 1/2"
I attached the sledding slopes and the designer paper with double sided tape.  
Next, I attached the pine trees and the mountains. I positioned the mountains to give the appearance of a mountain lake. It reminded me of Lake Tahoe. 
The images are attached with dimensional adhesive. This little pair is so cute and I love how they look placed in the mountain scene.  
To finish off my card, I added my Love phrase. It's cut from cardstock using the Love Shadow die. I added a couple of enamel hearts and this card is finished. I hope I have given you an idea for a way to use these dies for Valentine's Day. See you next Saturday. 
Reminder: Our YouTube channel is active again. Check out the latest video and we are having a giveaway for subscribing, liking the video and giving it a thumbs up. Click here.

dies I used to create card: