Saturday, December 11, 2021

Angel Ornament


Hello CottageCutz friends! Thanks for taking the time to stop and visit with us today. It's Mary Marsh here bringing you the Saturday edition of the Blog. 

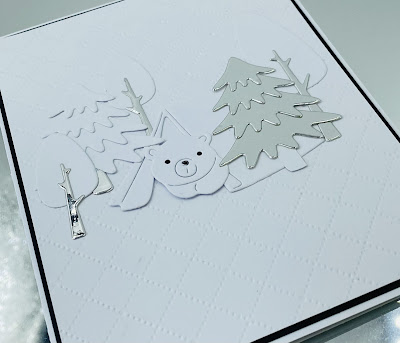
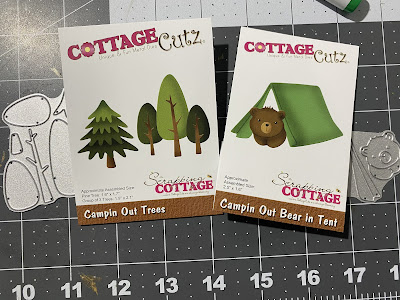
IT'S NEW RELEASE TIME! Our annual Black Friday release is in the store. It's the Campin' Out release with 14 ever so cute designs and they are currently on a 30% off sale. It's perfect for year-round card making. And the Christmas release Part 1 and Part 2 is also available. There is still time to get Christmas dies ordered and delivered for Christmas card making.

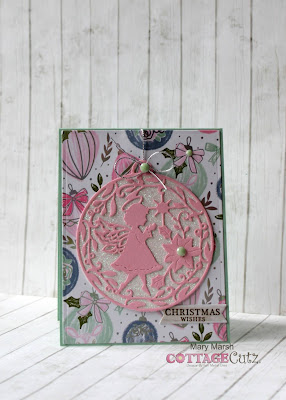
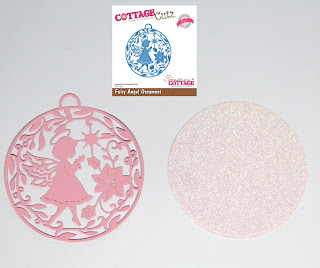
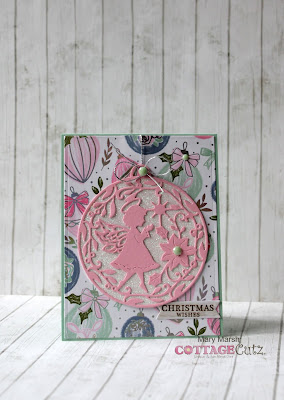
Today, for your viewing pleasure I have a Christmas card in non-traditional colors using the Fairy Angel Ornament die. It's from the Christmas Part 1 release. So, let's get started with some details on how I created my card.

Design Steps:

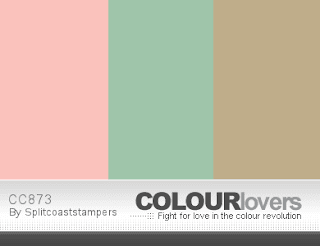
I started my card this week with the colors from the Splitcoaststampers color challenge #873. We were to use blushing bride, mint macaron and crumb cake for our color trio. Optional was to add bling. 
blushing bride, mint macaron, crumb cake
I chose some metallic ornament paper from my stash that had two of the challenge colors. I thought it would a great backdrop for my angel ornament. I love the paper but metallics are not easy for me to capture a good photo. This paper has lots of silver on every ornament, but it doesn't show on the photo. If you have any tips, let me know. 

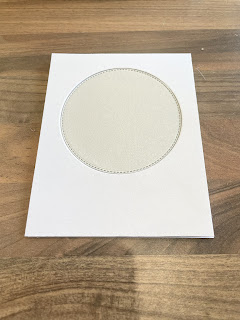
mint macaron card base: 4 1/4" x 5 1/2"
designer paper layer: 4 1/8" x 5 3/8"
Next, I cut my fairy angel ornament in the pink cardstock and decided to use some white glitter paper for the background. I used the largest die from the Circle set to cut it. 
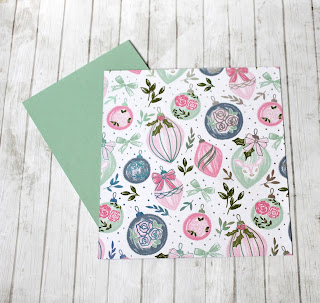
I had a bit of a struggle trying to figure out how to get the crumb cake color in my design. It doesn't have to be a lot, but it has to be there. So, I found some paper in my stash that had that color in a muted way. 
I cut it in a small banner and stamped my sentiment in a medium brown ink. 
Now that all my card elements are prepared, I am ready to start card assembly. I attached the designer paper to the card base with double sided tape. 

I attached the angel ornament to the glitter paper with Art Glitter glue. It dries clear and hold securely. 
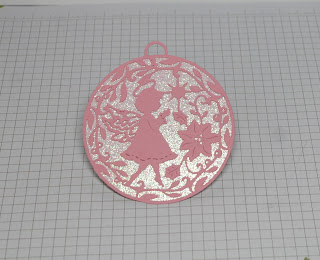
I used silver cord as the ornament "hanger" and also added a silver cord bow for interest. The ornament is attached with double sided tape.

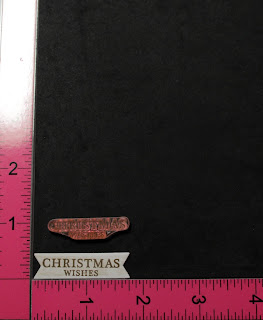
To finish off my card, I attached the sentiment banner with double sided tape and scattered some mint faceted enamel dots for the bling option. And that's my sample for this week. I hope I have given you an idea for the angel ornament die. See you next Saturday!


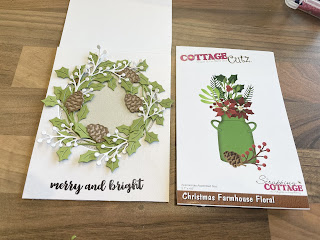
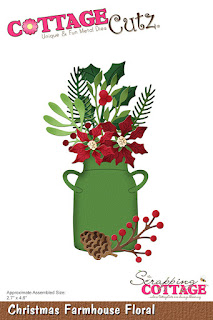
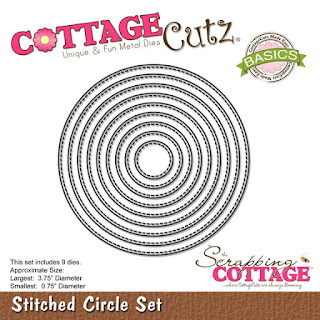
dies I used to create card:


Friday, December 10, 2021

Christmas Wreath


Dear Cottagecutz fans. Thank you for continuing to stop by to see the blogs each day, it means so much. It’s Wendy bringing you the blog today and I have a very simple stylish card for you.

To begin with I cut a piece of card when folded measured 5.5” x 4.5”. I also cut another piece of card the same size and cut a 4’ hole just above the centre as i wanted to add a sentiment to the bottom of the card. I then stuck the single piece of card onto the main card with 1mm foam pads.

Next I cut a great piece of card in grey, which was the same size of the hole I cut in in the main card and attached the alcove in the card with glue adhesive.


Here is the design bis far


Next, I wanted to create a wreath and the best way of doing this is to create a ring. I made this from the ‘Nested Stitched Circles’ sizes, 3” x 2 3/4”


Once cut out I decorated the started to decorate the wreath before sticking down to the card. I used the ‘Christmas Farmhouse Florals’ to do this. I took some green holly, top tip, take the end off the holly as it sits better without it. Add some white mistletoe and then a few pine cones to finish. Attach to the main card with glue


Finally I added some red germs to look like holly and your card is complete.


Thank you for popping by today. I really hope you like the card.  It is super easy to make and will give your stash the wow factor. Have a wonderful weekend and I will see you Tuesday with another design
Hugs, Wendy

ooh and don’t forget to visit the YouTubre channel


Dies I have used:


Thursday, December 09, 2021

Christmas Snowman

Hello Scrapping Cottage Friends

I have a few more Christmas cards to finish up so I thought I would try a shaker since I bought some really cute little sparkle to put in the shaker window.  I am using the Snowman w/Woodsy Friends for this card.


Design Steps:

1.  Use an A2 white card base and a piece of snowy DP 4 x 5 1/4.  Using the Pierced Wide Rectangle Frame second from the larges cut out 4 in white cards stock.  Glue the snowy DP to the white card base
2.  Glue the 4 frames together sandwiching in a piece of acetate.  Place strip dimensional tape on the back of the window
3.  Above are the different bits and pieces that I placed in the shaker window
4.  Carefully pile up your shaker bits onto the card front and then place the window over the pieces
5.  Using the Snowman w/Woodsy Friends die cut out the pieces in white, green, blue, red, dark brown and black
6.  Assemble the snowman and gifts using a fine tip clear drying glue.  Pop the snowman and gifts to the front of the card as shown below then stamp your sentiment and layer onto red cards stock.  Glue the sentiment as shown below and your card is complete

CottageCutz Products


Thanks so much for stopping by today and I will see you next Thursday!  And just to remind you we have a wonderful YouTube Channel for more inspiration.  Check it out HERE

Blessings
Pam


Wednesday, December 08, 2021

Creating a Northern Lights Background


Hi, it's Marla, back with another  CottageCutz YouTube video.  Have you been lucky enough to have seen the Northern Lights in person?  I can only imagine how beautiful they are.  In fact, my imagination and a few photos prompted me to try to recreate their beauty for this village scene card.  


When I saw the sweet houses from the Winter Houses 2 and the Winter Accessories dies I knew that a snowy winter village, nestled in the mountains, would be the perfect backdrop for them.  I prefer to spread out my scene, so the Mountain and Trees Slimline die was going to help me create the majestic mountain scene I was imagining.

I hope you will join me on the YouTube Channel to see how this magical scene came together. Don't forget, if you left a comment on my last video, you could be the winner of one of the dies I used in that video.  The Scrapping Cottage is generously giving away another die set for this video, so don't forget to follow the instructions in the video to enter.

All of the products I have used on my project and more are available in The Scrapping Cottage. You can use the links in this post to find them.  Until next time.... Marla


Tuesday, December 07, 2021

Classy Christmas Card


Happy Tuesday Cottagecutz fans. It’s Wendy bringing you the blog today. We are less than 3 weeks until the big day so I wanted to create a quick and easy card, with flair and finesse. I also am so aware that I haven’t made my family cards yet so this will be my card of choice this year

I don’t have a full tutorial for this card as you will nail it in minutes but here are the instructions.

I used the Victorian Velvet Distress Ink to create a background. My choice of weapon is blending brushes as they give a beautiful background and there are no hard edges, it just blends so well. I then used a ‘Wink of Stella’ brush pen to flick some glitter on the card to give it some dazzle. It may be hard to see but the original looks to pretty. 

Next I used the Snowy Trees die and cut this out 3 times in non shed glitter card. I attached 2 of the tress to the card with glue and the middle one I used 1mm foam pads for dimension.

Finally I used the ‘Wishes’ sentiment to finish off the card in coordinating colours and we are done.

Here’s a close up, I really hope you can see how pretty the ink looks


Thank you for stopping by, It means heaps. I am going to be back on Friday with a full tutorial for you so have a wonderful week
Wendy

Ooh and don’t forget to keep logging onto our YouTube page for more inspiration. The designs are amazing


Dies I used:


Monday, December 06, 2021

White Christmas

Hi for my card today I used Campin Out Trees and Campin Out Bears from the latest release which was for Black Friday.  Hopefully everyone was able to get the amazing deal The Scrappin Cottage had available for that special day!!  Super adorable set..

I went for an all white on white with just a touch of silver.  I diecut the pieces and alternated the trunks on the trees using silver foil paper (which I love).  It really brings out whatever you are using because of the amazing shine it has.

To finish my card off I added some black cardstock to mat the top layer of white cardstock I used.  This helped bring out the white off the card.

I hope everyone enoyed my post for the day and thanks so much for stopping by be sure to check out our YouTube channel we are adding so many great videos for everyone to enjoy. Click here 


Products Used


Sunday, December 05, 2021

Quick and Easy Christmas Tags


Happy Sunday Scrapping Cottage friends! Melinda here with another project share. Today I am showcasing a couple of quick, easy and cute gift tags for Christmas.

Here is a look at my tags.
I used the super cute Gnome Santa Gnome w/ Silly Reindeer Die.

I cut the reindeer out of white cardstock. I then used my brown marker to color his body in.
I then used some chalks and some white gel pen for some extra touches.


Here's a closer look at the Reindeer tag. I used the fine tip pen to write Merry Christmas. 

I finished off the tag by mounting it onto the Green patterned paper and the Black paper for mats. I put all that onto the Scallop stitched rectangle die for the base. I added a little red jingle bell and twine bow for a finishing touch.

Here is a closer look at tag two with the cute little Santa Gnome I used the smallest die from the scallop stitched rectangle set for the sentiment.

The Dies I used to create these projects:


In case you didn't hear, The CottageCutz YouTube channel is up and running. We are featuring videos every Wednesday. Drop by and subscribe so you don't miss one and give us a thumbs up on our videos.


Make sure to come back by each day for some more great crafty inspiration from the super talented team. Don't forget to head over and take advantage of the great savings on these and more of the fabulous Sale!

Be sure to head over and check out the fantastic
CHRISTMAS PART 2 RELEASE!!!!
SOME AMAZINGLY CUTE DIES! 
This release has the Merry Christmas with Shadow die.

CHRISTMAS PART 1 RELEASE!!!!
SOME MORE AMAZINGLY CUTE DIES! 


Until the next time, have a wonderfully crafty day!
Melinda Beltran