Friday, October 22, 2021

Santa’s snowed in


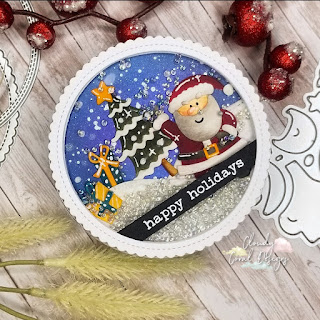
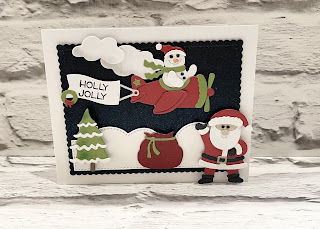
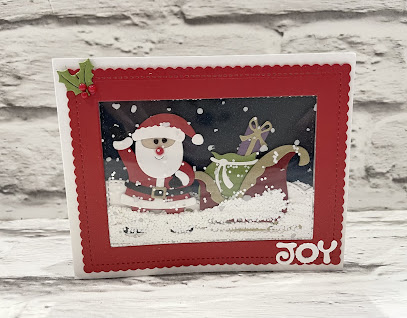
Happy Friday everyone. I really hope that your weeks have been great. Today I’m bringing you a cute little shaker card. I really love this card as its is filled with faux snow which is so realistic. Santa has been snowed in, so he’s hiking a ride to help him deliver the presents.

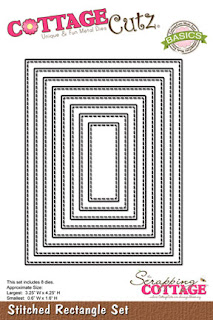
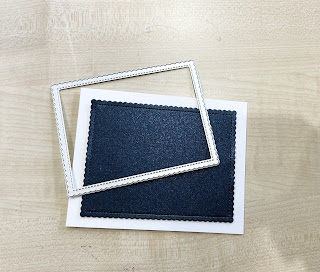
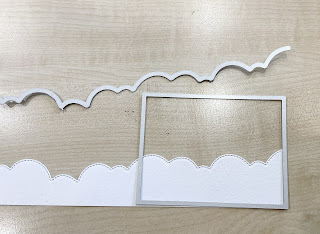
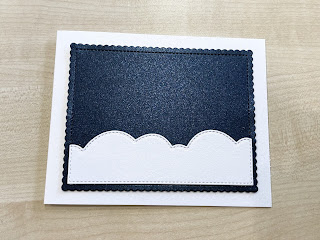
To begin with I took a card, that when folded measured 4.75” x 3,75”. I then cut out the largest of the scalloped stitched rectangles and cut it out in red card.  From this I cut out the centre of the card with the stitched rectangle measuring  3,5” x 2.5”. I overlayed a piece of acetate behind the red Frame and attached 2mm foam pads all the way around the edge to give me some lift for my shaker card. I also cut a navy piece of card the same size of the rectangle I cut into the centre of the card, so 3.5” x 2.5”.

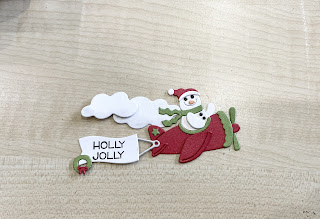
Next I took some strips of the slimline clouds and overlayed these into my design. It’s easy to get these the right size to fit into the design by using the same size rectangle as you’d did to cut out the centre of the picture

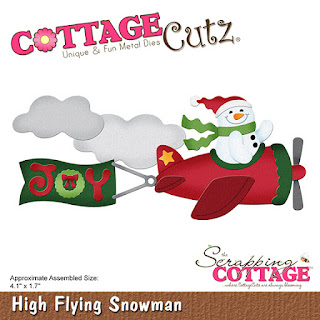
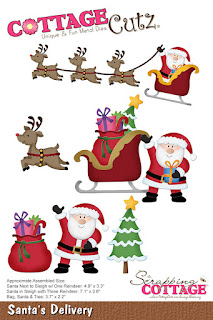
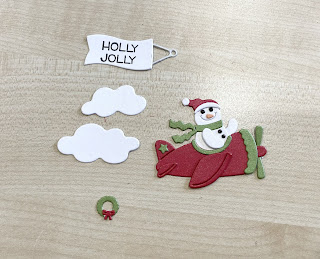
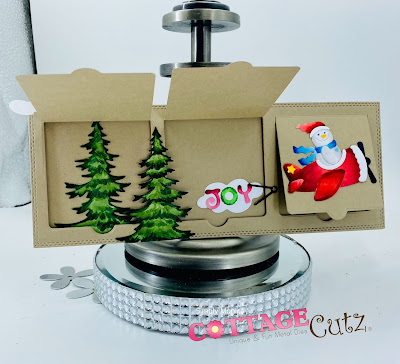
Next I die cut Santa, his sleigh and a present from the Special ‘Delivery’ die set and assembled over the snowy hills. I then put some of the faux snow onto the card before layering over the red rectangle. I used the joy sentiment from the ‘High Flying Snowman’.  So give the card a shake and the fun begins.

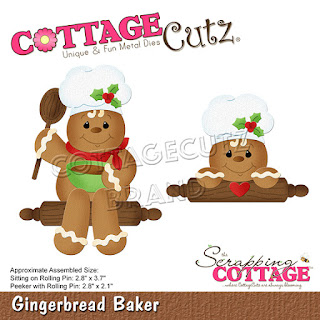
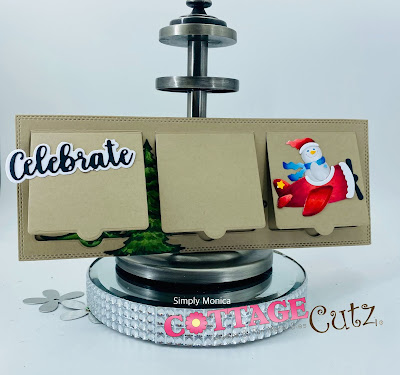
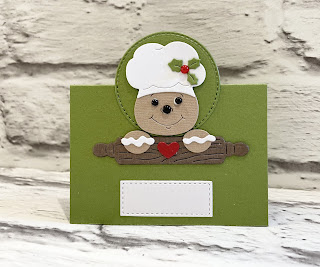
I just wanted to share a fun little make with your Christmas table in mind. This cute little place card is made with my favourite gingerbread die. When folded the card measures 3.5” x 2.5” and I have used the 2” stitched circle to place in the middle of the card. You can use you stitched rectangles to write or print names


I wish you all the very best for the weekend ahead and remember to take some time to craft. I will be back with you on Tuesday
Wendy

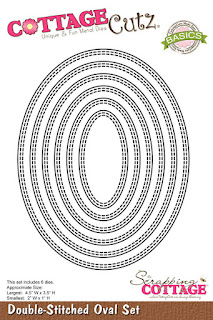
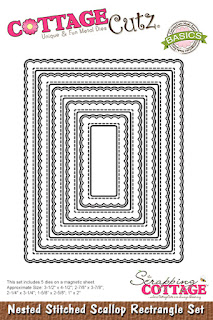
Dies I used to make the card 


YouTube Winner Announcement: The winner of the Santa's Delivery die from the Marla Harris YouTube video is Joyce Kurtz. Please email Mary Marsh at mrmarsh917@gmail.com to get it sent out.


Thursday, October 21, 2021

Christmas Calf

Hello Scrapping Cottage Friends

It is Pam sharing with you today!

The design team is continuing to show you some wonderful samples of our new release for Christmas.  The collection is available for purchase today!!  It has 40 darling dies that would make gorgeous cards, gift tags, banner or toppers for a bag.  In this release there is everything from farm animals to beautiful Navitiy Scenes.   Today, I am using the Festive Farm Calf.

Design Steps:
1.  Using the Festive Farm Calf die cut out the pieces in black, brown, light green, dark green, red, dark red, tan and yellow.  Shade the pieces with ink and then assemble with a fine tip glue
2.  Use an A2 kraft card stock base, cut a piece of plaid DP 3 x 4 1/8 and a piece of leaf DP 3 x 4 1/8,  cut a strip of red card stock 4 1/8 x 1/2


3.  Glue the leaf DP to the top of the base card and the plaid to the bottom.  Glue the red strip slightly lower then center as shown 
4.  Using the Pierced Scalloped Rectangle die second from the largest cut out a piece of white card stock and a piece of the leaf DP.  Glue the two together and pop to the card front using dimensionals
5.  Add the little calf and a few pieces of greenery with berries which I cut out using the Poinsettia & Holly Flower die.  Stamp the sentiment and layer it onto red and your card is complete

CottageCutz Products


Thanks so much for stopping by and don't forget it is never to let to start on those Christmas cards or even start to shop for our crafty friends!  One more bit of info our YouTube channel is up and running with some wonderful video inspirations check it out HERE.

YouTube Winner Announcement: The winner of the Santa's Delivery die from Marla Harris YouTube video is Joyce Kurtz. Please email Mary Marsh at mrmarsh917@gmail.com to get it sent out. 

Blessings and Take Care
Pam

Wednesday, October 20, 2021

Fun Interactive Shaker Card Using Santa's Delivery

    Hello, wonderful crafty friends! It's Theary Chea here on the blog today. I am so excited to share this fun interactive shaker card on the CottageCutz Youtube channel.

    Who doesn't love a fun shaker card? Seeing and hearing the sounds of the shaker elements moving inside the card makes me so giddy inside (and my children go wild for it too!) I am obsessed with creating fun interactive cards, and using products from the new release made creating that much more fun! 

    For this card, I used Santa's Delivery, along with a few of our basics dies. I love finding different ways to use our basics dies to help stretch out what we have in our stash.

Here is a look at the card I am sharing today. 


    CottageCutz is also giving this fabulous die to one of our amazing subscribers. To enter the giveaway, you will need to watch the video here at Santa's Delivery Shaker Card, comment, and make sure that you are a subscriber to the CottageCutz Youtube Channel. 
 
Good luck with the giveaway. 😊
I hope you have a wonderful rest of your day. 

Until next time,


Supplies used


Tuesday, October 19, 2021

Thanks Mr Snowman


Good morning Cottagecutz fans, it’s Wendy bringing you the Tuesday blog. I hope you had a lovely weekend. The weather has been kind to us in the UK so a lovely time of year for long walks.

When I bring to you a card, I really like to have a background story. In this card Mr Snowman has kindly helped Santa deliver his presents so that’s why Santa’s sack is empty

To begin with I cut out the elements from the ‘High Flying Snowman’ die. I’ve assembled some of the parts as I didn’t think you needed to see all elements cut out. Instead of using the ‘JOY’ on the flag, I stamped a sentiment, just to show you that there are other possibilities. 


Next I used some chalk to darken the clouds slightly and assembled the remainder of this element


Now to make the base of the card. I cut a card so when folded measured 5” x 4” in white and then took the largest ‘Stitched Scalloped Rectangle’ die in Navy blue and assembled to the card with 1mm foam pads


I then used the ‘Clouds Slimline die to cut a strip. I used the largest ‘Stitched Rectangle’ to cut it to size


I then curt the elements from the elements from ‘Santa’s Delivery’ die


To finish I assembled all finished items onto my card with 1mm foam pads. The Santas sack was a last minute element I added that’s why you can’t see it being cut out


So that’s my card for todays blog. I really hope you like it. Have a lovely week and I will see you Friday for another post
Wendy


Monday, October 18, 2021

Snowy Days

Hi everyone I am back with another Monday post. Today I am sharing a Christmas card inspired by a movie I saw but I sort of forgot the name. 😂. It was a Christmas show an oldie but goodie anyhoo. So I came up with this slimline

I used to Lift Flaps to create my card base with some desert sand cardstock and I just love this die. When I was done I added some foam tape to the back to give it some height. 


Next I colored some trees from Rustic Sign & Trees to create a sort of sky for my Snowman flyer and I colored my pieces with my COPIC markers 


Next I colored my High Flying Snowman and I glued some pieces on the top layer of my slimline and other pieces like the tree later below on the bottom layer.

Finally I added a sentiment Celebrate which says it all to complete my card

Here is the inside of my slimline and I hope everyone enjoyed my post!!


Sunday, October 17, 2021

Snowman With Country Shed Christmas Card

Happy Sunday Scrapping Cottage friends!  Melinda here, and today I am sharing a fun Christmas card. It features the super cute, Snowman With Country Shed die. It is one of the new dies in this month's new release. Now is the perfect time to pick them up! They are 30% off and they are SUPER FUN! They will help you get your Christmas projects done with some fun and pizazz!

Here is a look at my project. I created this cute card filled with frosty country charm!
The card is an A4 horizontal top folding card. The base is from some gray cardstock. I cut a mat from some cute pink snowflake digital paper I created. I then used the cute Snowman With Country Shed Die. I cut all the pieces in white and then used a combination of markers and colored pencils to color my pieces.
For the country shed, I colored it with a base of my red marker.

I then added some details to give the "wood" some additional dimension with my colored pencil. I proceeded to color all of the other pieces in the same way.


I then used the largest Double-Stitched Oval die from the Nesting die set. I cut it in half length wise.

I layered the dies on the bottom of my mat. The mat is the largest Stitched Scallop Rectangle from that nesting die set. I added a mat of some pink snowflake digital paper I created. I trimmed the ovals down to match the width of the pink mat paper. They made some perfect snow mounds for my background.

Here is the base of the card. As I mentioned above, it is a top folding horizontal A2 base. I then cut another mat of my patterned paper and mounted onto the base. From there I assembled the rest of the pieces onto the scalloped stitched base. Once everything was in place, I mounted that mat onto my card base. I finished it off by adding some white paint and stickles glitter glue.

Here is a look at the finished card. For the Warm Wishes sentiment, I used them from the Coffee & Cocoa Warm Wishes Die Set. I think this card turned out super cute! I know the perfect person to get this card! 

The Dies I used to create this project:


Well that about covers it for today! Be sure to head over to the Cottage Cutz You Tube Channel where some of the designers will be posting videos! You can also catch us on Facebook and Instagram!

Make sure to come back by each day for some more great crafty inspiration from the super talented team. Until the next time, have a wonderfully crafty day!