Saturday, January 09, 2021

Pedaling Puppy (new die)

Hello Scrapping Cottage friends! Thanks for taking the time to stop and visit with us today. It's Mary Marsh here bringing you the Saturday edition of the Blog. 

We have a brand new release of dies in the online store. It's our Circus release with 16 new designs. They are currently on sale at 25% off individual dies. If you purchase the entire bundle you can save 60% off.
Our Safari dies are also on sale at 25% off individual dies.

The Circus dies are so cute for Birthday, Valentine, Thinking of You or even Father's Day cards. Just let your creativity soar. The DT will begin showing some great ideas for ways to use these dies next week. Here is one that I created using the new Clown with Balloons die. 

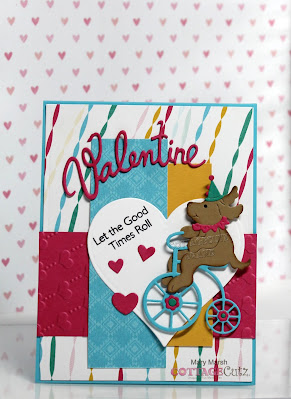
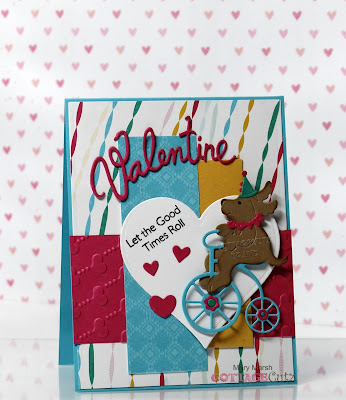
Today for your viewing pleasure I am featuring the new Pedaling Puppy die and I created a Valentine card. I have several little boys on my list that would love this card. I just have to decide which one will receive it. So let's get started with some details on how I created my card. 

Design Steps: 
I started off my card this week with the layout. I saw this sketch #835 on Splitcoaststampers and decided to use it for my layout.
Once the layout was chosen I selected my designer papers and that determined the card colors. I wanted a background paper that was a bit festive, and I think this paper achieves that look. 

For layer # 2, I embossed the pink cardstock with a heart embossing folder. Layer #4 is the reverse side of the designer paper I used for my background layer. 
 
Turquoise Card Base: 4 1/4" x 5 1/2"
Designer Paper: 4 1/8" x 5 3/8"
Layer #2: 2" x 4 1/4"
Layer # 3: 1" x 3 1/2"
Layer # 4: 1 1/2" x 4 3/8"
I cut my pedaling puppy from cardstock colors that are in the designer paper. 
I decided to use a heart for the puppy background since it's a Valentine's Day card. I used the largest die from the Heart Set. I picked a punny sentiment to pick up on the bike movement and stamped on an angle in black ink. 
Now I am ready to start card assembly.  I attached all the card layers to the card base with double sided tape.
Secured the heart with double sided tape and attached the image with dimensional adhesive. 
I wanted a bit more of a Valentine theme to my card so I used the 2019 Valentine Phrase & More die and cut some hearts and the Valentine phrase for my card. Cut those in the melon shade of cardstock that coordinates with the embossed panel and the designer paper. 
Well that's it for me for this week. See you next Saturday!

dies I used to create card:


Friday, January 08, 2021

Tons of Love

Happy Friday!  It's Jeanne today and I have another Valentine's Day card for you using the Safari dies.  I couldn't decide which of these three images to use with this sentiment so I hit upon using all three and making a slimline card!

I started by choosing a paper that was floral with greenery and in good "Valentine's" colors.  I cut  a panel 8 1/2 x 3 1/2 inches and a panel 8 3/8 x 3 3/8 inches from the floral.

I cut the animals using three different shades of grey.  (You could also cut them from white and color them using three different shades of grey ink.) I cut three hearts using the Stitched Hearts dies in pink and green to match my paper.

I glued one animal to each heart.  I knew I wanted the elephant in the middle as it is slightly larger than the other two.

To assemble the row of animals I glued one animal to each heart and aligned them using graph paper.  This made it very easy and the lineup turned out perfectly spaced.

I added this to the card front along with some baker's twine.

I stamped and cut out the sentiment and adhered it to the front using foam dots.  This was a very quick card to make and is sure to be a hit with any animal lover!

Dies used:


Thanks for visiting today!  I hope you have a fun and creative weekend!


Thursday, January 07, 2021

Sunset Sympathy

Hello Scrapping Cottage Friends

It is Pam sharing with you on the blog today!

I am making a variety of cards to start off the new year to refill my card stash.  And the one card I always have trouble making is a sympathy card especially when it is needed right away.  So I thought I would make a few a head of time so if needed it won't be do difficult.  I am using two dies from the Safari release the Savanna die and the Safari Watering Hole.  I thought they made a very peaceful scene for a sympathy card. 

Design Steps:
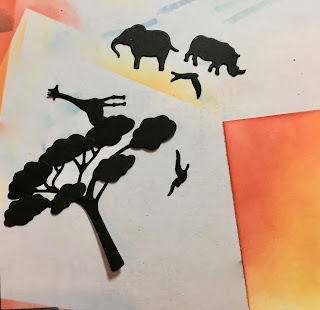
1.  Cut all of the pieces in black using the Savanna die.  I only used the smaller tree, a piece of grass and the birds for this card


2.  Assemble the tree using a fine tip glue and using the Safari Watering Hole die cut out the animals in black card stock

3.  Cut a piece of white card stock 4 x 4 and select your inks to create your sunset.  I cut a circle to mask the sun using the 4th from the largest Pierced Circle die.  First ink 3/4 of the white card stock with the lightest yellow.  Then place down your mask for the sun.  Next ink with the darker yellow working around the mask.  Select your orange ink and ink just to the edge of the darker yellow and last add your red along the edges of the paper.  For the bottom I ripped a Post It note and masked off the ground first the heavier black then moved the mask and used a lighter touch for the top black
4.  Cut a piece of white card stock 4 x 5 1/4 and then cut a circle in the center slightly toward the top.  I used the second from the largest Pierced Circle die.  Stamp your sentiment on the bottom and add a couple of score lines.  Use an A2 black card stock base.  Glue the sunset to the back of the white card stock with the circle cut out then portion onto the black card base.  Add the tree and the animals and your card is complete
CottageCutz Products


I hope you get a chance to relax and enjoy making some crafty thing whether it is cards, mini albums or scrapbooking!
Blessing
Pam

Wednesday, January 06, 2021

Happy Birthday

Hello!  This is Sukie and today I have a fun card to share.  I used one of the die sets from the Safari die release and changed it up to a birthday theme.  These die are so versatile and they work perfectly with all types of cards.

I used card stock to cut out all of the pieces from the Safari Ostrich, the Happy Birthday Phrase, the Oval Set and the Nested Stitched Scallop Oval Set.  The Happy Birthday Phrase was cut out twice for layering.  I went with a neutral theme for my die cuts.
I selected a basic striped paper for my card base.  The diagonal stripes add an element of interest against the set of nested ovals.
I layered the "happy" sentiment and offset it a bit so the white would show.  The sentiment was adhered along the top edge of my card.
Next, I affixed the other half of my sentiment along the bottom edge of my card base.  The layering of the 2 colors adds a shadow element to my sentiment.
The Safari Ostrich was centered inside the set of ovals finishing off my card.  The colors are not my normal go to colors however, I'm really liking the look of the non-traditional theme on this card.
Here are the die sets used on my card, available in the store:

Tuesday, January 05, 2021

Clown with Balloons (new die)


Hello Scrapping Cottage friends! Thanks for taking the time to stop and visit with us today. It's Mary Marsh here bringing you the Tuesday edition of the Blog. 

We have a brand new release of dies in the online store. It's our Circus release with 16 new designs. They are currently on sale at 25% off individual dies. If you purchase the entire bundle you can save 60% off
Our Safari dies are also on sale at 25% off individual dies. 

Today for your viewing pleasure I am featuring the new Clown with Balloons die. I created a card with some non-traditional colors for Valentine's Day. This one will go to a little 5 year old boy so the colors are good for him. It's another way to get more use out of your dies by using them for other occasions. 

I started my card with the colors from the Splitcoaststampers color challenge #825. The colors selected are gorgeous grape, granny apple green and coastal cabana. 


I cut the clown image in the challenge colors. I found some heart paper in my collection and used it for the backdrop for the clown. Framed it with a gorgeous grape wide rectangle frame. 

The "be my valentine" phrase is from an older die - Be My Valentine Puppies. I finished off my card by adding a few hearts cut in gorgeous grape cardstock and added to the background paper. 

Well, that's it for me for this post. See you again on Saturday with another card from this new release. 

dies I used to create card: