Friday, November 20, 2020

Cocoa Packet Gift Holder

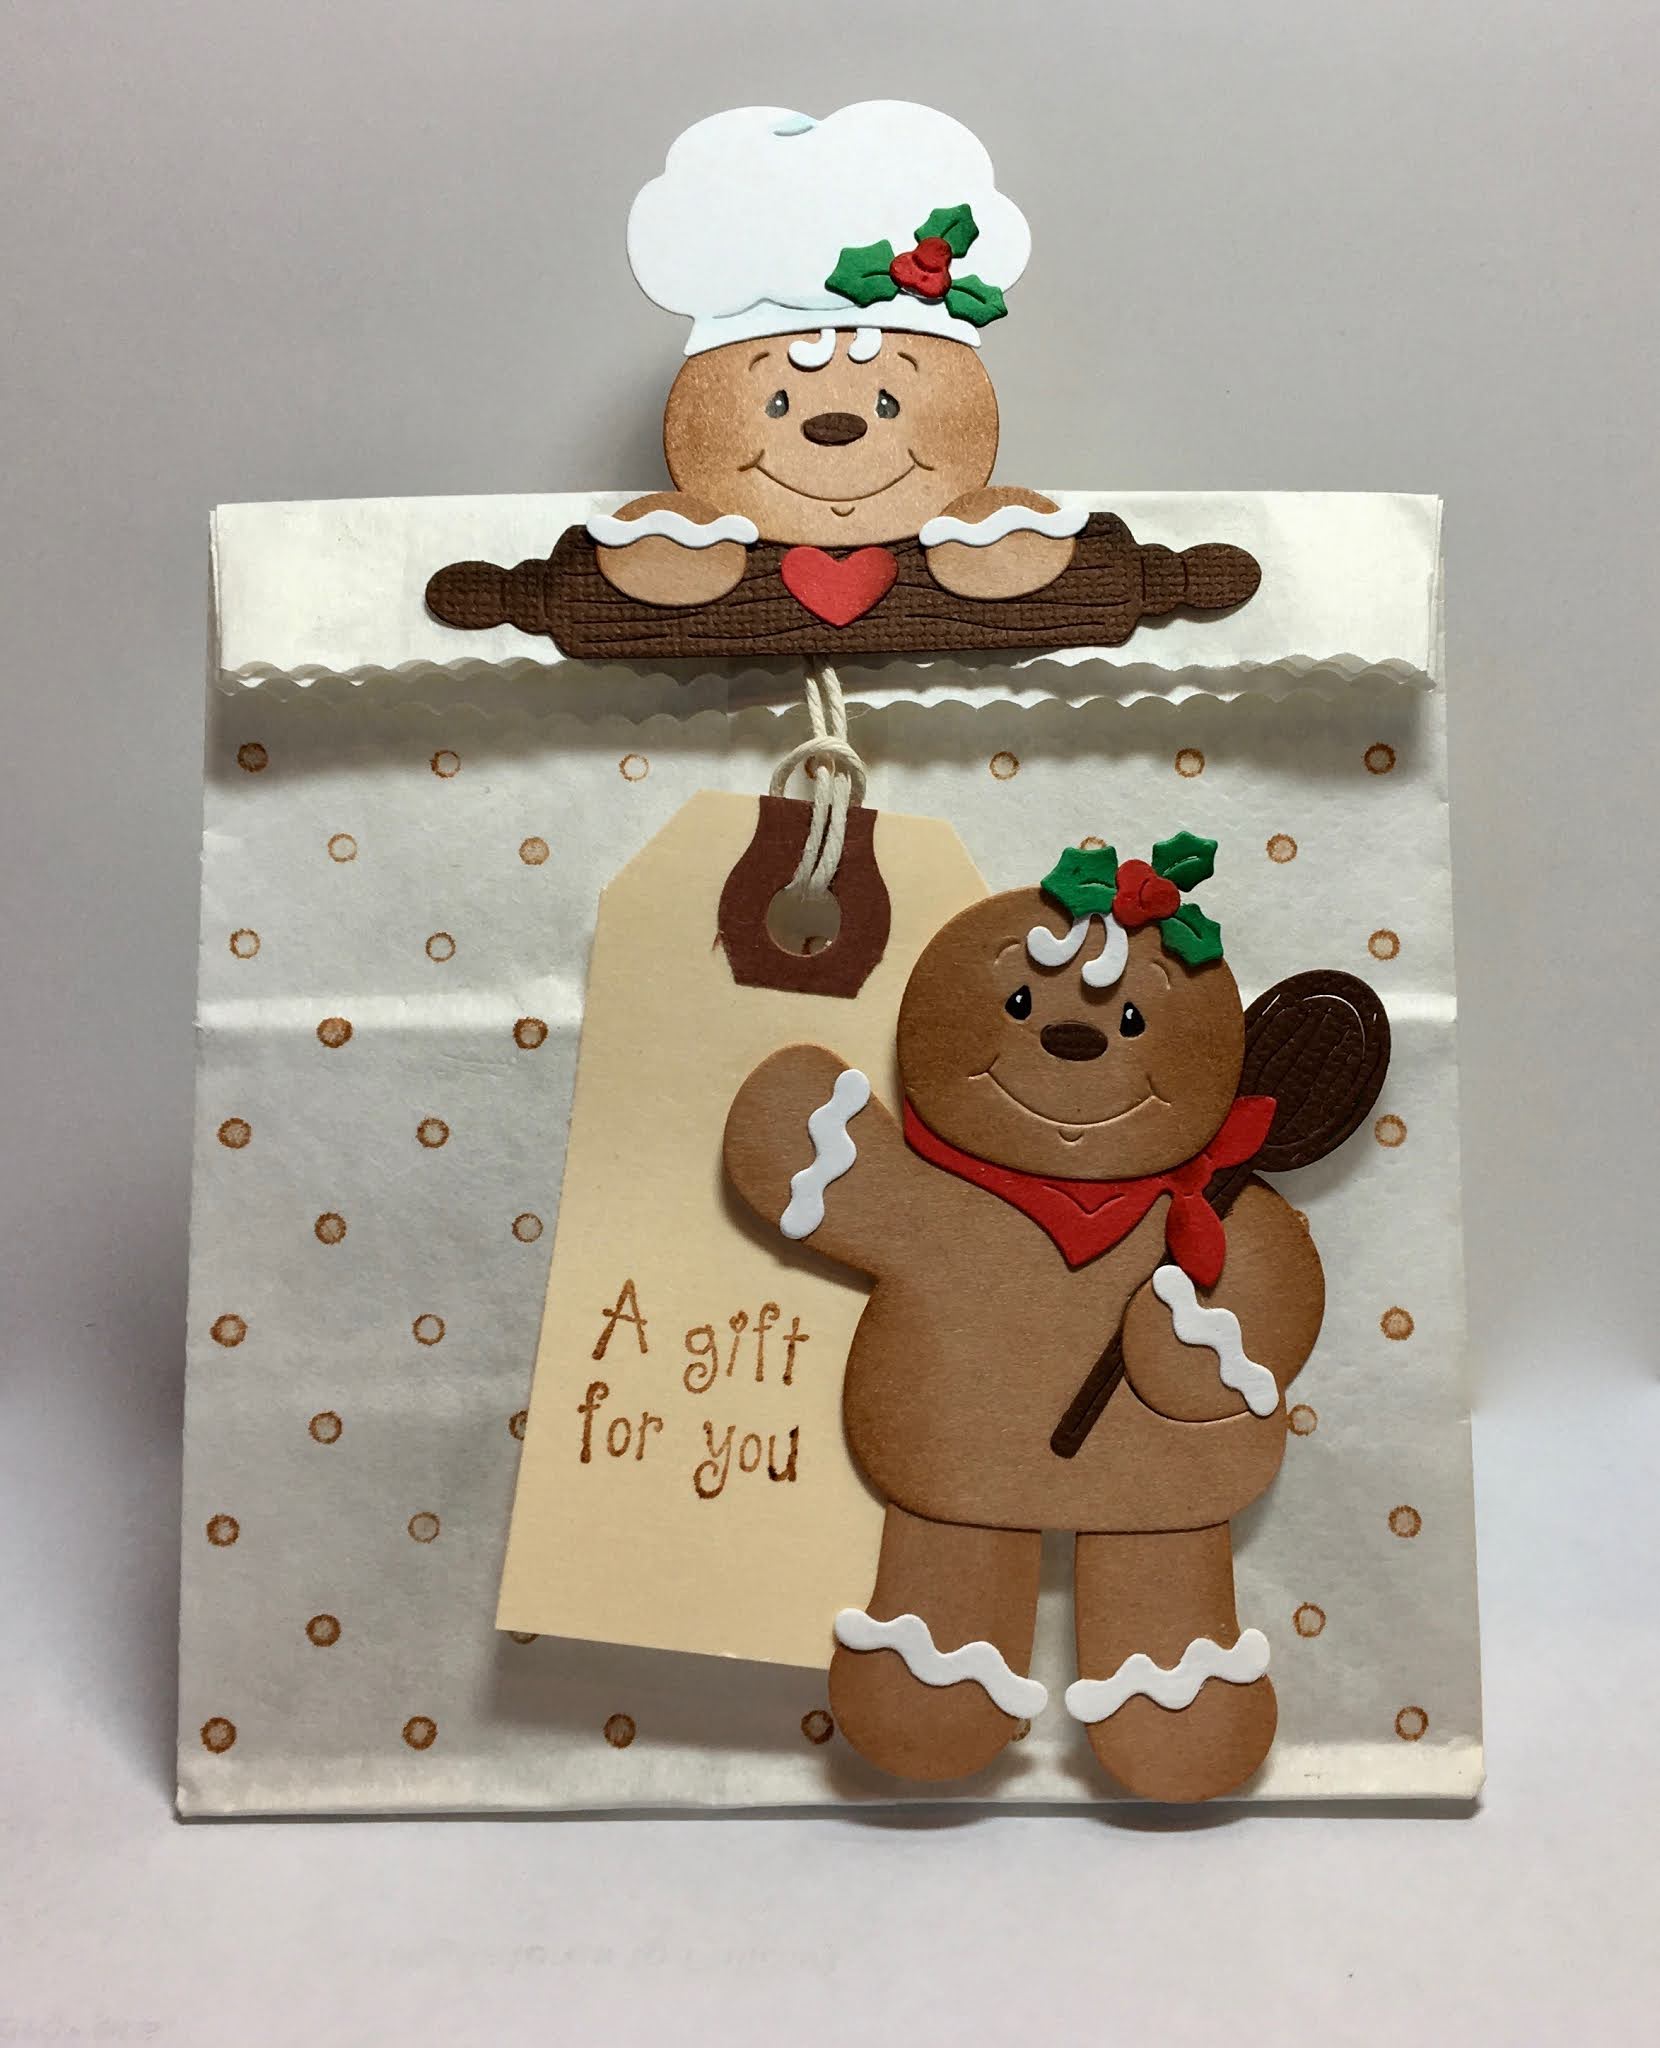
Happy Friday!  It's Jeanne today with a fun little gift idea for you!  This holder can be used to hold an envelope of cocoa or hot chocolate.  Perfect when you need just a little something or as a special addition to a gift basket.

This holder is actually quite easy to make.  I need to give a shout out to my friend Dawn, who sent me something very similar last year.  I took measurements and deconstructed it to come up with this holder.

The holder is basically a small box inside a wrap around outer panel.  To start, I'll show how to make the holder (inside shown here.)

I used kraft cardstock printed on both sides.  Alternately, you could use solid cardstock and add panels of patterned paper on the front, inside, etc.

Cut a piece of cardstock 4 1/4 x 11 inches.  Score 5 1/4 inches from both the top and bottom.  Fold at the score lines.  You should have 1/2 inch between the score lines for your box bottom to sit on.

For the inside box, cut a piece of cardstock 5 3/4 x 5 inches and score 1/2 inch and 1 inch from both the left and right sides and the bottom.


Using paper snips cut out the bottom corners at the inner most score lines.

Fold at the score lines and add sticky tape to the outer edges of the sides and bottom.

On the inside of the outer panel, match the first score line (the one 1/2 inch from the bottom on the box piece) with the upper score line on the outer wrap panel (the one 5 1/4 inches from the top) and tape down.  This forms your box bottom.

 Next fold the sides and tape those to the back panel.  Your box is now complete!

For my decorations:

I cut two gnomes from red, green and white cardstock and assembled them.  I used Distress Oxide ink in Tea Dye to color their noses and face, and Pumice Stone to add a bit a shadow to their mustaches.  I used the three largest dies from the Nested Stitched Scalloped Circle dies and adhered the Hot Cocoa Tag to the smallest of the three I cut.

The Hot Cocoa Tag I glued to the box holding the cocoa packet and the largest one I glued to the inside front flap so I can write a message.

Finally, the mid sized circle and gnomes were put on the front.  I used a paper punch to punch two holes for my ribbon and tied on a small wooden spoon as an accent. 

I hope you enjoyed my project today.  This holder would be great for any type of small packet - mug cakes, cider or even a soup packet as a get well card/gift!

Don't forget to visit the online store where the Christmas release (Parts 1, 2 and 3!) are on sale right now for 25% off!

 Dies used:


Thanks for visiting today!  I hope you have a fun and creative weekend!


Thursday, November 19, 2020

Gingerbread Gift!

Hello Friends,

It is Pam creating with you today!

Just a reminder that our online store is featuring some beautifully detailed Christmas dies.  The dies are from Christmas Part 1 (22 designs), Christmas Part 2 (21 designs), and Christmas Part 3 (12 designs).  All of these fabulous dies are on sale right now in the store for 25% off.  Just click here to check them out.

Today,  I am working with the Gingerbread Baker die.  It is perfect for making little gift bags full of gingerbread cookies! I found this adorable little gingerbread man cookie cutter.  So I am going to fill these bags with little tiny gingerbread men! 


Design Steps:

1.  Using the Gingerbread Baker die cut light brown, dark brown, red, green and white card stock.  Shade the pieces using a variety of ink colors and a small applicator

2.  Assemble the little gingerbread men using a fine tip glue.  Use a fine tip black marker to color in the eyes and then add a dot of white ink using a white gel pen

3.  Use a polka dot background stamp and stamp a small white bag.  Next I used our largest Scallop Retangle die to cut off part of the bag and to get a scalloped edge.  I also used an Avery Shipping Tag 2 3/4 x 1 3/8.  Stamp the tag in brown with A gift for you.  

4.  Loop the tag over the top of the bag and glue the Gingerbread man with the rolling pen on top of the string.  I only glue down the right side of the gingerbread man on the bottom of the bag so the tag could just slide behind him.  This way you can open the bag without ripping him. Your cute little gift back is complete

CottageCutz Products

Thanks so much for stopping by today.  I really appreciate it!
Blessings
Pam


Wednesday, November 18, 2020

Sweet Christmas

Hello!  This is Sukie and today I have a Christmas card to share.  For this card, I worked with the Sweet as a Christmas Cookie die set from the Christmas Part 3 die release.  It's just one of the fabulous die sets from the Christmas die releases which are currently on sale.

I used glittered card stock for some of my die cut pieces and some Stickles for the solid card stock pieces. The sparkle and shine adds a fun element to the cookies.  I also cut out a circle from patterned card stock and a Nested Stitched Scallop Circle from white card stock.
All of the papers are from my stash of Christmas themed card stock.  The colors of the striped paper were the inspiration for my die cut pieces.
Once I layered the striped paper on my card base, I added the red strip of card stock to break up the stripes. The double circles were affixed on top.
The next step in my card design process was to add the sentiment inside the circle.  The whimsical font makes for a fun focal point on my card.
A row of cookies was adhered below the sentiment inside the circle filling in all of the empty space.
The remainder of the cookies and rolling pin were added in the remaining empty space inside of the circle.
The finished card is perfect for tucking in with some yummy home baked treats during the upcoming holiday season!
Here are the die sets used on my card, available in the store:

Monday, November 16, 2020

Christmas Keys

Hi!

It's Anja here for my Monday's post. I made another "interactive" Christmas card today. I'll tell you a bit more about the crafting process below.

For this card I used:

- Cottage Cutz dies (Christmas Keys, North Pole Express Tag, Peeker Pocket),

- Distress Inks,

- craft card base (13x13 cm),

- white card stock for background (12x12 cm) and die cuts,

- patterned paper for background (11,5x11,5 cm) and die cuts,

- scissors,

- black pen,

- white pen,

- gold pigment ink,

- silver pigment ink,

- adhesive foam pads,

- paper glue. 


After cutting and coloring all the parts for the keys I started on the background. I used a few pieces of leftover patterned papers. After I cut the pocket I placed it on white card stock and cut a few millimeters around to get a bigger pocket in white. I glued the patterned one on top and then with adhesive foam pads to the card base. That's how I got a bit more space to stick all three keys in. I decorated the pocket with North Pole Express Tag. And my card was done.


Hope you like my project for today's post. Have a nice week and see you again on Sunday. 

Anja Z. 


Cottage Cutz dies I used: 


Sunday, November 15, 2020

Christmas Card & Ornament

Hi!

It's Anja here. I have a 2 in 1 card for you today. I made a card with an ornament you can remove and place it on your Christmas tree.

For this card I used:

- Cottage Cutz dies (Snowman Joy Ornament, Merry Christmas Love, Circle Set),

- Distress Ink,

- Zig water color brush markers,

- white card base (15x15 cm),

- red card stock for background (14x14 cm) and die cuts,

- white water color paper for die cuts and background (13,5x13,5 cm),

- gold acrylic spray,

- gold marker,

- white pen,

- black pen,

- glitter brush,

- brush,

- thread  (aprox. 20 cm), 

- heat gun,

- paper glue. 


First I cut the ornament and the circle. I cut two pieces of the ornament. I colored the circle with blue shade of ink.

I combined two ornaments (I cut one piece in the way that all the small pieces stayed in the silhouette) and placed it on the circle. Then I colored it.

Next I cut all the pieces for the background. I cut the ornament out of the watercolor paper. I used the positive and the negative later on. I also cut two sentiments and glued the red paper on the top of the white one.

Then I colored the background. I sprayed gold acrylic color to the glass mat and tapped the paper over it. I dried the paper with the heat gun.

When all the pieces were ready I glued the red background, gold background and one piece of the ornament on the card base. Next I added the sentiment. I only glued letters "m" and "y" of "merry" and "c" and "as" of "Christmas". I also added a bit of glue to the bottom of the rest letters of "Christmas" to hold the ornament. I added a piece of thread to the ornament. When the glue was dried I inserted the ornament in the middle and my card was finished.


Thank you for stopping by. Have a nice day and see you again tomorrow for another post. 

Anja Z.


Cottage Cutz dies I used for this project: