Friday, March 06, 2020

Window Frame Card

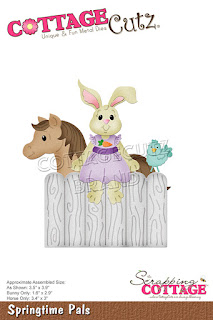
Happy Friday!  It's Jeanne today with a card that is a bit complex but totally worth the effort!  I used the Springtime Pals die but it will work with any dies where you want a foreground and background.  Here is the outside of my card:

And the inside:
There are quite a few steps to this card, but the end result is totally worth it.
I cut the pieces from white cardstock and colored them using Distress Oxide inks and sponge daubers.
For the bunny's dress I used patterned paper edged with some purple ink to give it shadowing.  I wanted it to have the same feel as the inked pieces.
Since this is a window card, I knew I needed back pieces for what would be shown through the window.  I cut the bunny head, dress and fence from white cardstock.  I toyed with the idea of coloring them too, but decided I really wanted them to be unobtrusive so I left them white.  To get them totally flat I ran the cut pieces, placed between the cutting plates, through my die cutter.  This flattens any edges or score lines a die cut piece may have.
I glued the white pieces to the back of the bunny and kept the fence for later.
The scene was stenciled on the card base and inside.  I cut a card base 8 1/5 x 5 1/2 inches scored at the 4 1/4 inch mark and a panel for the inside 4 1/4 x 5 1/2 inches.  I did not fold my card to make stenciling easier.  The reason that I used a panel for the inside was so that I could get my stenciling to line up perfectly.  I laid both panels side by side and used low tack tape to stick them to a craft mat.  Then I used computer paper to mask off the back of the card base and the grass.  The paper is
2 inches from the bottom.
After using a cloud stencil on the sky, I masked it off and created the grass by sponging and flicking ink on the grass area.
This is what the card and interior looked like after stenciling.  Now it's time to cut the window and assemble.
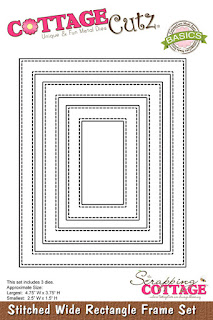
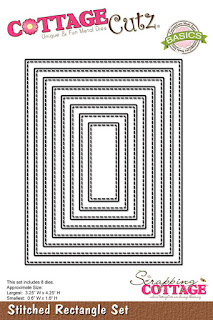
I cut a frame using the middle of the stitched rectangle frames, placed it 2 1/2 inches from the bottom and tacked it down with low tack tape after making sure it was even and centered.
I used a pencil to outline the inside of the frame and lightly mark the outside corners.
I used the 4th largest die from the stitched rectangles to cut the window.  This die is between the inside and outside of the frame.  I adhered the frame to the cut window using my light pencil marks as a guide then I erased them.
I used the tape to mark 1 3/8 inches from the bottom, making sure it was level, then glued my fence onto the card.
I glued my inside panel to the inside of the card base and added the horse.
I added him before the bunny so he would show nicely through the window (he is 1 1/2 inches from the bottom).  I knew I could adjust where the bunny sat on the fence based on him.
For the inside window on the card base, I cut the white fence piece just deep enough to fit into the bottom of the window.
Then I added another white frame and the bunny on the outside of the card.  She is stabilized in the window since her bottom is glued to the fence and her ears to the top of the outside frame.
My final steps were to add the sentiments and the bluebird and tulips (from Easter Egg Hunt die).  I love how this card turned out.  Now that I have made one, I'm not intimidated by this type of card.  It really is quite simple - it just requires a bit of measuring and a little planning!  I hope you give it a try!

Dies used:
http://www.scrappingcottage.com/cottagecutzspringtimepals.aspx

http://www.scrappingcottage.com/cottagecutzeasteregghunt.aspx
http://www.scrappingcottage.com/cottagecutzstitchedwiderectangleframesetbasics.aspx
http://www.scrappingcottage.com/cottagecutzstitchedrectanglesetbasics.aspx
http://www.scrappingcottage.com/cottagecutzexpressionsplushellophrase.aspx

http://www.scrappingcottage.com/cottagecutzexpressionsplusfriendsphrase.aspx

Thanks for stopping by - I hope you have a fun and creative weekend!

Thursday, March 05, 2020

Bright Butterflies

Hello Scrapping Cottage Friends!

I am finishing up my Easter cards for my family and friends.  Today, I am using the new release Butterfly die that has some beautifully detailed butterflies.

Design Steps:


1.  Using the Springtime Butterflies die cut out two of the large butterflies in black cards stock.  Also cut out 2 Happy in black using the Expressions die Happy


2.  Cut a piece of white card stock 4 x 5 1/4 and using some TH inks sponge on the colors of your choice.  Next use a spray bottle with water spritz the paper to create small water spots
3.  Postion the butterflies onto the card as shown glueing down just the bodies leaving the wings free. Next glue the two Happy cut outs together then adhere to the card.  Just below happy add the stamped word Easter layered onto black card stock.  Add your rhinestone flight trail and your card is complete

CottageCutz Products


The new release dies are still available so don't miss out on these wonderfully detailed dies! Thanks so much for stopping by!
Blessings
Pam


Wednesday, March 04, 2020

Have a Dandy Day!

Hello!  This is Sukie and I'm sharing a sweet card for my design team post.  The new Spring die release has some of the most adorable die sets to use for those Easter creations however with a few slight adjustments, the dies are versatile for all types of occasions.
I cut out the ducks from the Daffodil Duck and Duckling with Kite die sets.  All of the die cuts were shaded with some Oxide Inks.
I stamped a sentiment from the Scrappy Moms retired "Walking on Sunshine" stamp set on a piece of card stock.  The stamped rectangle was adhered on a strip of card stock to create a sentiment sign for my card.
A bit more Oxide Ink was used to create a soft background for my card background.  I went with a combination of 2 colors for a CAS look.
Once the background was done, I simply adhered the adorable ducks on my card base for a whimsical appearance.
The sentiment sign was canchored in the middle of the card between the 2 ducks for a finishing touch.
Here are the die sets used on my card, available in the store:

Tuesday, March 03, 2020

Spring bunny and duck

Hi! Janja here with you.
I made two spring cards for today's post. Let's look at them.


- CottageCutz dies: Hide & Seek Bunny, Duckling in Easter Basket, Nested Stitched Scallop Oval Set
- blank card: 4 1/4 x 5 1/2" (10,8 x 14 cm), folded
- gingham pattern paper
- colored cardstock
- colored ink pads
- colored markers
- glue, double-sided adhesive tape, self-adhesive foam pads

I started making cards by die-cutting all the pieces for both main motifs out of different colored cardstock. For more depth, I shaded all the pieces with ink pads.


For both cards, I used gingham pattern paper in two colors. I trimmed both papers to the size of a base card and attached them to the front.
For the background I used white cardstock that I cut out as shown. I lightly shaded the background with ink pad and brush.


The bunny and duck are attached to the background with foam pads.


To complete the cards, I trimmed two paper strips and arranged them as in the photos, slightly above and below the central motifs.


Have a nice day.
Janja


Sunday, March 01, 2020

Easter Ducks with Daffodils

Hi!

It's Anja here. For today's card I made a spring Easter scene. This ducks are so cute and the daffodils are so much fun to craft with. 


For this card I used:
- Distress Inks,
- white card base (15x15 cm),
- white card stock for die cuts, background (14x14 cm) and sentiment (14,2x0,8 cm),
- pink card stock for background (14,2x14,2 cm) and sentiment (14,2x1 cm),
- black pen,
- white pen,
- brush,
- plastic stencil (clouds),
- paper trimmer,
- printer,
- paper glue.

First I cut and colored the duck with the basket.


Next it was the duck with the daffodil.


And then the rest of the daffodils and Easter eggs.


In the next step I trimmed the background paper.


Then I did the clouds using the stencil. I used Distress ink for the grass.


Last I printed the sentiment and trimmed it to match the background.


When I had all the pieces cut and colored I finished the card.


This is all from me for today. Before I go I just want to remind you that all the new dies are still available for 25 % off

Have a nice Sunday! See you again next week.

Anja Z.


Cottage Cutz dies I used for this card: