Sunday, January 26, 2020

Whale You Be Mine?


Hi!

It's Anja here. I have a clean and simple card for you today. Perfect for Valentine's day.


For this card I used:
- Cottage Cutz die (Arctic Whale & Narwhal),
- Die Inks,
- white card base (15x15 cm),
- blue card stock (13x13 cm),
- white card stock for die cuts,
- bristol paper for background (12,5x12,5 cm),
- black pencil,
- white pen,
- Glossy Accents,
- heat gun,
- water spritzer,
- printer,
- paper glue.

First I cut and colored the whale. I used black pencil to emphasize some of the parts.


Next I printed the sentiment on bristol paper. I also trimmed a square out of blue paper.


Then I colored under the sentiment. I also spritzed a few drops of water on the color and dried the paper with the heat gun. Then I glued all the pieces of the card together.


And for the final touch I added a few drops of Gloss Accents.


And my card was done.


That's all from me for today. Have a nice Sunday and a lovely week.

Anja Z.


Cottage Cutz die I used:


Saturday, January 25, 2020

Be My Valentine


Hello Scrapping Cottage friends! Thanks for taking the time to stop and visit with us today. It's Mary Marsh here bringing you the Saturday day edition of the Blog. 

Today, I am featuring the 
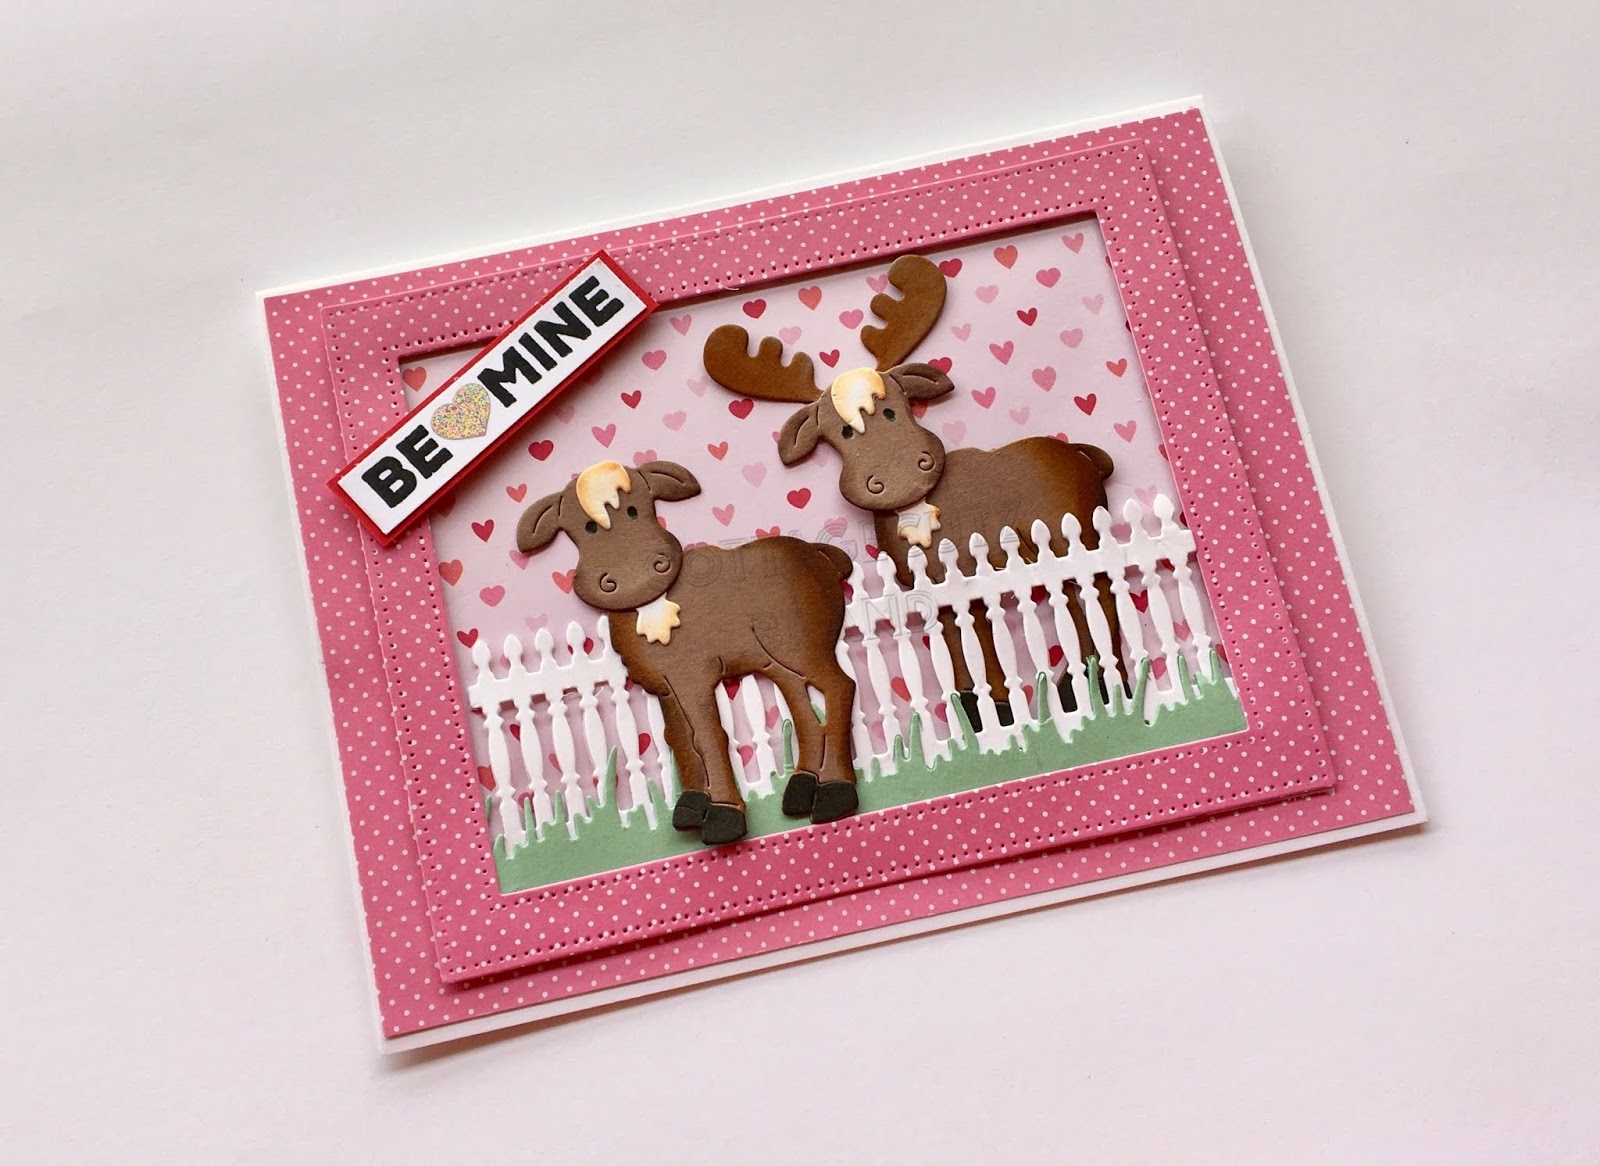
Moose Pulling Gnome Sled. It's from the Christmas Part 2 collection, but I am repurposing it for a Valentine card. It's just a way to get some more mileage out of your dies. Let's get started on some details of how I created my card.

Design Steps:
This week I started with my designer paper. I had this great winter scene paper and thought it would work well for a Valentine card. You can see another card I created using a scene from the paper pack here.
The paper is in a 6" x 6" pack and I didn't want to cut too much of the background scenery away. So I decided to make a square card.

Designer Paper: 5 1/4" x 5 1/4"
Rose Cardstock Layer: 5 3/8" x 5 3/8"
Espresso Brown Card Base: 5 1/2" x 5 1/2"

Next, I cut the Moose & Gnome using the cardstock colors from the designer paper. Since I am making a Valentine card, I only put one of the gnomes on the sled.
This part of the card is ready for assembly. I attached the designer paper to the rose panel with double sided tape. The moose & gnome are attached with dimensional adhesive. Lifting the images off the background gives added depth to your card.
I was going to stamp a sentiment directly on the designer paper above the trees. But I thought this "be my valentine" phrase would look like the gnome added it to the snow. My hubby did that for me one year when we had a snowstorm on Valentine's Day. He spray painted a heart and the same words I used on my card in red paint on top of the snow. It was so cute and the neighbors loved it as well.
I decided to add a few hearts above the tree tops on the designer paper. Just for a little added interest. After all it's a card for the big love day and I thought I should have them somewhere on the card (LOL).
To finish off my card I added the image panel to the espresso brown card base. I went with a brown base because I thought it accented the rose layering panel nicely.
Well, that's it for me for this week. I hope I have given you a new idea for using this die. See you next Saturday!!!

dies I used to create card:


Friday, January 24, 2020

Happy Flowers

Happy Friday!  Are you ready for spring to arrive?  I am (and I live where the weather is nice most of the year!)  It's Jeanne today and I have a card inspired by spring.
The Doodle Flowers are so much fun and can be used for many occasions.  I first cut all the piecs using colored cardstock.  I went through my scrap box and picked bright, warm colors.
Then I assembled the pieces.
I stamped my sentiment on a 5 1/2 x 4 1/4 inch white cardstock panel.
I cut off a little over 1/4 inch from the right side of the panel and roughly laid out where my flowers would go.
To get the stem behind the sentiment, I marked the section needing to be cut out in pencil and then used paper snips to cut it.
I glued the flowers, leaves and stems on the panel.
I used a piece of coordinating designer paper 1/2 x 4 1/4 inches  and glued it to the right side of a top folding A2 card base.

 The flower panel was adhered to the card base.
This is a very simple card to make but the boldness of the images gives it a lot of impact!  And since the flowers are so abstract, any colors will work beautifully.  Perfect way to use up scraps!

Dies used:
http://www.scrappingcottage.com/cottagecutzdoodleflowersset1.aspx

http://www.scrappingcottage.com/cottagecutzleavesandstems.aspx

I hope you enjoyed my card today.  May you have a fun and creative weekend!

Thursday, January 23, 2020

You Moose Be Mine!

Hello Scrapping Cottage Friends

It is Pam creating with you today on the blog!  I can't believe that Valentine's Day is less then a month away!!  I am finishing up my Valentines and I also have 2 birthdays in the month of February.  My sister was born on Ground Hogs day and my brother-in-law's is just a few days later.  So on to making today's card!
Design Steps:

1.  Using the Arctic Moose and Polar Bear die cut out the moose in brown twice.  Then using white card stock cut out the fur under the chin and and fur on the head twice
2.  Using a dark brown and rust colored inks shade the two moose.  Add black marker to the hooves and eyes.  Then assemble the moose leaving the antlers off of the female moose
 3.  Using the Victorian Fence die cut it out of white card stock.  Using the Spring Grass die cut it out of light green card stock.  Last using some polka dot DP cut out the frame using the Stitched Wide Rectangle Frame
 4.  Behind the frame first glue the grass and then behind the grass glue down the fence

 5.  Flip the frame over and add strips of dimension tape to pop it up on the card front
6.  Glue a piece of polka dot DP to a white A2 card base.  The DP will be just slightly smaller then the card base front.  Next glue down a piece of heart DP which is the slightly smaller then the frame
7.  Next pop the frame to the card front as shown.  Add the moose the male behind the fence and the female in front of the fence.  Add the sentiment and your card is complete


CottageCutz Products


Thanks so much for stopping by today!  Hope you have fun making Valentines for your friends and family!  I love being crafty and creating new cards!
Blessings
Pam

Wednesday, January 22, 2020

Wishing You a Cup of Cheer!

Hello!  This is Sukie and today I have a sweet card to share for my design team post.  I wanted to create a card that can be used as an all occasion card especially during the winter season!
The Hot Drink Cup and Mr. Snuggles die sets are so versatile that they can be used together or separately. I also used the Nested Stitched Eyelet Oval die set for my card.  The tiny heart was left over on my craft desk from one of my Christmas projects so I incorporated it into my card.
I went with a kraft theme for my card base which coordinated perfectly with Mr. Snuggles and his coffee cup.  I selected a strip of blue card stock to add to my card.
All of the pieces were layered and adhered to my card base.  The die cut oval topped off my card.
Mr. Snuggles and his coffee cup was adhered inside the oval leaving enough room for the sentiment tag underneath.
A triple bow made with some jute twine was the perfect finishing accent on this cheery card.
Here are the dies used on my card, available in the store: