Sunday, December 08, 2019

Husky With Presents

Hi!

It's Anja here. I used another adorable die for today's project. You can combine this cute husky with all kinds of dies. I used the presents from one of the older releases.


For this card I used:
- Cottage Cutz dies (Husky w/ Sled, Holiday Reindeer),
- Distress Inks,
- craft card base (13x18 cm),
- white card stock for die cuts and background (7x17 cm),
- craft cardstock for background (8x17 cm),
- patterned paper (12x17 cm),
- black pen,
- white pen,
- clouds plastic stencil,
- red ribbon,
- jingle bell charm,
- tape,
- paper glue.

First I cut and colored the husky and the presents.


Next I started on the background. I used craft card base and trimmed the patterned paper first.


Next I used a strip of white and craft cardstock.


I adhered both together and made the clouds using the plastic stencil and blue Distress Ink.


I adhered this piece on the patterned paper and made a bow using red ribbon and bell charm. I taped it with the tape on the other side.


When I had the background done, I glued it on the card base and added the husky. And my card was done.


That's all from me for today.

Have a nice day and see you again next week.

Anja Z.


Cottage Cutz dies I used for this project:


Saturday, December 07, 2019

Vintage Rudolf

Happy Friday Cottage Cutz fans!  It's Jeanne today with a card that reminds me of the style of Christmas cards around when I was a little girl.  This card is also quick to create and would be easy to make in multiples as we get down to the wire in the holiday cardmaking season!
I cut the reindeer from white and Crumb Cake cardstock using the Reindeer and Penguin die. 
I used Copic markers to color the hooves, nose and collar, and Distress oxide ink in Vintage Photo to shade the deer; then I assembled Rudolf.
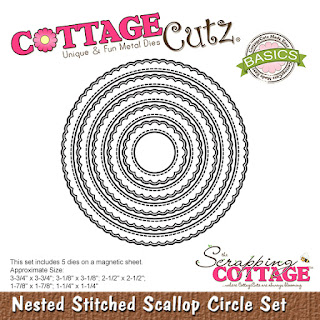
 I cut a 5.5 x 4.25 inch panel from a vintage look paper and a circle from white cardstock using the largest of the Scalloped Stitched Circle die.
Using the same DO ink, I antiqued the edges of both and glued the circle in the center of the panel.
Next, I cut Merry Christmas in Real Red cardstock that I had backed with an adhesive sheet.
I assembled the pieces....
and adhered the panel to an A2 card base.  I added gold glitter dots as jingle bells on Rudolf's collar.  This card is quick to make for a fun vintage look.

Dies:
http://www.scrappingcottage.com/cottagecutzreindeerandpenguin.aspx
http://www.scrappingcottage.com/cottagecutznestedstitchedscallopcircleset.aspx
http://www.scrappingcottage.com/cottagecutzmerrychristmaswfriends.aspx

Thanks for stopping by today!  Be sure to stop by the online store to see all the latest dies!

Friday, December 06, 2019

A Beary Merry Christmas

Hello Scrapping Cottage friends! Thanks for taking the time to stop and visit with us today. It's Mary Marsh here bringing you the Friday edition of the Blog. 

The new release of Artic Animal dies are in the online store. There are 13 new designs in this release and they are currently on sale. You can get this entire release at an amazing price of under $70.00. The sale ends tonight though so make your selections quickly. 

These new dies are so versatile, and can be used for a variety of occasions. The baby Artic animals  would make a cute congratulations card,  baby shower invitations, a welcome new baby card, a child's birthday card or cards for our animal loving friends. The other dies are great for a winter birthday, thinking of you, thanks and let's not forget our Christmas cards. 

I am featuring the new Artic Polar Bear and Cub + the Artic Snowy Tree dies, and I made a whimsical Christmas card. So let's get started on some details of how I created my card.

Step 1: I started my card by choosing my designer paper. I have this Christmas collection of plaid papers and I wanted to use some of the patterns on my Christmas cards. Plaids are so on trend right now.
Spruce layering panel: 4 1/4" x 5 1/2"
Designer paper layer: 4 1/8" x 5 3/8"

Next I cut my Polar Bear images. I used a naturals white paper that has fine specks of gray in it. Although in this photo the bears look a bit yellow (lol)! It's perfect for the bear images. I matched their scarves to the colors in the designer paper. The snowy trees are cut in the same spruce cardstock as the layering panel.
I used the largest Circle and largest Stitched Circle dies for the image panel. My sentiment is computer generated so I printed that off first on white cardstock and then used the die to cut the circle.
I wanted the Bear to walk on a snow mound so I used the one from the Skiing Gnomes die.
In order for it to fit in the circle I used the largest circle die and laid the snow mound in there and cut it.
Finished image
Step 2: Now that all my elements are cut, I am ready to start card assembly. I attached the bears with dimensional adhesive & the snowy tree with double sided tape to the circles. 

I used double sided tape to adhere the other panels. When it was put together I decided to make the card base the cherry shade. I thought it brightened up the card with this extra color and I also added a tuft of spruce ribbon. The base measures 4 1/2" x 5 3/4". I added the glitter to the snow mound after it was attached to the designer paper. A little tricky doing it this way but it worked out ok. 
To finish up my card, I scattered a few gold sequins. I hope I have given you an idea on a way to use these new dies. Today is the last day of the sale, so if you are considering any or all of them head over to the online store before 9:00 pm PST.

  
dies I used to create card:


Thursday, December 05, 2019

Husky and Friends

Hello Friends

Our new release called Arctic Animals is just so cute!  And you have just one more day to catch the Black Friday sale.  The discounts are amazing.  So hop on over to the online store!!

I hope you are all ready for Christmas!!  I have a friend who's birthday is close to the holiday and she is a dog lover.  So I made her a card featuring our sweet Husky pup. He is part of the Arctic Animal release.

Design Steps:
1.  Cut all the pieces out of white using the Husky w/ Sled die.
2.  Color and shade all of the pieces using your favorite markers.  I used Copics

 3.  Assemble the Husky and his sled
 4.  Using the Arctic Polar Bear and Cub die cut the pieces out of white card stock
 5.  Color and shade the pieces with your markers
 6.  Use a white A2 card base, cut out a piece of blue card stock just slightly smaller then the  front of the card and then cut a piece of DP slightly smaller then the blue.  Cut a piece of white glitter card stock 2 x 5 1/4.  Glue the DP to the blue card stock and the white glitter card stock to the center of the DP
 7.  Place dimension squares to the back of the dog and sled
8.  Pop the die cut to the glitter card stock as shown.  Using the Expressions Let it Snow die cut it out twice using purple card stock.  Glue the pieces together and add to card as shown below.  I added Glossy Accents to the words

CottageCutz


Check out this amazing collection of Arctic Animals!  It is a terrific buy!!

Blessing


Pam