Friday, October 25, 2019

Snowflake Motion Card

Happy Friday Cottage Cutz fans!  It's Jeanne today with a fun motion card that is simple to make with specialty papers most of us have on hand.  It uses the Snowfall Village and Snowflake Charm dies.
I started by cutting my main image from white pearlized cardstock and the tag from white glitter cardstock.
Then I cut a circle from red foil cardstock using the third smallest circle from the Stitched Circle dies.  I also cut a gold panel 5.5 x 4.25 inches.
I glued my circle behind the tag - it is a perfect fit!
Next, I glued the village scene to the gold foil panel leaving the space between the right snowflake and the right star unglued.
I slipped my ribbon through the opening.
And I tied my tag on.  I will admit I needed another pair of hands and my daughter held the tag in place while I tied the bow.
You can flip the tag over and write a message on the backside.
The tags swings freely creating a fun motion effect.  I took a video and am attempting to post it here.  I hope it works!

Everything was glued to a top fold A2 card base and I added rhinestones to the center of the snowflakes for a bit of bling!
 
I hope you enjoyed today's card.  Don't forget to visit the online store to see all of the wonderful new Christmas dies!

Dies:
http://www.scrappingcottage.com/cottagecutzsnowfallvillageelite.aspx


http://www.scrappingcottage.com/cottagecutzsnowfallvillageelite.aspx
http://www.scrappingcottage.com/cottagecutzstitchedcirclesetbasics.aspx

Thanks for stopping by.  Ihope you have a fun and creative weekend!


Thursday, October 24, 2019

Joy to the World Tree

Hi Friends!

It is Pam creating with you on the blog today!

Part 2 of the new Christmas release is OUT and ready for you to take a peek.  Just go to our online store to check it out.  I am using one of the dies from the Part 2 Christmas release and it is just so pretty!  It think it makes a very elegant card!


Design Steps:

 1.  Using the Pierced Oval die the 4th from the largest cut out a white oval.  Use the Pierced Oval die the 3rd from the largest cut out a piece of red metallic card stock.  Also using the Joy to the World Tree die cut out the words in metallic green and the bulbs in metallic red. Also cut out the trunk of the tree in brown and the star is metallic gold
 2.  Glue the words to the oval and then glue down the red bulbs.  Add the trunk to the bottom of the words and the star to the top of the tree.  Then mount the white oval to the red oval
 3.  Use a white A2 card base cut out a piece of red metallic piece 5 1/4 x 4 and then a piece of DP gold paper 5 x 3 3/4
4.  Glue the gold DP to the red metallic then add the ribbon to the bottom of the DP.  Then glue the panel to the white card base.  Use dimensions to the back of the oval and mount to the card

CottageCutz Products


Thanks so much for stopping by today!  I hope you take a peek at the new Christmas release Part 2.  There are tons of adorable dies as there was in the Part 1 release!

Blessings
Pam

Wednesday, October 23, 2019

Ho Ho Ho

Hello!  This is Sukie and today I'm sharing a card featuring the new Christmas Part 2 die release.  I used the Ho Ho Friends die set for my card.
I found this festive paper in my stash which I used for the letters. The adorable penguin, snowman and reindeer were nestled inside the letters with the holly as an accent.
I created a tea length card ( 4"x9.25") for the sentiment to fit vertically on my card.  The string-light paper was the perfect background for my card.  I added some solid card stock at the top and bottom of my card base to break up the pattern.
I used some foam pop dots on the backs of the letters for added dimension on my card.  Next I added  the letters to my card base.
A sentiment from the Scrappy Moms (retired) Christmas Cheer stamp set was stamped on a hand cut tag. The hole was embellished with a hole reinforcement punched with the We R Memory Keepers Hole Reinforcer punch.
I wrapped my card with some Candy Cane Trendy Twine along the edge.  The mini tag was tied at the top for a finishing touch on my card.
Here's the die set used on my card which is available here:

Monday, October 21, 2019

Holy Night

Hi!

It's Anja here for my Monday card sample post. I made a shaker card this time, using a manger scene.


I'll walk you a bit trough the process of making this card.

1. First I made the center circle part of the card. I cut two circles, one from the Pierced Circle Set and the second from Pierced Wide Circle Frame Set. I colored both using two darker shades of blue Distress Inks and a bit of black ink. Then I spritzed both with water and dried it.

2. Next I cut another whole circle from plastic foil and one more border circle frame from foam. I glued foam on the colored whole circle and filled it with mix of silver star confetti and silver glitters when glue was dry. I glued the foil on top and after that the colored frame. I let it dry.

3. Then I made the manger scene using the new Manger Scene die. I cut it twice from white card stock and once from dark blue card stock. I glued all three together. Then I used embossing ink and gold embossing powder to give it this golden look. I glued it on top of the shaker part.

4. I trimmed dark blue card stock for background (12x12 cm) and spritzed it with gold acrylic paint. I let it dry. Next I used gold ink to color the paper around the edges. I adhere the background on craft card stock. On top of that I adhered the shaker part. And my card was done.


Hope you like my Christmas scene.

Thanks for stopping by and see you again on Sunday.

Anja Z.


Cottage Cutz dies I used for this card:


Sunday, October 20, 2019

Christmas Delivery

Hi!

It's Anja here. I have a Christmas Delivery card for you today. Again I combined dies from the Christmas release and made this Holiday's scene.


For this card I used:
- Cottage Cutz dies (Winter Barn, Santa & Reindeer w/Sleigh),
- Distress Inks,
- white card base (15x15 cm),
- white card stock for die cuts and background (14x14 cm),
- silver card stock for background (14,5x14,5 cm),
- black pen,
- white pen,
- silver pigment ink,
- gold pigment ink,
- scissors,
- brush,
- water spritzer,
- heat gun,
- adhesive foam pads,
- paper glue.

First I cut and colored the barn.


Then the Santa and his Reindeer.


Next I trimmed the paper for the background. I used two shades of blue for the night sky. I colored only part of the paper that was seen on the card.


Next I used water spritzer to add some stars to the sky. I dried it with the heat gun.

Next I trimmed the paper for the background. I used silver paper this time.


Then I used white card stock to make snowy background. I used scissors to cut the lines. I colored the strips with light blue to add some dimension.


When I had all the pieces I adhere it on the card base. I used adhesive foam pads to glue the snowy ground and reindeer and the Santa. And my card was done.


This is all from me for today. I wish you all a pleasant Sunday and see you again tomorrow for my card sample post.

Anja Z.


Cottage Cutz dies I used:


Saturday, October 19, 2019

Penguin Carolers sing Joy to the World

Hello Scrapping Cottage friends! Thanks for taking the time to stop and visit with us today. It's Mary Marsh here bringing you the Monday edition of the Blog. 

We have the new release of Christmas Part 2 in the online store and they are all in stock and available for delivery. There are 34 new designs in this release. 

This release has something for everyone. So if you prefer a more religious tone to your cards- we have you covered. If you like a more whimsical design featuring Santa, reindeer, gnomes, moose or even a hot chocolate theme you will find some really cute dies.

I actually do a combo of religious and whimsical for my Christmas cards. Today, for your viewing pleasure, I am going whimsical with the Penguin Carolers (It's from the Christmas Part 1 release} + Joy to the World (Christmas Part 2 release) dies. So let's get started with some details on how I created this card. 

Step 1: I saw this week's Mojo sketch, and I immediately thought of these 3 penguin carolers. I knew the penguins would fit in one of the circles and a sentiment in the other. Plus, I could use some red ribbon which I like to do for my Christmas cards.
I looked through my designer papers and I thought this musical note themed paper would work well. I paired it with black cardstock and will use some red ribbon and embellishments to brighten it up. I used the 
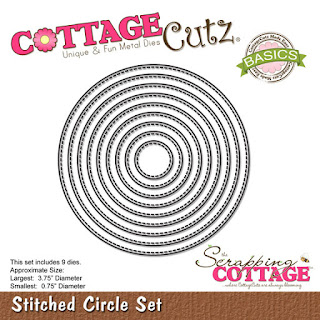
Stitched Circles die for the circle elements of the sketch. It's the 3rd, 5th & 6th largest dies in the set.

Next, I cut the penguin carolers from black, white and red cardstock. Notice the little songbooks they are holding. So cute!

The Joy to the World Sentiment is done with a black foil. I thought the shiny foil would work well against the white circle of the sketch.
Step 3: Now that all my card elements are cut, I am ready to start assembly. I secured the designer paper to the white base with double sided tape. Used the same for the ribbon.
I placed the largest stitched circle on my card first because I wanted to position the sentiment and also make sure the penguin fit. 
Once I had the sentiment where I wanted it, I placed the 2 remaining circles.
When I added the penguins, I thought the middle one was a bit too large for this circle layout. So I cut another of the smallest and it worked ok. I will use the other penguin on my card inside.
For the flower element of the sketch I decided to use a black snowflake and cut it in the black foil. This is an older die from CottageCutz - Season's Greetings w/Snowflakes. I used the tiny dots from the Joy to the World sentiment to embellish the circles.
The card still didn't have the finished look to me. So I decided to make the card base red and cut some more dots and added those to the snowflakes on the designer paper. Bingo - the card brightened up and I am happy with the finished look.  
Well, that's it for me for this week. I hope I have given you a bit of inspiration on a way to use this new die. See you next Saturday!
dies I used to create card: