Friday, July 05, 2019

More Than Flowers!

Happy Friday Cottage Cutz fans!  It's Jeanne today.  I hope you had a Fourth of July and that you have a long weekend to relax.  I have a clean and simple card for you today using the Flower Pot House from the Magical Garden release.
I die cut everything twice in white card stock and used Distress Oxide ink to color them.

To get the shading on the pots I used a Post-it note and placed it in the slit that creates the pot rim.  This creates a mask and allowed me to easily shade just part of the pot.
I assembled my flowers.
For the card front, I took an A2 panel and stenciled dots on it.  I knew I was going to use striped washi tape and felt the dots were a nice complement.
After stamping the sentiment I arranged the pots and flowers on the card and took a photo with my phone.  Since I usually need to remove most of what I've arranged in order to start gluing everything, and this makes a wonderful reference.
In the final you can see that I did rearrange things a little.  One tip to add depth to your die cuts - make sure to layer some over and under other pieces!

Dies:


Thanks for stopping by today.   Make sure to stop by the online store where there is a BIG July 4th sale going on right now!!!


Thursday, July 04, 2019

Hey Gnomie!

Hi Scrapping Cottage Friends!

It is Pam creating with you on the blog today!

HAPPY 4TH OF JULY!! COTTAGECUTZ IS CELEBRATING WITH A HUGH SALE WITH SAVINGS UP TO 70%!  CHECK IT OUT NOW IN OUR ONLINE STORE!!

On to todays project! Our New Release Magical Garden has lots of wonderful whimsical dies and all of them just make the most fanciful cards, tags and gift boxes!  They are 25% off in the store right now take a peek.  The card I am showing you today has our adorable Gnome on it!


Design Steps:
 1.  Using the 
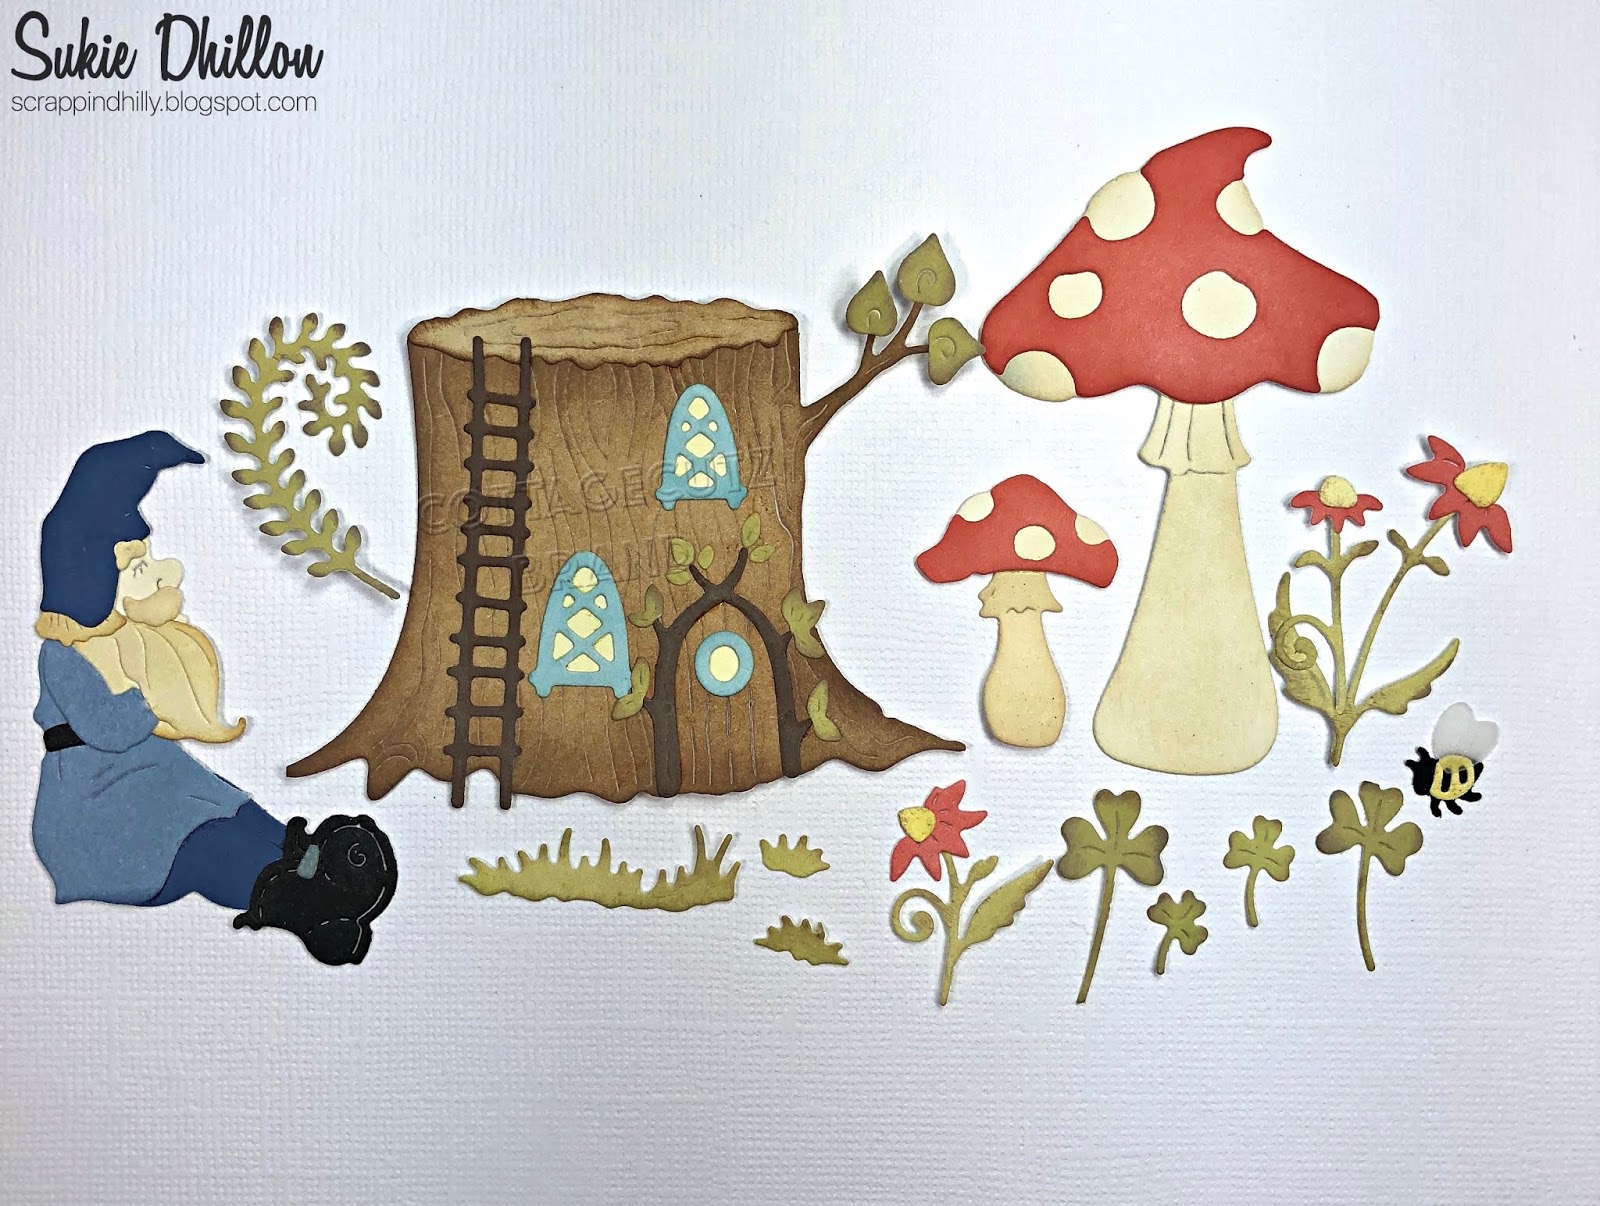
Gnome on a Tree Stomp cut out the pieces.  I used DP for the shirt and pants and card stock for the other pieces
 2.  Shade the pieces with inks and markers and begin assembly.  I cut the hat and flower out of red shimmer card stock
 3.  Add the lantern and candle to his hand
 4.  Cut the stump out of brown card stock and the grass and stem out of green then add the shading
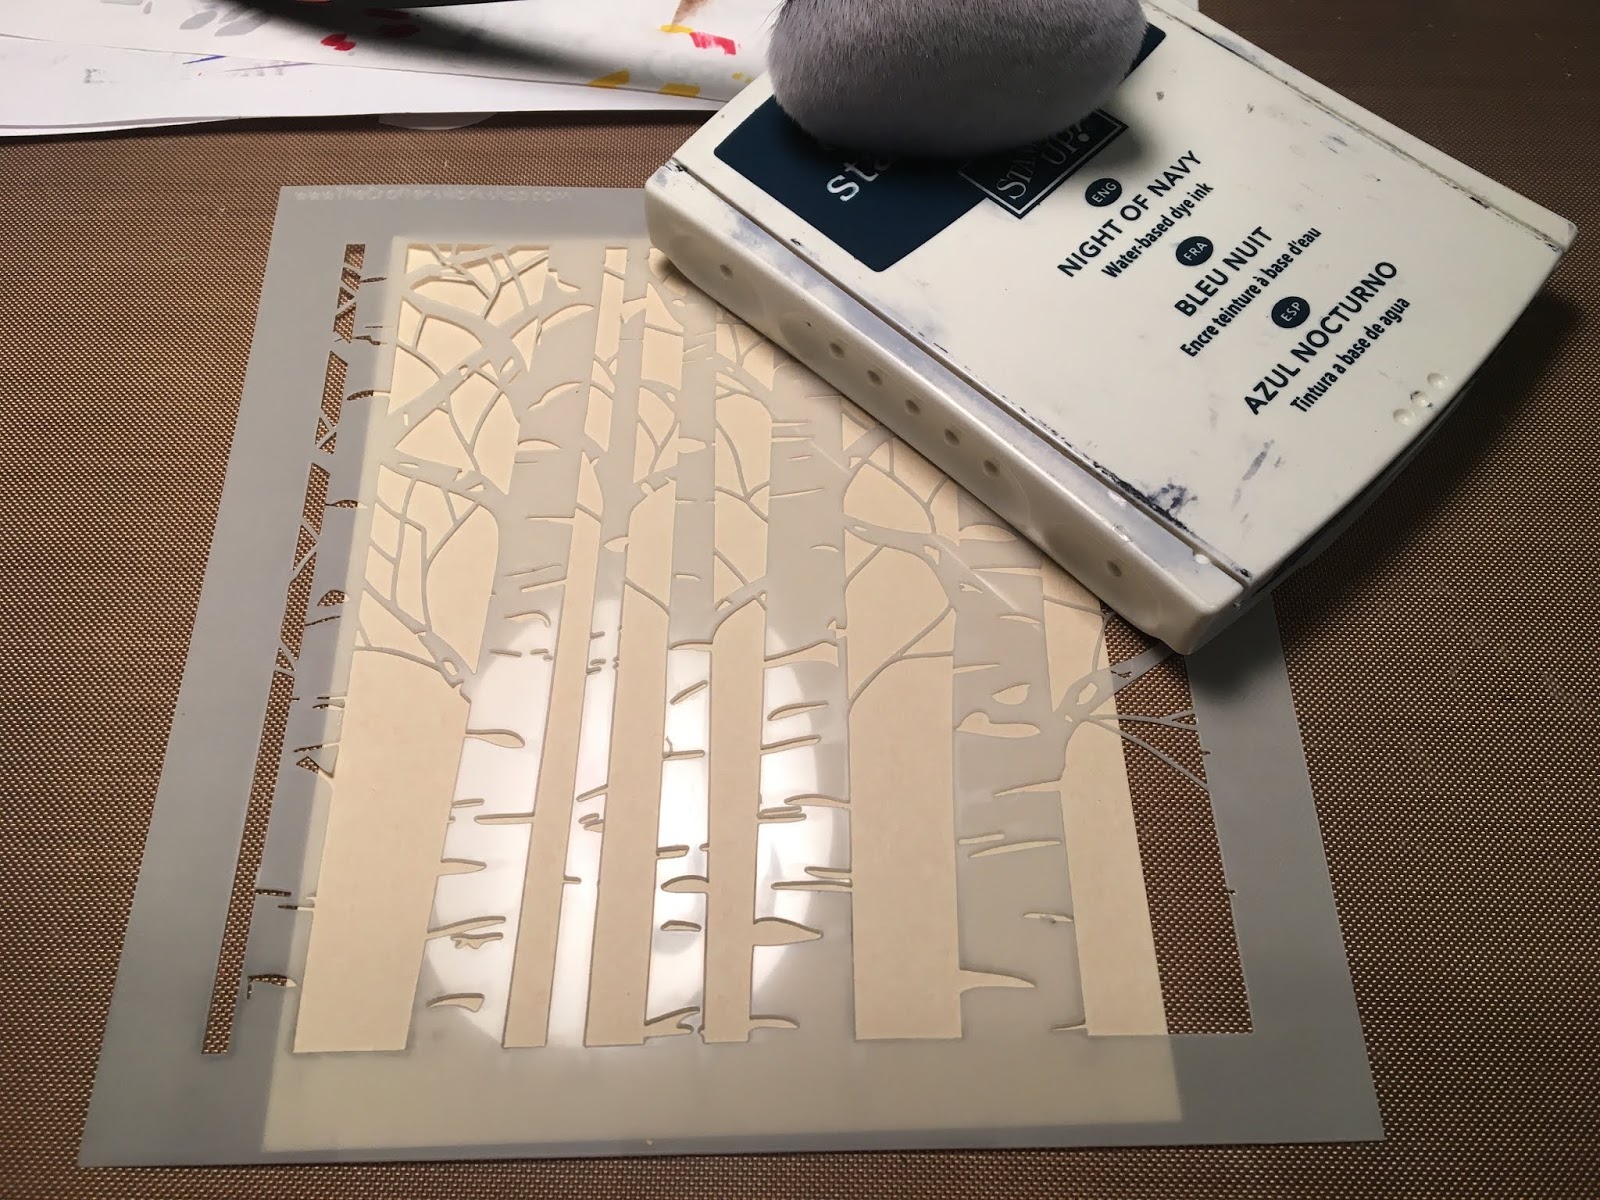
 5.  Use a birch tree stencil over a light tan piece of card stock.  I used navy ink to create the night sky
 5.  Add a little brown ink to the ground
 6.  Pop up the gnome on the stomp and add the grass and flower.  I also added a little yellow ink behind the lantern
 7.  I used a light tan A2 card base and a slightly smaller piece of navy card stock as my layer
8.  Glue the gnome scene to the navy card stock and add your ribbon and then glue it to the tan card base.  Add your sentiment and your card is complete


CottageCutz Products

I hope have a wonderful time celebrating this amazing country we live in! 
Blessings
Pam


Wednesday, July 03, 2019

For a Friend Like Gnome One Else

Hello!  This is Sukie, thank you for stopping by the blog today to check out a fun card I created.  I was inspired by the new Magical Garden release to create this friendship card.
I wanted a rustic theme to my card so I started with a patterned sheet from the DCWV Timeless Type stack along with a kraft card base.  I trimmed my paper to fit the 5x5, oversized card.  The sentiment is a printable which was inked on the edges.
The die cuts are from the Cottage Cutz Sleepy Gnome w/Mushrooms and the Magical Forest die sets.  All of the die cuts were shaded with Distress Inks.
I began building the scene on my card base by placing the 2 mushrooms on the left side.  Next I added the tree stump and trimmed off the branch on the right side.
I tucked in the branch behind the gnome along with some of the greenery and flowers. The gnome was leaned against the tree.  A few pieces of grass were anchored along the bottom edge of my card.
Once I added the tiny bee to my card base, I decided to cut out a couple of the smaller mushrooms from the Magical Forest die set and adorned them on the tree stump.
A burlap handout flag along with a small bow in jute were adhered as embellishments. The sentiment was the final finishing touch on my card.
Here are the dies used on my card, available in the shop:

Tuesday, July 02, 2019

There's No Place Like Home

Hi, Janja is here with you.
Today I want to show you two cards with cute houses from Magical Garden release.


- CottageCutz dies: Cottage w/Petal Roof, Mushroom House
- white card base: 4.25" x 5.5" (10,8 x 14 cm), folded
- patterned paper: 4" x 5.20" (10,2 x 13,2 cm)
- colored cardstock
- colored ink pads
- glue, double-sided adhesive tape, self-adhesive foam pads

I think that both houses are the perfect main image. So I decided to create a simpler scene. I used the same layout on both cards.


First start by die-cutting houses from colored cardstock. Color the edges with colored ink pads.
Cut the grass from a piece of green cardstock.


Trim two rectangles from a patterned paper and paste them on cards front. 
On each background stamp a sentiment.


Now it's time to begin assembling the cards.


Completed cards.


Thanks for stopping here and happy crafting.
Janja


Sunday, June 30, 2019

Gnome On Tree Stump


Hi!

It's Anja here. I have a cute and simple card for today's post.


For this card I used:
- Cottage Cutz dies (Gnome On Tree Stump, Magical Forest),
- Distress Inks (Peeled Paint, Vintage Photo, Black Soot, Tattered Rose, Fired Brick, Stormy Sky, Faded Jeans, Pumice Stone, Mustard Seed) and Oxides (Broken China, Faded Jeans),
- craft card base (18x13 cm),
- gold pigment ink,
- water spritzer,
- heat gun,
- black pen,
- adhesive foam pads,
- paper glue.

First I cut and colored the gnome.


Next the stump. I used some of the greenery from the die.


Last I made the background. I used Oxides for coloring. I spritzed a few water drops over it and dried it with the heat gun.


When I had everything cut and colored I adhere all the pieces to the background. I used adhesive foam pads for the gnome. And my card was done.


Before I go I want to invite you to the Scrapping Cottage online store. All the new dies are still available for 25 % off.

Have a nice Sunday and see you again next week.

Anja Z.


Cottage Cutz dies I used: