Tuesday, March 26, 2019

Easter Wreath

Hi, Janja is here with you.
You have probably started looking for ideas and decorations for the Easter.
While I'm waiting for the spring dies I prepared an Easter card with some older dies.


- CottageCutz dies: Egg Painting Bunny, Spring Watering Can, Be My Valentine Puppies (banner), Build-A-Grapevine Wreath
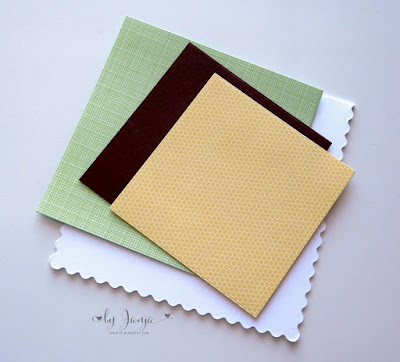
- white scalloped card base: 5.3" x 5.3" (13,5 x 13,5 cm), folded
- patterned paper: 4.7" x 4.7" (12 x 12 cm)
- patterned paper: 3.7" x 3.7" (9,5 x 9,5 cm)
- colored card stock
- colored ink pads
- glue, double-sided adhesive tape, self-adhesive foam pads

From colored card stock cut out bunny, eggs, wreath and flowers with greenery. Emphasize edges with colored pads.


Cut out a banner and stamp a sentiment.


Prepare a card base. Trim brown card stock and two patterned papers.


Gradually attach all the elements to the wreath with glue.


Completed card.


Have a nice day.
Janja


Sunday, March 24, 2019

Best of Luck

Hi!

It's Anja here. Today I have a tag for you instead of a card. I used different dies from the previous release and made a tag you cab send to a friend to wish them luck.


For this project I used:
- Cottage Cutz dies (Be My Valentine Puppies, Lucky Leprechaun, Shamrock & Valentine Scottie, St. Patrick's Day Cupcake, St. Patrick's Day Phrase & More, Mail Tag Set),
- Distress Inks (Black Soot, Mowed Lawn, Forest Moss) and Oxides (Squeezed Lemonade, Wild Honey, Fossilized Amber, Spiced Marmalade)
- white card stock and watercolor paper for die cuts,
- silver pigment ink,
- gold pigment ink,
- white pigment ink,
- gold color spray,
- black pen,
- embossing tools,
- hole punch,
- white pen,
- heat gun,
- string,
- paper glue,
- adhesive foam pads.

First I cut and colored the heart.


Then I prayed it with gold and dried it with the heat gun.


Next I cut and colored the shamrocks and other pieces.


I used white pigment ink and white pen to make it a bit more realistic.


I added the shamrocks a little dimension using the embossing tools.


I wrote the sentiment with black pen.


 I punched a hole into the heart and glued a golden ring around it.


And then I just arranged the shamrocks and other pieces on the heart I used adhesive foam pad for the sentiment.


That's all from me for today. Have a nice Sunday and see you again next week.

Anja Z.


Cottage Cutz dies I used for this project:


Saturday, March 23, 2019

He is Risen Cross (new die)


Hello Scrapping Cottage friends! Thanks for taking the time to stop and visit with us today. It's Mary Marsh here bringing you the Saturday edition of the Blog.

We have a new release of 36 Spring dies in the online store. There are a variety of designs so perfect for Easter or Spring card making. Take a look in the store you definitely won't be disappointed.
For my card today I am using the new He is Risen Cross die.  There is such detail in the cross itself and it also comes with the He is Risen phraseSo let's get started with some details on how I created my card. 

Step 1: Having a layout in mind at the card start is always a big boost for me. I love working with the sketches that are out there in the online world. That way I can just choose the card colors and designer paper and I am good to go. I liked this week's sketch #741 on Splitcoaststampers because of the layers. I thought it could be bumped up a notch with the addition of designer paper, ribbon and a creative idea for element #3.

I looked through my designer papers to get one that would provide a nice background for the cross image but not overwhelm it. I settled on this one that I have had since 2013. I liked the colors in the paper and knew it would work well for an Easter card. 
Pistachio green card base: 4 1/4" x 5 1/2"
Indigo layering panel: 4 1/8" x 5 3/8"
Designer Paper layer: 3 3/8" x 4 5/8"

I cut the cross and the Risen phrase in the indigo cardstock. I layered it on the 4th largest Oval Set die.
I wanted the words "He is" on the oval. So I masked off the stamp that I wanted to use and inked just those words in Indigo ink. 
 Step 2: Now that all the elements are cut I am ready to start card assembly. I attached the cross to the oval with dimensional adhesive. I wanted it lifted slightly from the background. 
I decided to use some ribbon for element 5 of the sketch. I first used a pistachio green and layered indigo. I thought it was to much of the same color so I went with a purple satin instead. It gave it just the touch of color I was looking for.  
I cut the Risen Phrase in Indigo card stock 2x and used Ranger multi matte medium to secure it to the designer paper background. I wanted it to stand out a bit more because of the pattern in the paper. 
 To finish off my card, I attached the panel to the pistachio card base with double sided tape. I scattered a few indigo enamel dots and that completed this card. I hope I have given you an idea for a new way to use this detailed cross die. See you next Saturday!!!


dies I used to create card:


Friday, March 22, 2019

Lamb Easter Basket Tags

Happy Friday!  It's Jeanne today with some fun Easter basket tags.  This little lamb cupcake is too cute.  I thought it would be perfect to decorate the front of a tag to hang on Easter baskets.
To start, I cut the lambs from vanilla cardstock and the cupcake, flower and tag reinforcement from three different colors of cardstock.  I used white cardstock and the largest of the tag dies for the tags.
Using Distress Oxide ink in Antique Linen, I tipped the lamb pieces to add dimension to the fleece and colored the face.  Then I used a black fine tip marker and white gel pen to color the lambs' eyes.
I played around with how I wanted the colors to line up.  Originally I thought I'd use all one color per tag, but ultimately decided to use all the colors on each tag.
I assembled the tags by gluing all the cupcake pieces together and then putting them on the tags.
Finally, I used coordinating ribbon as the ties.

Dies used:
http://www.scrappingcottage.com/cottagecutzspringlambcupcake.aspx
http://www.scrappingcottage.com/cottagecutzmailtagset.aspx

Thanks for stopping by today.  I hope you have a fun and creative weekend!