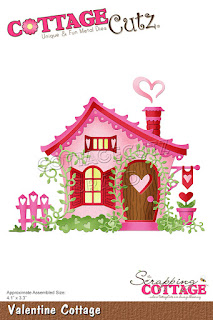
Friday, February 15, 2019

A Happy Hello

Happy Friday!  I hope you all had a great Valentine's Day. Today I have card that uses a die from the Valentine's release but for a different purpose - to welcome a new neighbor!
This card would be a fun way to welcome a new family to your neighborhood.
I started by cutting all the pieces from various colors of card stock.  I kept my main pieces in the blue family and used brown for the door, roof and chimney, yellow as accents for the windows and banner, and green for the foliage.
I glued my smaller pieces together first.  I find this works best for me, rather than gluing everything directly to the main piece.
When they were finished I glued them to the larger elements before assembling the card.
I cut a white square using the second largest of the Wacky Stitched Squares set and Hello using the Hello Phrase die.  I also cut a 5 x 5 inch square from blue gingham paper as a background for my card base.
I glued all the elements at an angle to the 5 x 5 inch card base.  My last step was to add Buttermilk Nuvo drops as "flowers" in the bushes in front of the house.

This house die is so much fun and be personalized in so many ways.  Right now it's on sale - along with the other dies in the Valentines and Spring releases!  But only for a limited time so visit the online store today.

Dies used:
http://www.scrappingcottage.com/cottagecutzvalentinecottage.aspx


http://www.scrappingcottage.com/cottagecutzexpressionsplushellophrase.aspx

http://www.scrappingcottage.com/cottagecutznestedwackystitchedsquareset.aspx

Thanks for stopping by!  I hope you have a fun and creative weekend.

Thursday, February 14, 2019

Raining Hearts!

Good Morning Scrapping Cottage Friends!

Happy Valentine's Day to everyone!! It is Pam sharing with you on the blog today!

I am using one of our new spring release dies Spring Showers Bunny and giving it a twist for Valentine's Day.  Most all of our dies can be used in so many different ways if you just open up that imagination.  And when you do it gives you tons of fun options!


Design Steps:

 1.  Using the Spring Showers Bunny and card stock colors of your choice cut out the pieces
 2.  Use a variety of inks to shade the bunny if desired
 3.  Assemble the bunny and color in the eyes with black marker and add a little white dot with a gel pen
 4.  For the background cut a white piece of card stock 4 x 5 1/4 use a heart stencil and some light pink ink and sponge in the hearts
 5.  Use an A2 white card base and a piece of red card stock cut slightly smaller then the card base front
6.  Mount the heart stenciled piece to the red card stock.  Stamp the Happy Valentine's Day to the bottom.  Attach the black stitched ribbon and then pop up the bunny.  Use the Swinging Monkey Die to cut out all of the tiny red hearts and glue them as shown.  Your card is complete


CottageCutz Products


The online store is having an awesome sale on the Spring, Valentine and St. Patrick's Day Releases so make sure your do not miss out on the 25% savings going on right now!
Blessings
Pam

Wednesday, February 13, 2019

Be My Valentine

Hello!  This is Sukie and today I'm sharing a set of Valentine's cards for my guest designer post.  With Valentine's Day tomorrow, these are perfect to share with that special someone especially an animal lover.
These sweet puppies were die cut from the Puppy with Valentine and Puppy Love Letter dies.  The sentiment, banner and hearts are from the Be My Valentine Puppies die set.  I also cut out two circles from the Stitched Circle Set and two squares from the Double Stitched Square Set.
I went with a black, white and red theme for my card so the die cuts came together very quickly.  The puppies were cut with neutral shaded card stock.  A bit of Glossy Accents were added to the eyes and noses of the puppies.
The puppies were centered perfectly on the white circles.  After I adhered the tiny hearts next to the puppies, I decided to cut the black circles with my electronic die cutter for a frame.  The patterned papers are from the My Minds Eye "Charmed" 6x6 paper pad.  I love the row of neutral hearts amongst the black hearts.
The sentiment banner was adhered along the top edge of the die cut squares so that it would be centered above the puppies.
The finished die cuts were layered on the base of my card.  The sweet puppies are the perfect focal point for these Valentine's cards.
Here are the dies I used on my cards, available here:

Tuesday, February 12, 2019

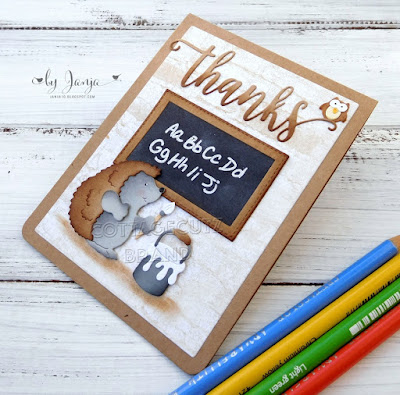
Thanks, teacher

Hi, Janja is here with you.
For today, I made a card on which I used the Valentine hedgehog. Let’s see the hedgehog as a teacher.


- card base: 4.25 x 5.35" (10,7 x 13,9 cm), folded
- patterned paper: 3,74 x 4,96" (9,5 x 12,6 cm)
- colored card stock
- ink pads
- white and black gel pen
- double-sided adhesive tape, foam tape, glue

First, stamp an alphabet on a black card stock. Then white embossed letters. Cut rectangles and a frame for the school board.


Cut out the hedgehog from a colored card stock. Color the edges with a brush and ink pads. Glue all pieces to each other.


Trim a piece of patterned paper and paste it onto the card front. 
Cut out a thanks phrase and a little owl.


Attach the hedgehog to the card front as shown using a dimensional tape. When everything is finished, darken the floor with a brush under the hedgehog and a bucket of paint.


I would like to invite you to the online store. The new Spring dies are on sale for 25% off.

Have a nice day.
Janja


Sunday, February 10, 2019

Love Cottage

Hi!

It's Anja. Today I have a simple card for you. I used adorable cottage die, which has a lot of lovely small details. I wanted to highlight those details and that's why I made a minimalistic background. 

For this card I used:
- Cottage Cutz (Valentine Cottage, Love Phrase),
- Distress Inks (Mustard Seed, Picked Raspberry, Shabby Shutters, Peeled Paint, Spun Sugar, Worn Lipstick, Vintage Photo, Barn Door, Broken China),
- water color card stock (30x15 cm),
- white card stock for die cuts,
- water spritzer,
- heat gun,
- paper trimmer,
- paper glue.

First I cut and colored the cottage. I used Distress Inks to color it.


I did the same with the love phrase.


Then I trimmed the paper for the card base. I made 15x15 cm base.


I used Distress Ink to color the sky. I colored in circles.


Then I spritzed a few water drops to add a little interest to the sky. I used heat gun do dry the paper. Before drying I used paper towel for additional water.


And then I just glued the cottage and the phrase to the card base and my card was done.


Before I go, I would like to invite you to the store to check out the new Spring release. Many new adorable dies, now for 25 % off. Can't wait to start using it.

Have a nice Sunday.

Anja Z.


Cottage Cutz dies I used: