Friday, October 26, 2018

Autumn Leaves

Happy Friday Cottage Cutz fans!  It's Jeanne posting today.  I love these new leaf dies!  I decided to use a card sketch from CAS Colours & Sketches because it allowed me to concentrate on the technique instead of the layout.
 Here is the challenge:
https://cascoloursandsketches.blogspot.com/2018/10/design-team-call-and-challenge-295.html
I used my Distress Oxide inks and what I call a "splat" technique.  I swipe the ink pad on a plastic mat and spray with water, then I dip my paper into the mess.  I do this with several colors, most of the time using my heat gun to dry between layers.  I used Fossilized Amber, Wild Honey, Peeled Paint, Fired Brick, Spiced Marmalade and Gathered Twigs ink colors.
When the paper was nice and dry, I die cut the leaves.  This technique gives a randomness to the leaf colors - just like in nature!
I tipped the edges of the leaves in the brown and brick inks.  This gives a bit more realism to the leaves.

I cut a rectangle 2 1/2 x 3/1/4 inches from Early Espresso card stock and three strips of Copper Foil card stock 1/4  x 4 1/4 inches.  I also cut an A2 panel from white card stock and tipped the edges in the brick and brown since white edges seemed too stark for this card.
The brown panel is 7/8 inches from both the top and sides and I placed the top copper strip 1 3/4 inches from the bottom.  Each strip is 1/4 inch from the one above it.


Finally, I added some epoxy dots as "dew" drops.

This card is actually quite easy to make although it looks intricate and time consuming.  Because of the technique there will never be two cards alike, but that is the beauty of nature!

Dies:
http://www.scrappingcottage.com/cottagecutzfallleaves.aspx

Thanks for visiting today!  I hope you have a fun and creative weekend!


Thursday, October 25, 2018

Autumn Treats!

Good Morning Scrapping Cottage Friends!

Happy Thursday to you! It is Pam sharing with you on the blog today!  I hope you all are enjoying the beautiful fall weather and all of the colors that are starting to appear on the trees.  I am continuing to make fall cards not only for Halloween but for Thanksgiving as well.

My card today features the yummy cupcakes from the Autumn Sweets die and the lovely scripts are from the Fall Phrases die.

Design Steps

1.  Cut all of the pieces using the Autumn Sweets die out of white card stock

2.  Use your favorite markers to color all of the pieces


3.  Assemble the pieces with a fine tip glue.  I like to assemble them as soon as I get them colored so I don't misplace any of the small pieces.  Set the cupcakes aside
 4.  Use an A2 white card base.  Fold the front flap in half as shown above.  Cut 2 brown pieces 2 x 5 1/4 and glue to the front.  Then cut a brown piece 5 1/4 x 4 for the inside flap
 5.  Using designer paper cut 2 pieces slightly smaller then the front flap brown cards stock.  Cut one piece slightly smaller then the inside brown card stock
 6.  Using the Stitched Scalloped Oval cut out 2 ovals using lined DP
 7.  Using the Fall Phrases cut out the enjoy and fall out of brown card stock

8.  Glue one of the cup cakes to the oval and attach it to the front flap making sure you only put the glue on one side of the oval.  Also glue down the enjoy to the front flap
9.  On the inside of the card glue down the other cupcake to the lower right side of the card and then add the oval making sure it will be hidden right behind the front flap oval.  Add the word fall and your card is complete
CottageCutz Products


I hope you take some time to really enjoy all of the fall colors!  And you also use that as an inspiration to make some beautiful cards!
Blessings
Pam


Tuesday, October 23, 2018

Old MacDonald had a farm ...

Hi, Janja is here!
Today I have two cards for you with a lovely scene on the farm.
Let me show you how I created my cards.


Supplies:
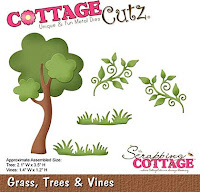
- CottageCutz dies: Barn & Windmill, Chickens & Coop, Cow, Pony, Goat, Pig, Geese, Old Farm Fence, Grass, Tree & Vines
- white card base: 4.25 x 5,35" (10,7 x 13,9 cm), folded
- white card stock: 4 x 5.2" (10 x 13,2 cm)
- colored card stock
- colored ink pads
- glue, double-sided adhesive tape, self-adhesive pads

From the "Autumn" release I have chosen two new dies.
Cut out all the pieces we need.
I used different colors of card stock. The edges are further highlighted with colored pads.


I added some animals from the older release "On the Farm".


Now prepare the card base and a rectangle from a white card stock, which is slightly smaller than the base surface of the card.
Spray the white rectangle with a blue and green color.


To finish the card attach all the elements to the prepared background with glue and self-adhesive pads.


Thank you so much for joining me. Have a nice day.


Monday, October 22, 2018

Autumn Bake Sale

Hi, Lois here with my regular Monday blog post.  Before I get started though, let me tell you about a huge sale in the CottageCutz store.  It's their Fall into Autumn Sale, where you can save up to 50% on most CottageCutz designs.  The sale ends at 9:00 pm PDT, so you need to hurry if you want to get in on the savings!

I made a Side Step Card today, using several of the new Autumn dies from CottageCutz.  


To start my card, I cut cardstock as follows:

Wood plank cardstock - 8 1/2" x 5 1/2"
Cream cardstock pieces - 7/8" x 5 3/8", 2 7/8" x 3 1/4", 3 3/8" x 7/8", 3 3/8" x 2"
Orange plaid paper pieces - 3/4" x 5 1/4", 2 3/4" x 3 1/8", 3 1/4" x 3/4", 3 1/4" x 1 7/8"


A side step card is a relatively easy fun fold.  To show you how to cut and score, I made a little diagram.


After I cut and scored the wood plank cardstock piece, this is what it looked like.


I then glued the orange plaid pieces to the cream pieces and adhered them to the card base.


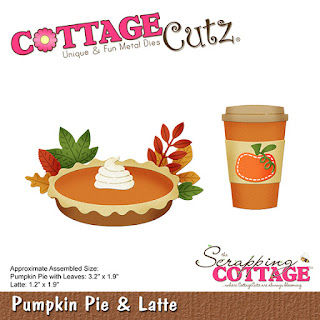
I then cut the Autumn Sweets and Pumpkin Pie and Latte dies from cream cardstock.


After coloring the pieces with Copic markers, using the packaging as a guide, I constructed each of the images.


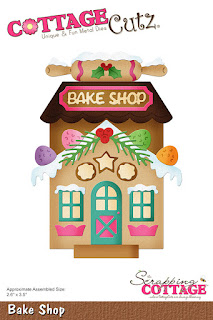
I also cut the word "fall" from the Fall Phrases die and  rolling pin from the Bake Shop die and stamped the words "bake sale," using my old Snap Stamps.


I then adhered all the die-cut pieces to the card base, gluing the "fall" and rolling pin and using foam pop dots on the others . . .


. . . and my card was complete.


Here is a side view of the card.


CottageCutz dies used on this card are:

http://www.scrappingcottage.com/cottagecutzfallphrases.aspx


http://www.scrappingcottage.com/cottagecutzautumnsweets.aspx

http://www.scrappingcottage.com/cottagecutzautumnsweets.aspx

http://www.scrappingcottage.com/cottagecutzbakeshop.aspx