Friday, August 03, 2018

Vintage Christmas Puppy

Happy Friday!  It's Jeanne today with a vintage looking Christmas card.  My daughter said the colors looked vintage to her and I had to agree. And the card uses previous Christmas and non-Christmas dies.
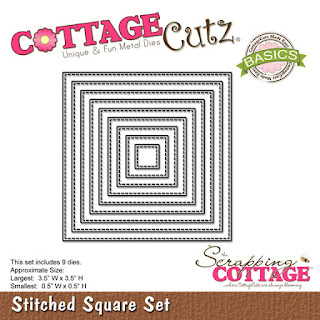
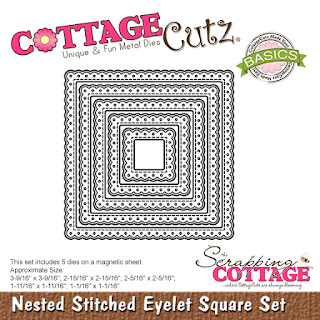
I started by die cutting all pieces in various colors of card stock to match my plaid.  For the frame I used the second largest of the Eyelet Squares and the fourth largest of the Stitched Squares.  I centered one inside the other and used washi tape to hold them in place as I ran it through my die cutter.
I cut a white panel for the front 5 1/2 x 4 1/4 inches, a 2 1/2 inch square from the plaid paper and a piece of ribbon a bit longer than the panel so I could wrap it around the back.
I glued the candy together and covered them in Wink of Stella.
I laid things in place to get a general placement and took a photo with my phone.  I often do this so as I'm gluing things down I have a reference.  This is especially good if you have a lot of pieces or critical placement.
I glued the ribbon 1/2 inches from the left side and lined up my plaid square with the edge.  The bottom of the square is 1 1/2 inches from the bottom of the panel.  I also glued the dog to the plaid square.  His eyes and the nose piece are colored with a marker.
I glued the candy with the notch to the frame (I snipped off the part that showed beyond the frame) and used narrow foam strips to raise up the frame.
Next I tucked one candy under the frame and the other on top.  I also decided at this point to angle my sentiment rather than put it on straight.
In looking at the panel, I thought it needed just a bit more.  So I rounded the upper right hand corner using a corner rounder.  Then on the white A2 card base I adhered a small strip of the plaid paper. I toyed with the idea of using a solid, but decided the plaid looked better.
And the finished card!

We're getting ready for a new release of holiday dies that promises to be WONDERFUL!  There are so many cute dies coming - I can't wait!

Dies Used:
http://www.scrappingcottage.com/cottagecutzforestpeekersbeaveranddog.aspx
http://www.scrappingcottage.com/cottagecutzsnowmanincocoa.aspx
http://www.scrappingcottage.com/cottagecutzstitchedsquaresetbasics.aspx
http://www.scrappingcottage.com/cottagecutznestedstitchedeyeletsquareset.aspx

http://www.scrappingcottage.com/cottagecutzexpressionsmerrychristmas.aspx

Thanks for stopping by.  I hope you have a fun and creative weekend!


Thursday, August 02, 2018

Sea Turtles!

Good Morning Friends!

It is Pam sharing with you on this wonderful Thursday morning!

We are getting very close to our new release for Christmas!  And it will soon be time for us to share the new dies but until then we are showing you some new ideas for those favorite dies from the past!  I live near Hilton Head Island and the area is famous for sea turtles!  So with that in mind I used our turtle die combined with a few other dies to create my card for you today!


Design Steps:
1.  Cut out 2 Sea Turtles one in green and one in brown.  Place the shell panels from the green turtle into the brown and the brown into the green.  I just taped them into place
 2.  Add a little shading to the turtles using TH inks.  Use a fine black marker to make the eye standout
 3.  Use an A2 kraft card base, cut a slightly smaller piece of white 4 x 5 1/4.  Cut a 4 x 5 1/4 piece of wood grain DP and cut an oval in the center using the largest of the Wacky Stitched Oval dies.
 3.  Next cut a piece of 3 3/4 x 5 kraft card stock and cut out the second to the largest Pierced Oval die in the center.  Glue it directly behind the wood grain DP as shown
 4.  On the white card stock create an inked background for the water.  Use TH inks and then splatter with shimmer water (water mixed with Perfect Pearls Powder)
 5.  Glue to the back of the wood grain DP. (Make sure not to glue to close to the oval opening so you can stick the sea grass behind the oval
 6.  Using the Botanical Garden 2 die cut out the foliage in 2 shades of green card stock
 7.  Tuck the foliage into the oval and glue down
 8.  Add the sea turtle to the card front
 9.  Take a piece of white cheese cloth and spray with a walnut stain and let dry
10.  Add the cheese cloth to the card front and then add the pearls
CottageCutz Products


I hope you are having a good time looking a new ideas for all of those older favorite dies!  I am sure having fun using them again!  Stay tuned for those new Christmas dies coming very soon!

Blessing

Pam


Monday, July 30, 2018

What a Fox!

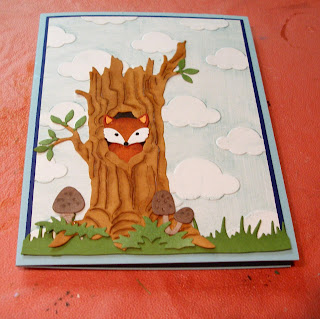
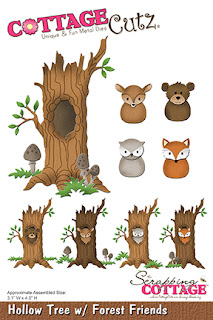
Hi, Lois here with my Monday card.   While the CottageCutz design team waits for the new release dies, we're having a month of "throwback" cards -- using previously released dies to show them off once again.    My card today uses Hollow Tree w/Forest Friends and Spring Grass.


To start my card I die cut the tree and animals from white cardstock and the grass from green cardstock.


I then colored the pieces with Copic markers and sponged some darker green ink onto the grass piece -- and then constructed the tree.


The card base consists of light blue cardstock 5 1/2" x 8 1/2", scored at 4 1/4"; the navy piece is 4" x 5 1/4", and the white piece is 3 7/8" x 5 1/8".


I swiped a light blue ink onto one side of a cloud embossing folder and then ran the white cardstock through my Cuttlebug.  This technique allows portions of the embossed piece to be blue, while leaving the clouds white.


I then constructed my card base.


The green strip of grass was placed along the bottom of the card base, covering the navy mat piece and then the tree was added over the grass, trimmed at the edges.


 Several weeks ago, when I was in Hobby Lobby, I saw some really cute fox buttons that I thought would look good on a card at some time.  Today was the day.  I placed one of the buttons sitting on the grass next to the tree.


I had a sentiment that would work for this foxy card, so I stamped it on white cardstock, cut it into a banner, and mounted it on a strip of navy.  I placed this at the top of the card.


And my card was now finished.


CottageCutz dies used on this card are:

http://www.scrappingcottage.com/search.aspx?find=Hollow+Tree

http://www.scrappingcottage.com/cottagecutzspringgrasselites.aspx

Sunday, July 29, 2018

Home

Hi!

This is Anja. Just a simple card for today. I'm away on work holidays, having fun with the kids in the summer camp. We're a few days from going home. We're having ton of fun, but when you're tired, sometimes home sounds like the best idea :)


For this project I used:
- Cottage Cutz dies (Puppy w/ Heart, Stitched Alphabet),
- Distress Ink (Spun Sugar, Pumice Stone),
- craft card base (10,5x15 cm),
- white card stock for die cuts and background (9,5x15 cm),
- patterned paper (9x15 cm),
- black pen,
- white pen,
- paper glue.


First I cut the paper for the background. I colored the edges of white paper with Spun Sugar Distress Ink. I glued both papers on the card base.


Then I die cut the puppy and colored it with Distress Inks. I used black and white pen for he eyes. I cut one more puppy and used its head to layer it on top of the whole puppy to add some dimension.


Next I cut the letters and colored the edges with Distress Ink.

And then I just glued the puppy and the letters to the card base. And this i my finished card.


Have a great Sunday and see you again next week.

Anja Z.


Cottage Cutz dies I used: