Friday, July 13, 2018

Love Bandit

Happy Friday!  It's Jeanne posting today with throwback card featuring previously released dies. These Forest Peekers are always fun because there are so many ways and occasions to use them.
To start, I cut all the pieces from white card stock and used Copic markers to color them.  The marker colors are listed in the photos below.


When I was finished coloring, I assembled the main components.
Next, I stamped the sentiment on vanilla card stock and used the middle Nested Scallop circle die to cut it out.  I then sponged the edges with some Soft Suede ink and colored in the heart with the R29 marker.
I cut an A2 card base from vanilla card stock and two panels - one solid and one patterned.  These are each 1/8 inch smaller the previous one.
I stacked and adhered these together, then glued the images to the front of the card.
I used a white gel pen to add dots to the mushrooms.  The sentiment circle is popped off the card using foam dots.

Dies used:
http://www.scrappingcottage.com/cottagecutzforestpeekersfoxandraccoon.aspx
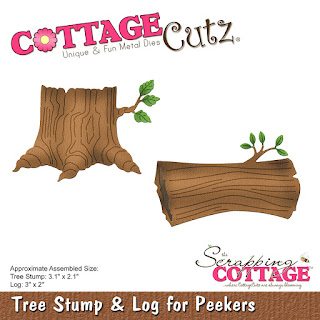
http://www.scrappingcottage.com/cottagecutztreestumpandlogforpeekers.aspx

http://www.scrappingcottage.com/cottagecutzhollowtreewforestfriends.aspx
http://www.scrappingcottage.com/cottagecutznestedscallopcircleset.aspx

I hope you enjoyed this card today.  The Forest Peekers are so much fun!  This set comes with a fox and racoon but there are several other dies with different animals if you have a favorite forest critter.

Thanks for stopping by and have a creative weekend!


Thursday, July 12, 2018

Traveling Llama!

Good Morning Scrapping Cottage Crafters!

Hello it is Pam sharing on the blog today! We don't have a new release of dies for July,  so we are having a throwback month.  The team will be featuring some of our previously released dies to give you some fresh ideas for using them.

Since it is vacation time for a many families I thought it would be fun to make a travel related card.  My niece is going on short mission trip with her church. She is heading to El Salvador to work with children and share her love of singing to the Lord!  So this card is dedicated to her.

Design Steps:

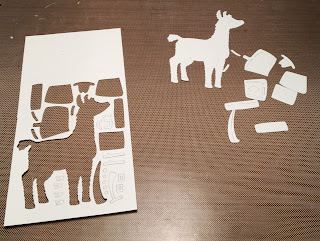
 1.  Cut all of the pieces from the Traveling Llama in white card stock
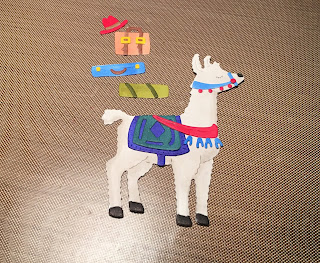
 2.  Use your markers and color the pieces.  I find it easier to color the smaller pieces while they are still attached to the larger piece of white card stock
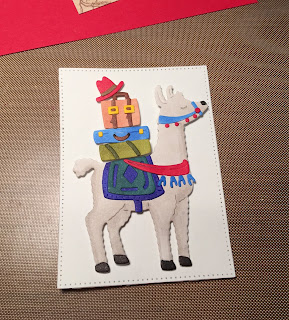
 3.  After all of the pieces are colored assemble the llama
 4.  Use an A2 white card base, cut a slightly smaller piece of red then a slightly smaller piece of DP.  Use the third from the largest Pierced Rectangle die and cut out a white rectangle
 5.  Pop up the Llama onto the white rectangle
 6.  Glue the red card stock to the DP map and add the ribbon.  Then glue the panel to the front of the white card base
7.  Use the Retro Tag Toppers and cut out the pieces in tan and dark brown.  Stamp the sentiment and cut out the circle and glue the tag together
8.  Pop the rectangle with the llama to the front of the card then add the sentiment tag and your card is complete
Cottage Cutz Products


As always thanks so much for stopping by to visit!  We appreciate it so much!

Blessings
Pam


Monday, July 09, 2018

Special Thank You


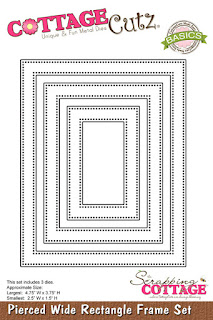
Hi, Lois here again with my Monday card.  As I mentioned last week, during the month of July the CottageCutz design team is reminding you of some older dies when making their cards.  My card uses two such dies -- Stitched Leaves and the Pierced Wide Rectangle Frame Set.


To start my card, I cut the stitched leaves from a piece of white cardstock.


I then colored the pieces with Copic markers.  I had originally planned to use a white pen to make the stitches more pronounced, as is shown on the packaging; but I was not happy with the results on the first leaf I tried.  So I turned it over and colored the back so it was not wasted.


I then cut the card base pieces and the frame.  The cream card base is 5 1/2" x 8 1/2", scored at 4 1/4"; and the inside of the frame is 3 5/8" x 4 3/8".  I used the largest frame die.


I adhered foam tape on the back of the frame.


After constructing the card, I laid out the leaves down the side of the frame to see how much room I would have for my sentiment.


I removed the leaves and stamped the sentiment.


I then replaced the leaves, gluing them down over and under the frame, as well as the acorns at the bottom.  And my card was finished.


CottageCutz dies used on this card are:

http://www.scrappingcottage.com/cottagecutzstitchedleaves.aspx

http://www.scrappingcottage.com/cottagecutzpiercedwiderectangleframesetbasics.aspx

Sunday, July 08, 2018

Don't Stop Me Now

Hi!

This is Anja. There was just one die I haven't used from Just for Guys release. I decided to give it a go today. I made a card using Traffic Light die. It's a simple card, because I wanted to give as much attention to the die as possible.

I used one of my favourite songs for inspiration. It's a song Don't stop me now from Queen. So many memories of great moments when I hear this song.


For this card I used:
- Cottage Cutz die (Traffic Light),
- Distress Ink (Tumbled Glass, Stormy Sky, Faded Jeans),
- white card base (10x15 cm),
- watercolor paper for background (9x14 cm),
- black, red, yellow, green card stock for die cuts,
- black foam for die cuts,
- silver pigment ink,
- black pen,
- water spritzer,
- heat gun,
- paper glue,
- scissors,
- printed phrase.

First I made the background. I did the smooching technique with different shades of blue. I dried the paper with the heat gun.


Then I made traffic lights. I wanted it to look as 3D as possible. I cut three traffic light bases from black card stock and one from black foam. I used green, yellow and red card stock for the lights. And I colored light frames with silver pigment ink.


Then I assembled the lights. I glued three bases together and then glued strip of black paper on the foam base. Then I added the three layered base.


And then the lights and frames.


I printed the phrase on white paper and cut it.


And then  jut glued all the pieces to the card base. And this is my finished card.


Have a great Sunday. We'll be eating cake and celebrating my brother's 20th birthday. Good day ahead. Hope yours is to.

See you again next week,
Anja Z.


Cottage Cutz die I used: