Sunday, March 18, 2018

Stitched Spring Garden

Hi!

This is Anja again. This week I added a bunch of new Zig markers to my collection and I had to try them out. I used dies from the Stitches collection and combined them in a light Spring garden card. This dies are so fun to use and you can combine them in different theme cards.


For this card I used:
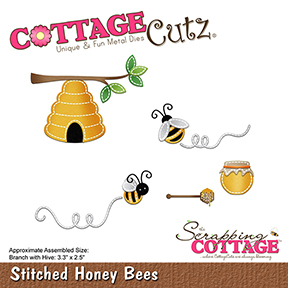
- Cottage Cutz dies (Stitched Flowers, Stitched Garden Friends, Stitched Honey Bees, Stitched Sun, Clouds & Umbrella),
- watercolor paper for background (14,5x14,5 cm) and die cuts,
- craft card base (15x15 cm),
- Zig markers (numbers: 024, 043, 046, 052, 063, 065, 066, 083, 094, 200,  260)
- Distress Inks (Tumbled Glass, Stormy Sky),
- water spritzer,
- watercolor brush,
- black pen,
- white pen,
- heat gun,
- paper glue. 

First I die cut all the pieces from watercolor paper. I used Zig markers and watercolor brush to color it. First I colored on the edge and then pushed colored with the watercolor brush to the middle. I don't have a black Zig marker, so I used a black brush pen.


I also used watercolor paper for the sky background. I used two blue Distress Inks to color the paper. Then I spritzed a few water drops over it and dried the paper with the heat gun.


When I had everything colored I added eyes to the snail and the bee. I used black and white pen. Then I arranged the sun, flowers, clouds and critters on the card. I decided to use the stitched fly lines also.

And this is my finished card.


Rise & Shine dies are still available for 25 % less, so don't forget to check them it out.

Have a beautiful Sunday and a nice week ahead.
Se you next time.
Anja Z.


Cottage Cutz dies I used:


Saturday, March 17, 2018

Spring Window Scene

Hello Scrapping Cottage friends! Thanks for taking the time to stop and visit with us on this St Patrick's Day 2018. It's Mary Marsh here bringing you the Saturday edition of the Blog. Hope you all have recovered from the switch to Daylight Savings time. It usually affects me for a couple of days, but I think I am adjusted now. Love the longer daylight that's for sure.

Before I start with today's card, I wanted to let you know we have a new release of dies. It's our Rise & Shine collection and they are currently on a 25% sale. To see some card samples from the team - click here and here

Today, I am showing a card from our Spring die collection. I am using the Spring Window w/Vine  and also the Chickies w/Egg Plant dies. So let's get started with some details on how I created my card.

Step 1: I decided to create an outdoor scene. Started by using a brick wall stencil and white 3-D molding the wall. I stenciled on a light gray cardstock.
Carefully removed the tape and set it aside to dry. I like how some of the brick have the appearance of slight imperfections. Just like real brick. This panel is 3 7/8" x 5 1/8".
Step 2: On this step I cut my window, vine and flowers. I love the detail of the flowers in this die. Used sweet sugarplum, rich razzleberry and daffodil yellow cardstocks.
I cut my 2 chickies from daffodil yellow cardstock and sponged the edges slightly with wild honey distress ink. Just to add a little depth.
Step 3: Ready to start some card assembly. I used dimensional adhesive on the window and chicks. I like the dimension it gives to your card. Since you are looking into the window, I added some sweet sugarplum cardstock so it would look like a painted wall. The Spring grass is an older CottageCutz die.
Step 4: I wanted to get a sentiment on this card and I just wasn't quite sure how to do that. Thought about stamping on the egg shell or on the grass but neither of those ideas really resonated with me. Then the lightbulb went off and I decided to add the Joy phrase to the window.
It is the perfect size. And, this die is currently 80% off. You can pick it up for just a $1.00 in the online store.
I also cut 3 butterflies in the same colors as the window flowers. They are from the Spring Meadow die.
 
Step 5:  To complete my card I used the sweet sugarplum cardstock. The card base is 4 1/4" x 5 1/2".  Well, that's it for me for this week. I hope I have given you an idea for an Easter card. You still have time to get these dies if you want to re-create this card. See you next Saturday!
 
Dies I used to create card:
http://www.scrappingcottage.com/cottagecutzspringwindowwvine.aspx
 
 
http://www.scrappingcottage.com/cottagecutzspringmeadow.aspx

http://www.scrappingcottage.com/cottagecutzchickiesweggplant.aspx
http://www.scrappingcottage.com/cottagecutzexpressionsjoy.aspx

http://www.scrappingcottage.com/search.aspx?find=spring+grass


Friday, March 16, 2018

CAS Easter Card

Happy Friday, it's Jeanne posting today.  I'm a big clean and simple (CAS) design fan.  Many of my cards are in that style.  When doing a CAS design I love using dies because they come out so crisp and graphic, keeping everything - clean and simple!  My card this week illustrates that.
These little bunnies from Some Bunny Loves You are adorable and highlighted perfectly by the color offset squares.
Out of white cardstock, I made an A2 side fold card base, then embossed a panel 4 1/4 x 5 1/2 inches and adhered it to the base.  I used this basket weave since I thought it perfect for that "Easter basket" look.
Next I die cut the bunnies from Sahara Sand and three squares each from white, yellow, pink and purple.  I used the third smallest square from the Cross-Stitched squares set.
I used a sponge dauber and Sahara Sand to edge the bunnies.  Then I glued on their little white tails.
For each of the three colored squares, I stacked and glued them, then offset a white square and glued a bunny on top.  Then it was time to glue them to the card front.  It was fairly easy to line them up on this card since the basket weave gave me a natural alignment tool!  A tip when lining up three items - do the top and bottom first then center the one in the middle.
For the sentiment I used a fourth color and die cut the Happy Easter Egg.  I love the playfulness of the font used in this die.
Using paper snips, I cut out the sentiment and adhered it to the front of the card.

Dies used:
http://www.scrappingcottage.com/cottagecutzsomebunnylovesyou.aspx
http://www.scrappingcottage.com/cottagecutzhappyeasteregg.aspx
http://www.scrappingcottage.com/cottagecutzcross-stitchedsquaresetbasics.aspx

Thanks for stopping by today.  Have a fun and creative weekend!


Thursday, March 15, 2018

Bee Happy!

Good Morning Crafty Friends!

It is Pam from Stamper at Heart Blog sharing ideas with you!  Before we get started I wanted to remind you that we are having a sale in our online store!!  So don't miss out!!
Now onto today's project! I am using the new Collection In Stitches.  If you haven't checked out this collection please take a peek it is just adorable!
Designer Steps:
 1.  Cut a white piece of card stock 4  5 1/4 use a hexagon stencil to add the honey comb to the top of the card
 2.  Cut a piece of DP 3 1/2 x 4 and glue to the lower half of the card
 3.  Using the largest die from the Pierced Wide Rectangle Frame Set and cut out of white card stock save the inside piece
 4.  Before you glue the frame to the front of the card add the black and white twine
 5.  Use foam tape on the rectangle frame and pop to the card as shown

 6.  Cut all of the pieces from the Stitched Honey Bees die out of white card stock
 7.  Use copic markers to shade and color the bees and hive.  On the inside retangle stamp bee happy then glue the retangle flat to the center of the frame
 8. Cut the wings out of vellum.  Glue the hive and little bee trails to the card then add the bees and sequins to finish

Cottage Cutz Products


Thanks for stopping by and please remember to stop by our store for the awesome sale!
Blessings
Pam