Sunday, August 20, 2017

Wedding Cake and Butterflies


Happy Sunday CottageCutz fans! It's Janet and it's my turn to share some creative inspiration with you.


Today's project is a card featuring the beautiful new Tiered Wedding Cake die. I had a lot of fun putting it together. It has a lot of small pieces but I found a way to make them easier to manage and color. I share this tip with you in the video and show you how well it works. You may have seen it before but you'll get to see it in action in the video.


The card also features the new Nested Stitched Eyelet Oval Set, the Celebrate Expressions Die, Butterflies, and the Leafy Foliage dies. 


I cut all the pieces in white card stock and used my Spectrum Noir markers and clear Wink of Stella so that each of the die cuts complemented each other as a set.

For full instructions and a look at how it was put together, click on the video link below.


It was great spending a little time with you today. I hope the rest of your weekend is great!

- Janet   
SugarShine Designs

Dies Used In This Project:


Saturday, August 19, 2017

Chapel in the Woods

Hello Scrapping Cottage friends! Thanks for taking the time to stop and visit today. It's Mary Marsh here bringing you the Saturday edition of the Blog.

Hope you have been enjoying all of the beautiful creations that the DT has been showing over these past weeks with the wedding dies. If you haven't seen them, just page back through the Blog for some delightful eye candy.

Today I am using one of the wedding dies, Little Chapel, but I turned it into a chapel in the woods for a Christmas card. So let's get started on how I created my card for today.

Step 1:  As I was thinking about my post for this week, I knew I wanted to do something different with the little chapel die. Then my mind went to Christmas and then to a scene in the woods. I knew I wanted snow and evergreens and also a white card with just a hint of another color.
I pulled out a falling snow embossing folder and started my background.
Step 2: To embellish the snow banks, I used the winter wonderland die for the sledders and the small house, for the pine trees I used the snowglobe winter accessories die and for the smaller trees on the hills I used the winter cabin border (2016 Christmas) die. I snipped these border dies to just use the parts that I wanted in my scene.
Then for my snowy hills, I decided on the jolly snowman die. That had a perfect snowdrift that would work for a hill in my scene. You could also cut your own hills. I covered my hills with glitter.
Step 3: To complete the last of the scene elements, I die cut my little chapel. This is the inspiration die for my card today I sponged some fossilized amber distress ink to give a soft glow to the inside of the church.
Step 4: For the oval frame that surrounds my scene, I used the stitched eyelet die(largest) and also the stitched oval die (2nd largest). I cut one at a time. That works better for me as far as placement. I cut the largest oval first. Then I take the next oval die and place it on that one and run it through my die cut machine. And now you've got your oval frame. It's easy enough.
 
Step 5: With all the elements cut it is now time to start the assembly of my scene. I secured the die cuts with glue dots, multi medium matte and dimensional adhesive. Attached my frame and then the 2 larger pine trees.
Image Panel: 4 1/8" x 5 3/8"
Card Base: 4 1/4" x 5 1/2"
Step 6: I wanted just a touch of color on this all white scene. So I chose to use the Merry Christmas Ribbon (Christmas 2016) die and cut it in red. I snipped off the ribbon part because it was just a bit too large for the corner of my card. Secured this with the multi medium matte. I also did a die inlay technique by placing the Christmas letters back into the die.
 
And, that completes my card for this week. I hope I have given you some inspiration on a way to use a die in a different way. One that was intended for a wedding has now become a part of Christmas.
See you next Saturday.
 
Dies I used to create card:
http://www.scrappingcottage.com/cottagecutzlittlechapelpetites.aspx

http://www.scrappingcottage.com/cottagecutzwinterwonderlandborderelites.aspx

 http://www.scrappingcottage.com/cottagecutzwintercabinborderelites.aspx

http://www.scrappingcottage.com/search.aspx?find=merry+christmas+ribbon


Friday, August 18, 2017

Enjoy the Journey!

It's Jeanne here with Friday's post.  I love stretching my supplies and using them for purposes other than the original one, so today's card uses the Honeymoon Car, but not for a honeymoon!
The card is A2 in size.  My first step was to create the car.  I think the hardest part of this card was deciding what color to make the car! I cut all the car pieces from various colors of cardstock, then I used a pink marker to color in the heart on the license plate.
After assembling the car I decided it needed a windshield since I was not using the honeymooners inside.  To do this, I cut a piece of acetate roughly the size I needed, placed it over the back of the car, then drew a cut line with a sharpie.
I adhered it to the car by using snail adhesive on the back of  the car and laying the acetate on that.
I cut a rectangle from black cardstock using the second largest rectangle from the Nested Wacky Stitched Rectangle set.  To get the map the perfect size for centering, I drew a line using the inside of the rectangle as my template.  And by using the rectangle as a frame, I was able to pick just what I wanted showing on the map.  Wouldn't it be great to choose a map of the destination for someone going on a trip?
I wanted some interest in the background, so I stamped a tone-on-tone wood background on a panel the same size as the front and sponged the edges for a worn look.
I created the compass using various colors of cardstock and then I assembled the card.  The map panel and word are adhered directly to the card.  The car and compass are put on with dimensional foam dots for some depth.

This card was super fun to make and I had a difficult time choosing the word.  "Journey", "Explore", "Discover" or "Memories" would all work equally as well.

I hope I've inspired you to be creative!  See you next week.

Products used:
http://www.scrappingcottage.com/cottagecutzhoneymooncar.aspx
http://www.scrappingcottage.com/cottagecutznestedwackystitchedrectangleset.aspx
http://www.scrappingcottage.com/cottagecutzcompass.aspx
http://www.scrappingcottage.com/cottagecutzexpressionsplusjourneyphrase.aspx


Thursday, August 17, 2017

Honeymoon!

Good Morning Scrapping Cottage Friends!

Hi it is Pam creating with you today! And I am continuing to share dies that are newly released. So today I am featuring two of the dies!

Design Steps:

 1.  Use an A2 black card base and cut a slightly smaller piece of pink card stock then glue to the front.  Cut a piece of DP dotted paper 3 7/8 x 2 and then layer onto black card stock.  Attach the blue ribbon and mount to the card front as shown.  Using the Cottage Cutz Nested Stitched Eyelet Rectangel Set (3rd largest) cut out a white retangle and mount onto black card stock
 2.  Using the Cottage Cutz Honeymoon Car die cut out all of the pieces.  I used pink, silver, blue, black, white and sparkle card stock.  Assemble the car and them pop dot it to the card front as shown below


Cottage Cutz Products


I think this card is such fun especially with the kind of retro 50's looking papers! Hope you can give it a try!

Thanks for stopping by!

Blessings
Pam

Tuesday, August 15, 2017

Happy Wedding

Hi, Janja here!

Today I share with you a wedding card, created with the new Wedding CottageCutz dies.
Usually my cards are in vibrant colors, but this time I decided for natural colors.
Let's see how it is made.


Supplies:
- CottageCutz dies: Wedding Chapel, Wedding Convertible, Rose With Wedding Rings, Love Bow and Arrow, Nested Stitched Scallop Circle Set, Circle Set, Nested Stitched Scallop Rectangle Set, Mail Tag Set
- white card base: 4.1 x 5.4" (9,5 x 12,7 cm), folded
- white cardstock: 4 x 5.2" (10 x 13,2 cm)
- white and kraft cardstock
- Distress ink: Antique Linen, Vintage Photo
- ColorBox pigment frost white

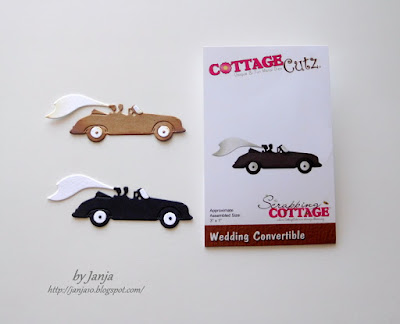
Prepare all the pieces for wedding chapel and wedding convertible. Distress them with Distress inks and glue them together.


Trim white cardstock and cut out circle with the seventh die in a row from the middle of the set.
Also trim a rectangle from kraft cardstock. Create an embossed background with embossing folder.


Shadow kraft cardstock with a sponge and white pigment.


Cut out frame from kraft cardstock with dies: nested stitched circle set (4th die), and circle set (7th die).
Cut the frame and fasten it on a white cardstock.


Now cut out two strips from white and kraft cardstock as shown.


Stamp "Happy Wedding" and add two small hearts.


Completed card.


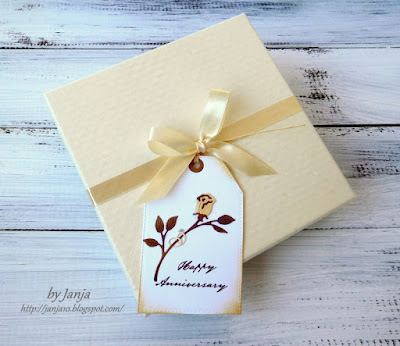
I also prepared a tag for the wedding anniversary that may be added to the gift.


I used rose with wedding rings die and the biggest die from mail tag set.


Thank you for coming over and have a lovely day.