Thursday, August 17, 2017

Honeymoon!

Good Morning Scrapping Cottage Friends!

Hi it is Pam creating with you today! And I am continuing to share dies that are newly released. So today I am featuring two of the dies!

Design Steps:

 1.  Use an A2 black card base and cut a slightly smaller piece of pink card stock then glue to the front.  Cut a piece of DP dotted paper 3 7/8 x 2 and then layer onto black card stock.  Attach the blue ribbon and mount to the card front as shown.  Using the Cottage Cutz Nested Stitched Eyelet Rectangel Set (3rd largest) cut out a white retangle and mount onto black card stock
 2.  Using the Cottage Cutz Honeymoon Car die cut out all of the pieces.  I used pink, silver, blue, black, white and sparkle card stock.  Assemble the car and them pop dot it to the card front as shown below


Cottage Cutz Products


I think this card is such fun especially with the kind of retro 50's looking papers! Hope you can give it a try!

Thanks for stopping by!

Blessings
Pam

Tuesday, August 15, 2017

Happy Wedding

Hi, Janja here!

Today I share with you a wedding card, created with the new Wedding CottageCutz dies.
Usually my cards are in vibrant colors, but this time I decided for natural colors.
Let's see how it is made.


Supplies:
- CottageCutz dies: Wedding Chapel, Wedding Convertible, Rose With Wedding Rings, Love Bow and Arrow, Nested Stitched Scallop Circle Set, Circle Set, Nested Stitched Scallop Rectangle Set, Mail Tag Set
- white card base: 4.1 x 5.4" (9,5 x 12,7 cm), folded
- white cardstock: 4 x 5.2" (10 x 13,2 cm)
- white and kraft cardstock
- Distress ink: Antique Linen, Vintage Photo
- ColorBox pigment frost white

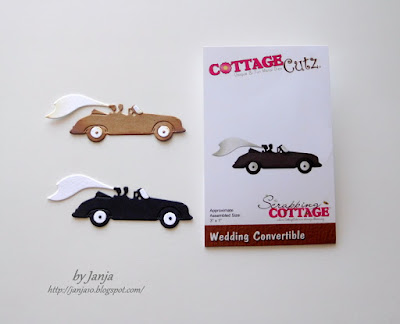
Prepare all the pieces for wedding chapel and wedding convertible. Distress them with Distress inks and glue them together.


Trim white cardstock and cut out circle with the seventh die in a row from the middle of the set.
Also trim a rectangle from kraft cardstock. Create an embossed background with embossing folder.


Shadow kraft cardstock with a sponge and white pigment.


Cut out frame from kraft cardstock with dies: nested stitched circle set (4th die), and circle set (7th die).
Cut the frame and fasten it on a white cardstock.


Now cut out two strips from white and kraft cardstock as shown.


Stamp "Happy Wedding" and add two small hearts.


Completed card.


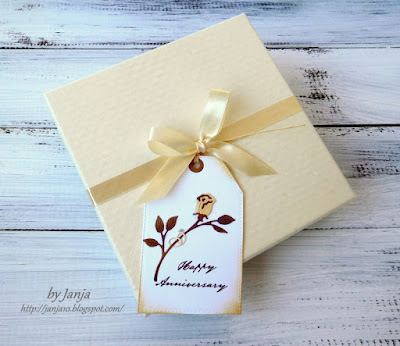
I also prepared a tag for the wedding anniversary that may be added to the gift.


I used rose with wedding rings die and the biggest die from mail tag set.


Thank you for coming over and have a lovely day. 


Monday, August 14, 2017

Going to the Chapel

Hi, Lois here with a simple card today.  I'm  still playing with the new dies that CottageCutz has recently released.  You can find them on the CottageCutz website.  They are a series of wedding dies and a series of nested shapes.  I have another wedding card today, which uses dies from both series.


To begin the card, I cut a piece of heavyweight white cardstock 5 1/2" x 8 1/2, a piece of Glittery Pink cardstock 4" x 5 1/4", and a piece of shimmer white cardstock 3 7/8" x 5 1/8".


Then, using several CottageCutz dies, I cut the various die-cut pieces from shimmer white, pink glitter, and black glitter cardstock.


Before constructing my card, I embossed the shimmer white panel with a swirly embossing folder.


I added added small foam pop dots to the back of the carriage . . . 


. . . and ran the two small black die-cuts through my Xyron X sticker maker.


I then constructed my card and added a few sequins which matched the color of the carriage.


CottageCutz dies used on my card are:

http://www.scrappingcottage.com/cottagecutznestedscallopovalset.aspx

http://www.scrappingcottage.com/cottagecutzweddinghorseandcarriageelites.aspx

http://www.scrappingcottage.com/cottagecutzlittlechapelpetites.aspx

http://www.scrappingcottage.com/cottagecutzlovebirdbranch.aspx

Sunday, August 13, 2017

Wedding Accordion

Hi!

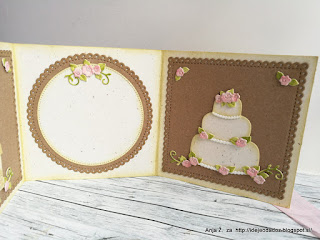
It's Anja here. Today I'm continuing the wedding theme. This time I made an accordion card in which you can write your good wishes for the bride and groom. But I could also be used as a wedding invitation. I think the chapel and the cake would be perfect to use with ceremony and reception information. 


For this card I used:
- Distress Inks (Antique Linen, Spun Sugar, Shabby Shutters, Peeled Paint),
- craft card stock (light and dark),
- ribbon,
- paper glue,
- double sided adhesive tape. 

I started with cutting the paper. I cut 30x10 cm piece from light craft paper. I scored it at 10 and 20 cm. I put some Distress ink around the edges. 


Then I adhere the ribbon the way it's shown on pictures below. 


When I had the card base I die cut all the other pieces, colored them with Distress inks and adhere them together. 


And this is the result.


Thank you for stopping by and see you again soon. 

Have a great Sunday.
Anja Z.


Cottage Cutz used in this project: