Sunday, July 02, 2017

Under the Sea Life

Hi!

It's Anja here and I have a summer card for you today. Summer has officially started and I can't wait to go to the beach, soak up the sun and get my feet wet. But for now a sea scene will have to do.


For this card I used:
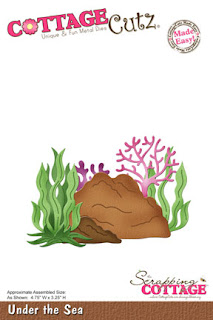
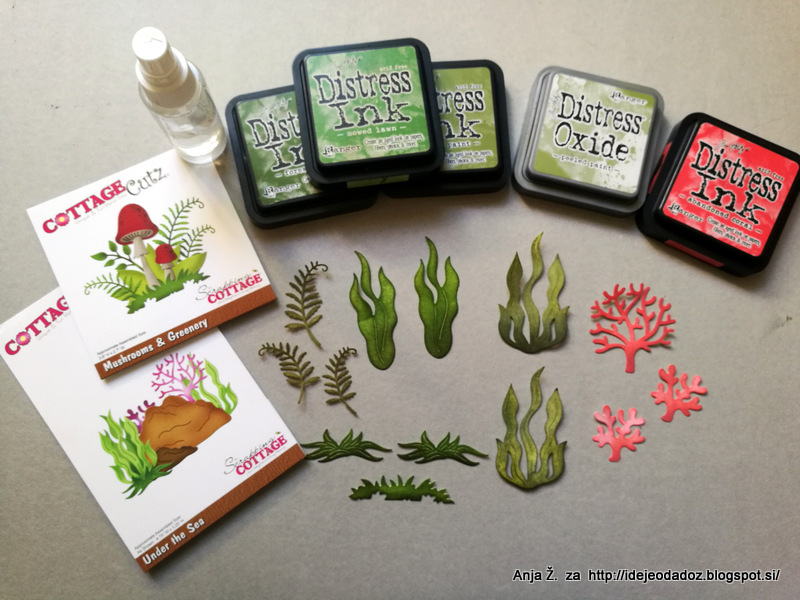
- Cottage Cutz dies (Under the Sea, Anchor, Happy Fish 1, Crab, Mushrooms & Greenery),
- Distress Inks (Broken China, Stormy Sky, Faded Jeans, Chipped Sapphire, Cracked Pistachio, Mowed Lawn, Forest Moss, Peeled Paint; Abandoned Coral, Barn Door, Fired Brick, Black Soot, Scattered Straw, Wild Honey, Spiced Marmalade),
- Distress Oxides (Vintage Photo, Walnut Stain, Peeled Paint),
- white Hero Arts pigment,
- white card base (21 x 10,5 cm),
- watercolor paper (20,7 x 10,2 cm),
- Ranger Multi medium Matte,
- Glossy Accents Glue,
- white and black pen,
- brown acrylic paint,
- brown foam,
- cinnamon and nutmeg mix,
- beach sand,
Wink of Stella glitter brush pen,
- white string,
- paper glue. 

First I made the background. I used watercolor paper and blended different shades of blue Distress Inks.


I started with light colors and added darker colors in the end. I blended the shades with Cracked Pistachio. I finished it off with a few drops of water and dried it with heat gun.


Then I die cut and colored all the greenery and creatures.


For the anchor I used a technique I learned on one of Pete Hughes's classes. I wanted the anchor to look old, like it under the sea for quite some time. I painted it with brown acrylic paint and before it dried I sprinkled cinnamon and nutmeg all over it. It gives it a rusty edge. I die cut additional anchor from foam to add a bit of dimension.


Then I glued all the pieces to the card. I put a generous amount of Multi medium matte at the bottom of the card and sprinkled it with beach sand to make it look more realistic. Then I added a few greenery pieces on it. I let it dry then.


And for the final touch I added some glitter on the fish, using Wink of Stella brush pen and some bubbles with Glossy Accents.


And this is how I made my under the sea scene.


Hope you like my card. I'm wishing you a fun filled Sunday :)

Take care,
Anja Z.


Saturday, July 01, 2017

~ Precious Little One ~

Hello Scrapping Cottage friends! Thanks for taking the time to stop and visit today. It's Mary Marsh here bringing you the Saturday edition of the Blog.

Hope you are continuing to enjoy all the different cards from the DT using the new Expressions Plus word dies. The team has shown some really creative ways to use these word dies with your existing collection of dies. With 35 different word phrases, there is so much you can do with them in your own card making.

I have been showing you over the past several weeks how to combine word die phrases with a stamped sentiment. Check out my cards here, here, here here and here.  I am continuing with this series today as well.

Today I wanted to create a baby card and use the Baby Koala w/Blanket die. I thought the Precious Phrase would work nicely along with a baby sentiment. So let's get started with some details on how I created my card.

Step 1: I started my card this week with a sketch. I liked this one because it's a square card and I thought it would fit the Koala Bear well.
Step 2: Once the layout was decided on, I started figuring out my square card base and the additional layers. I decided to make a 4 3/4" square card. Then I picked my card colors. For the center squares I was able to use the stitched square & square set dies. I used the 2nd largest of each set.

Sugarplum Card Base: 4 3/4" square
Vanilla Layer: 4 1/2" square
Green Striped Patterned Paper: 4 3/8" square
Yellow Center Square Layer: 3 1/8" square
Vanilla Center Square Layer: 3" square
Step 3: I cut the Koala Bear in a medium and dark brown cardstocks. Decided to use a yellow for the blanket. The ears and tummy are cut in vanilla and I shade them with cocoa ink.
Step 4: Started some partial card assembly. I hadn't cut the oval or the rectangle layers yet and I needed to determine how large to make those.
Step 5: Placed my Precious Phrase in this step. This helped in the placement of the center square. The sketch has everything evened off. I moved my image panels down slightly to accommodate the phrase.
Step 6: I decided to use the 4th largest oval from the Oval set. The Koala Bear fit nicely in that size oval.
The rectangle panel underneath the oval is cut at 1" x 3 3/4". I used a hearts embossing folder on this panel. These were both cut in the sugarplum cardstock.
The green flag is 5/8" x 4 3/8" and I cut in a wasabi green shade that matched the patterned paper.
Step 7: Before I assembled all the center layers, I stamped my sentiment. It is a bit large and I wanted to make sure everything would fit. It also had more words than I wanted to use.  So I used my MISTI and taped off the words "for a special". I inked up just "Little One".
 
 Step 8:  Almost finished. I adhered the image to the oval panel and then attached it to the square sentiment panel.  
Step 9: Assembled this panel to the card base to complete my project. I used a couple of hearts in the sugarplum shade to finish it off. There is such detail in he CottageCutz dies. Here is a close-up of the Koala Bear. Love the font on these new phrase dies as well.
I hope I have given you some inspiration this week. If you need a baby card this bear is just too sweet. And, by changing the color of the blanket you could make it for a boy or girl. Well, that's it for me for this week. See you next Saturday.
 
Dies I used to create card:
http://www.scrappingcottage.com/cottagecutzbabykoalawblanket.aspx
http://www.scrappingcottage.com/cottagecutzexpressionspluspreciousphrase.aspx
http://www.scrappingcottage.com/cottagecutzovalsetbasics.aspx

http://www.scrappingcottage.com/cottagecutzstitchedsquaresetbasics.aspx
http://www.scrappingcottage.com/cottagecutzsquaresetbasics.aspx


Thursday, June 29, 2017

Beautiful Sea!

Good Morning!

It is Pam sharing with you today! I hope you are having a fantastic summer.  I live in the Hilton Head area so we have a good number of tourist coming to visit.  And the biggest draw is the beautiful Atlantic Ocean!  So I thought I would do an ocean themed card inspired by our beautiful sea!


Here are the design steps:

1.  Use inks on watercolor paper direct to paper then use water and a stipple brush to move the ink around on the paper
2.  Distress the edges of the paper and use distress ink on the edges
3.  Use a stencil and translucent embossing paste to create the bubbles
4.  Glue Prills to the bottom of the card to create the sand
 5.  Use Kraft card stock and cut out the Cottage Cutz Sand Dollar and Sea Horse
 6.  Ink the Sand Dollar and Sea Horse then splatter with a dark brown ink

7.  Cut seaweed using the Under the Sea die and ink the seaweed.  Attach a piece of cheese cloth that has been lightly inked to the center of the card. Then attach all of the dies.  Last splatter the entire card with dark brown ink


I hope you take a walk outside and let nature inspire you!

Blessings
Pam


Tuesday, June 27, 2017

Mountain lodge

Hi, Janja here!

If you are an avid hiker, then the season to visit hills and mountains is here.
So today one card for lovers of hiking and mountaineering.


Supplies:
- CottageCutz dies: Mountain Lodge, Rustic Sign & Trees, Moose & Trees, Birch Trees & Deer
- white card base: 6 x 6" (15,2 x 15,2 cm), folded
- patterned paper: 5.5 x 5.5" (14 x 14 cm)
- white and colored cardstock
- Distress ink pads: Peeled Paint, Aged Mahogany, Vintage Photo, Hickory Smoke
- Distress oxide pads: Peeled Paint, Vintage Photo

Trim white cardstock for the card base and patterned paper for background. With scissors cut out green paper below.


From colored cardstock cut out all pieces with dies that we need for the mountain lodge. Also cut out the largest element of lodge from fun foam. Distress all pieces with Distress ink pads and assemble them into a whole.


Also prepare some spruces, birch trees and deer cutouts.


When we have everything cut out, start by assembling the card.
First paste green paper on blue background. Directly on the background fasten spruces and birch trees.
Fix the mountain lodge and remaining two spruces with adhesive foam tape.
Finally, we add a deer.


I hope you've enjoyed this project. 
Thank you for coming over and have a lovely day.