Thursday, May 11, 2017

Baby Monkey!

Good Morning Scrapping Cottage Friends!

It is Pam creating with you on this beautiful Thursday!  I just thought I would share another use for this cute little new release Baby Monkey die!  I always need cards for enclosing gift cards. So I found this really easy design on Youtube.  I altered some of the measurements so that it would fit into a A2 envelope.   It seems now a days that a gift card is all anyone wants especially my older nieces and nephews.  I must admit it is much easier then trying to please them but it does take some of the fun out of gift searching!


Designer steps:

1. Use a light brown card stock base 4 1/4 x 11 and score at 4 1/2, 5 1/2 and 6 1/2.  Use your bone folder and crease the card as shown.


2. Flip the card over and put a strip of strong tape as shown then press together.  This will form the card holder.

3. Use the second to the largest Pierced Rectangle die which is the same wideth as a gift card and make the cut through the mountain fold.


4. And now it is time to decorate the  card!  Cut a white 4 1/4 x 4 1/4 piece of white card stock and emboss it with cupcakes.  Glue to the front of the card


5. Using the Baby Monkey with Balloons die cut all the pieces of the monkey and balloons.  Use brown, tan, and black for the monkey.  Before you assemble the monkey sponge the edges for more depth
6. Glue all the pieces together adding small black pearls for the eyes

7. Cut the balloons using designer paper and the strings out of black card stock
8. Cut a strip of light brown card stock 11 x 1 inches this will make a band around your card to keep the gift card inside it good and safe.   Just take your band and fit it around your card and make a tiny pencil mark as to where you will place the tape

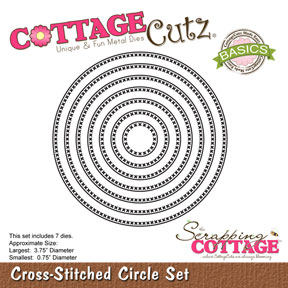
9. Cut a Cross Stitched Circle out of designer paper and glue the monkey and balloons to the circle.  Then attach the circle to the front of the band set aside

10. On the inside of the card cut a Double Stitched Rectangle and glue to the center of the inside of the card
11. Using designer paper cut another set of balloons, string and the word Celebrate glue all to the inside of the card


Here are the Cottage Cutz Products used:


I hope you enjoyed this project and that it will inspire you to make a card with an enclosed gift card!

Blessings and thanks for stopping by!
Pam


Wednesday, May 10, 2017

CottageCutz Baby Lamb on Moom

Hello and welcome to the Scrapping Cottage Blog!  I am Beverly Polen from Guneaux Designs, and today I am a guest designer.  I have for you a darling card that features the CottageCutz Baby Lamb on Moon Die.  I think the baby lamb is so adorable!


The card design is a Z-Fold with ovals cut out from the first and second sections.  You can see through the ovals to the main element on the back section of the card, which is the CottageCutz Baby Lamb on the Moon.  I have not seen before a Z-Fold card with the first two sections cut out for windows to see through to the main image on the back section.  If there is no such design in the crafting world, I guess I just created a new Z-Fold card design.   LOL!

To create my Z-Fold card, I cut from white card stock the pieces from the lovely CottageCutz Baby Lamb on Moon Die.  


I colored the pieces with Copic Sketch Markers, adding a touch of gray to the moon.  Afterwards, I glued the pieces together.


Using the second and third to the largest CottageCutz Double-Stitched Oval Dies, I cut out an oval and frame from white card stock.  I later colored the frame with a yellow copic marker.  I also cut a second frame with the largest and second to the largest dies and colored it yellow. 


I colored the oval with two of the new Tim Holtz Oxide Ink Pads (i.e., faded jeans and broken china). I used the lighter blue for the center of the oval for the moon's glow.


Then, I cut a 10-13/16" x 5-1/2" piece of white card stock and, on the 10-13/16" side, scored at the 3-5/8" and 7-1/4" measurements.  The 3-5/8" score line is a mountain fold and the 7-1/4" score line is a valley fold.  At this point, I did not fold the card stock on the score lines until I finished additional steps.  


I wanted to create the appearance of a galaxy; therefore, I sponged onto the card stock three of the Tim Holtz Oxide Inks (i.e., fossilized amber, faded jeans, and broken china) and spritzed it lightly with water.  After drying, I used a toothbrush and diluted white acrylic paint to splatter paint onto the colored card stock.


After that dried, I turned the card stock over and colored the center section with the same inks, spritzed with water, and splattered with acrylic paint.  When the card is finished, this section will be the inside center fold.


Before folding on the score lines, I placed the second largest Double-Stitched Oval Die on the first section of the card, and the third largest die on the center section, centering them as much as possible. I ran the card stock and dies through my die cutting machine.


I then folded the card on the score lines, and the following photo shows the result.


Next, I assembled the card by attaching the baby lamb and moon onto the oval previously colored and adhered it to the last section of the card.  I used an old star stamp to stamp, emboss, fussy cut, and add to this piece.


Then I added the largest yellow frame to the first section of the card and the smaller frame to the inside center section. 


When the card is closed, the back middle section that was inked will show as the second section on the card.


I did not add other embellishments to the card as I did not want to distract from the "galaxy" effect on the card.  A sentiment will be added when I know who is the recipient.

I hope you enjoy this card and take time to browse the recently released baby and script design dies! The script dies are 25% off for a limited time!  Have a blessed day!

I used these two CottageCutz dies for the card:


Tuesday, May 09, 2017

Baby Dolls

Hi, Janja here!

Today one birthday card for all the girls who like to play with dolls.


Supplies:
- CottageCutz dies: Baby Dolls, Baby Doll Girl Clothes, Double-Stitched Rectangle set, Rectangle set
- white scalloped card base: 5.3 x 5.3" (13,5 x 13,5 cm), folded
- patterned paper: 4.7 x 4.7" (12 x 12 cm)
- white and colored cardstock
- Distress inks: Tattered Rose, Vintage Photo, Hickory Smoke, Mowed Lawn

Cut out all the pieces that we need to put together four dolls. Distress the edges with Distress inks and assemble the dolls.


Now it's time for the most fun part - cutting out the clothes. This is the opportunity to use the remains of papers. 


I was so excited, that I cut out clothes for entire wardrobe :). 


Trim bright patterned paper two times. On the lower part create the lawn with a stencil and texture paste. Color it with the green Distress ink. Leave white the second sheet of paper. 
Cut out two rectangles with the largest die of both sets, and glue them together. Stamp two various sentiments. 


Place both patterned paper with adhesive tape on the card base. In the inside of the card add a larger rectangle and attach on it two little dolls.


Assemble the same front side of the card.

For more fun, we can finally add one or two dolls, and a variety of clothes. The girls can later dress up dolls themselves. 


 I hope you like it. Thank you for coming over and have a great day.


Monday, May 08, 2017

Noah's Ark Bendi Card

Hi, Lois here today with a really fun card.  I recently saw a U-Tube video on a variation of a Bendi Card, with just a little different look.  Instead of the two narrow panels crossing each other, they just met in the middle.  I was intrigued by this variation and decided to try to make one myself.  I used one of the new baby dies from CottageCutz called Noah's Ark.


Supplies used on this card:

White cardstock - 4 1/4" x 11", scored at 5 1/2"
Light blue cardstock - 4" x 5 3/8"
Aqua cardstock - 4" x 5 3/8", two strips 2 1/8" x 4 3/4", two panels 4 1/4" x 5 1/2"
Patterned paper - 4" x 5 1/4"
Pieces of brown, gray, and white cardstock for the die-cuts
Wave border punch
Various inks and markers
Sponge daubers
White gel pen
Foam pop dots
2 small washers
CottageCutz dies - Noah's Ark, Congratulations

To begin my card I cut all the cardstock I would need.


Score the white piece in half and glue the light blue cardstock to the upper section (sky) and the 4" x 5 3/8" aqua piece (ocean) to the lower section.  Then using the wave punch, punch a border on the two 2 1/8" x 4 3/4" strips and score them at 1/2" and 4 1/4".   Sponge along the bottom with Ranger Distress Salty Ocean ink and run a white gel pen along each of the waves.


Adhere some Scor-Tape on the 1/2" sections and adhere to the upper section of the card, just above the score line to allow some leeway for the fold.   Cut two strips from one of the 4 1/4" x 5 1/2" pieces of aqua cardstock and punch along the top, forming the waves on the background.  Sponge as above and apply white gel pen to the waves.   Trim to 4" wide.  Glue to the background.  Using scissors, cut at the front score lines on each of the "wave" strips -- down halfway from the top on one of them and up halfway from the bottom on the other.  This will allow the two panels to lock into each other.   Here is the completed card base.


Now the fun begins.  Die cut the pieces of the ark.  I cut the ark itself, as well as the monkey, the owl, and the cow, from brown and/or tan cardstock; the hippo and elephant from gray cardstock; the wave from aqua cardstock; and the rest from white.  Then I colored the various pieces with either distress ink or Copic markers.


This part was actually the hardest -- constructing each of the animals and placing them in the ark.


Next, cut the sentiment from brown cardstock.  To make it easier to adhere to the card, I ran a strip of brown cardstock through my Xyron X sticker maker and removed the protective clear sheet before I ran the die through my die-cutting machine. 


To finish off the outside of the card, I adhered the other 4 1/4" x 5 1/2" piece of aqua cardstock to the back of the upper section and then applied the patterned paper.   This hides the two tabs on the back from the "wave" pieces. As this is actually the back of the card, I didn't think it was necessary to put any kind of sentiment or design on it.


When I put the card together, the back was rather heavy and tipped the card back.  After some thought, I found two flat washers, which I adhered to the inside bottom of the two "wave" panels.  This allowed for a balance in weight and allowed the card to stand upright.


I then adhered the sentiment on the lower section in front of the "waves," and I was done.


This was such a fun card to make.

CottageCutz dies used were:


http://www.scrappingcottage.com/cottagecutznoahsark.aspx


http://www.scrappingcottage.com/search.aspx?find=congratulations