Tuesday, May 09, 2017

Baby Dolls

Hi, Janja here!

Today one birthday card for all the girls who like to play with dolls.


Supplies:
- CottageCutz dies: Baby Dolls, Baby Doll Girl Clothes, Double-Stitched Rectangle set, Rectangle set
- white scalloped card base: 5.3 x 5.3" (13,5 x 13,5 cm), folded
- patterned paper: 4.7 x 4.7" (12 x 12 cm)
- white and colored cardstock
- Distress inks: Tattered Rose, Vintage Photo, Hickory Smoke, Mowed Lawn

Cut out all the pieces that we need to put together four dolls. Distress the edges with Distress inks and assemble the dolls.


Now it's time for the most fun part - cutting out the clothes. This is the opportunity to use the remains of papers. 


I was so excited, that I cut out clothes for entire wardrobe :). 


Trim bright patterned paper two times. On the lower part create the lawn with a stencil and texture paste. Color it with the green Distress ink. Leave white the second sheet of paper. 
Cut out two rectangles with the largest die of both sets, and glue them together. Stamp two various sentiments. 


Place both patterned paper with adhesive tape on the card base. In the inside of the card add a larger rectangle and attach on it two little dolls.


Assemble the same front side of the card.

For more fun, we can finally add one or two dolls, and a variety of clothes. The girls can later dress up dolls themselves. 


 I hope you like it. Thank you for coming over and have a great day.


Monday, May 08, 2017

Noah's Ark Bendi Card

Hi, Lois here today with a really fun card.  I recently saw a U-Tube video on a variation of a Bendi Card, with just a little different look.  Instead of the two narrow panels crossing each other, they just met in the middle.  I was intrigued by this variation and decided to try to make one myself.  I used one of the new baby dies from CottageCutz called Noah's Ark.


Supplies used on this card:

White cardstock - 4 1/4" x 11", scored at 5 1/2"
Light blue cardstock - 4" x 5 3/8"
Aqua cardstock - 4" x 5 3/8", two strips 2 1/8" x 4 3/4", two panels 4 1/4" x 5 1/2"
Patterned paper - 4" x 5 1/4"
Pieces of brown, gray, and white cardstock for the die-cuts
Wave border punch
Various inks and markers
Sponge daubers
White gel pen
Foam pop dots
2 small washers
CottageCutz dies - Noah's Ark, Congratulations

To begin my card I cut all the cardstock I would need.


Score the white piece in half and glue the light blue cardstock to the upper section (sky) and the 4" x 5 3/8" aqua piece (ocean) to the lower section.  Then using the wave punch, punch a border on the two 2 1/8" x 4 3/4" strips and score them at 1/2" and 4 1/4".   Sponge along the bottom with Ranger Distress Salty Ocean ink and run a white gel pen along each of the waves.


Adhere some Scor-Tape on the 1/2" sections and adhere to the upper section of the card, just above the score line to allow some leeway for the fold.   Cut two strips from one of the 4 1/4" x 5 1/2" pieces of aqua cardstock and punch along the top, forming the waves on the background.  Sponge as above and apply white gel pen to the waves.   Trim to 4" wide.  Glue to the background.  Using scissors, cut at the front score lines on each of the "wave" strips -- down halfway from the top on one of them and up halfway from the bottom on the other.  This will allow the two panels to lock into each other.   Here is the completed card base.


Now the fun begins.  Die cut the pieces of the ark.  I cut the ark itself, as well as the monkey, the owl, and the cow, from brown and/or tan cardstock; the hippo and elephant from gray cardstock; the wave from aqua cardstock; and the rest from white.  Then I colored the various pieces with either distress ink or Copic markers.


This part was actually the hardest -- constructing each of the animals and placing them in the ark.


Next, cut the sentiment from brown cardstock.  To make it easier to adhere to the card, I ran a strip of brown cardstock through my Xyron X sticker maker and removed the protective clear sheet before I ran the die through my die-cutting machine. 


To finish off the outside of the card, I adhered the other 4 1/4" x 5 1/2" piece of aqua cardstock to the back of the upper section and then applied the patterned paper.   This hides the two tabs on the back from the "wave" pieces. As this is actually the back of the card, I didn't think it was necessary to put any kind of sentiment or design on it.


When I put the card together, the back was rather heavy and tipped the card back.  After some thought, I found two flat washers, which I adhered to the inside bottom of the two "wave" panels.  This allowed for a balance in weight and allowed the card to stand upright.


I then adhered the sentiment on the lower section in front of the "waves," and I was done.


This was such a fun card to make.

CottageCutz dies used were:


http://www.scrappingcottage.com/cottagecutznoahsark.aspx


http://www.scrappingcottage.com/search.aspx?find=congratulations

Sunday, May 07, 2017

Mother's Day Cards

Hi!

It's Anja here. Mother's day is approaching and I made two cards using new baby dolls dies. These were my first picks of the baby release because you can combine them in so many ways. And these is also my first post using new Distress Oxides.


Here is the material I used:
- Cottage Cutz Dies (Baby Dolls, Baby Doll Girl Clothes, Baby Doll Boy Clothes, Cupcake Mini, Duck Pull Toy Mini, Spring Bunny w/ Flowers, Lighthouse w/Clouds),
- Distress Inks (Tattered Rose, Vintage Photo, Brushed Corduroy, Peeled Paint, Broken China, Stormy Sky, Faded Jeans, Worn Lipstick),
- Distress Oxides (Faded Jeans, Broken China, Fossilized Amber, Spiced Marmalade, Worn Lipstick, Fired Brick, Wilted Violet, Peeled Pint, Vintage Photo, Walnut Stain),
- white card base (15 x 10,5 cm),
- watercolor paper (9 x 13,5 cm),
- violet and blue card stock (9,4 x 13,9 cm),
- black pen,
- glue.

I started with die cutting baby clothes and coloring them with Distress Oxides. I was very happy to see how easy it is to color with it.


Then I die cut all the body parts and colored them with Distress Inks. I found it easier to glue the clothes first and then add the hands, legs and heads. I finished the faces with black pen and added a little blush to the faces.


For the background I used watercolor paper and some colored card stock.


I smooshed Distress Inks on the watercolor paper using water spritzer and some acetate foil.


I also made some accessories for the boy and girl. The new dies combine nicely with some dies I already had.


And I die cut some additional background elements. I colored the grass with Distress Ink and the duck's wheels with Oxide (they are both colored with Peeled Paint). It's nice to see the difference.


Then I glued all the pieces to the card base and added the printed sentiment.


Happy and sunny Sunday to all.
Anja Z.

Cottage Cutz dies I used:


Saturday, May 06, 2017

Dinosaur Birthday Kisses

Hello Scrapping Cottage friends! Thanks for taking the time to stop and visit today. It's Mary Marsh here bringing you the Saturday edition of the Blog.

The new baby dies release is just too cute and I just can't stop making cards using these sweet dies (LOL)! And with 42 different designs, I have had lots of ideas.  So today for your viewing pleasure, I am showcasing a couple of the new baby dino dies using the Brontosaurus and T-Rex. I needed a child's birthday card and these dino's work perfectly. What little one doesn't love dinosaur's? And that's both boys and girls.

So let's get started with some details on what I did this week. I already knew I was making a birthday card so I just needed my layout. So when I saw the sketch #643 on Splitcoaststampers this week, I knew it would work for a little dinosaur scene.

Plum Card Base: 4 1/2 " x 5 3/4"
White Image Panel: 4 1/4" x 5 1/2"
I used a hinge technique to get this larger size card base. Here is a link to some instructions I provided previously on how I do this with 8 1/2" x 11" cardstock.

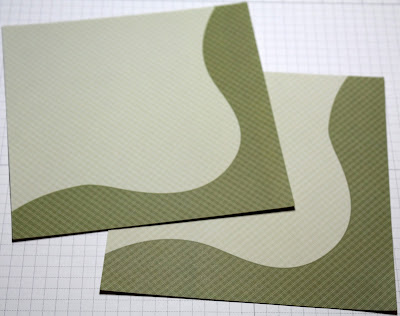
Step 1: Once I looked at this sketch, I thought I would make rolling hills as the spot to place my dino's. I was going to cut the hills but after looking through my patterned paper, I found paper that already had the shape of the hills. I just needed to measure and fussy cut. The paper even had a little pattern. It's the look I was after.

Step 2: Once the hills were cut I adhered to white card base with dimensional adhesive. I used a cloud template and sponged the top of the white cardstock with tumbled glass distress ink. The clouds are covering layer 1 of this sketch.

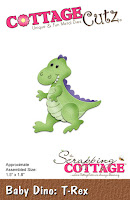
Step 3: I wanted 3 dino's in this scene so I cut one (1) T-Rex and two (2) from the Brontosaurus dies. On the Brontosaurus I used a peach card stock + peach patterned paper and yellow cardstock and + yellow patterned paper.
On the T-Rex I used plum and olive cardstocks + plum patterned paper. I like the variegated colors on the pattern papers I chose. It adds some interest to the dinosaurs.

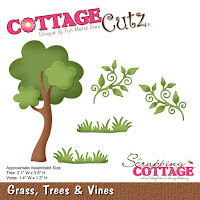
I also used the CottageCutz grass, tree and vines die for another element to this card.


Step 4: Now that all the card elements are done, I needed to think about my sentiment and the placement of it. I have a stamp set with individual sentiment words so I chose birthday & kisses. Since they are 2 separate stamps, I stamped in black ink on plum cardstock and cut them into 2 labels. Here is a card close-up.

Well, that's my card for this week. I hope I have given you some an idea for using these Baby dino stamps. Have a great weekend, Blogger friends and see you back here next time........
Dies I used to create card:
http://www.scrappingcottage.com/cottagecutzbabydino-brontosaurus.aspx

http://www.scrappingcottage.com/cottagecutzbabydino-t-rex.aspx

http://www.scrappingcottage.com/cottagecutzgrasstreeandvines.aspx