Friday, April 28, 2017

HAPPY DAYS WITH BABY ANIMALS

Hello Folks !!!

Happy Friday !! It's Anita here with the new release baby dies. CottageCutz has released a whole new collection of adorable baby theme dies and I am sure you will love them all. you can see them here.

I had made two cards with these cute dies last week. If you missed that post, do check it out here.

I loved the way this card has turned out. I am sure all kids will adore this card.


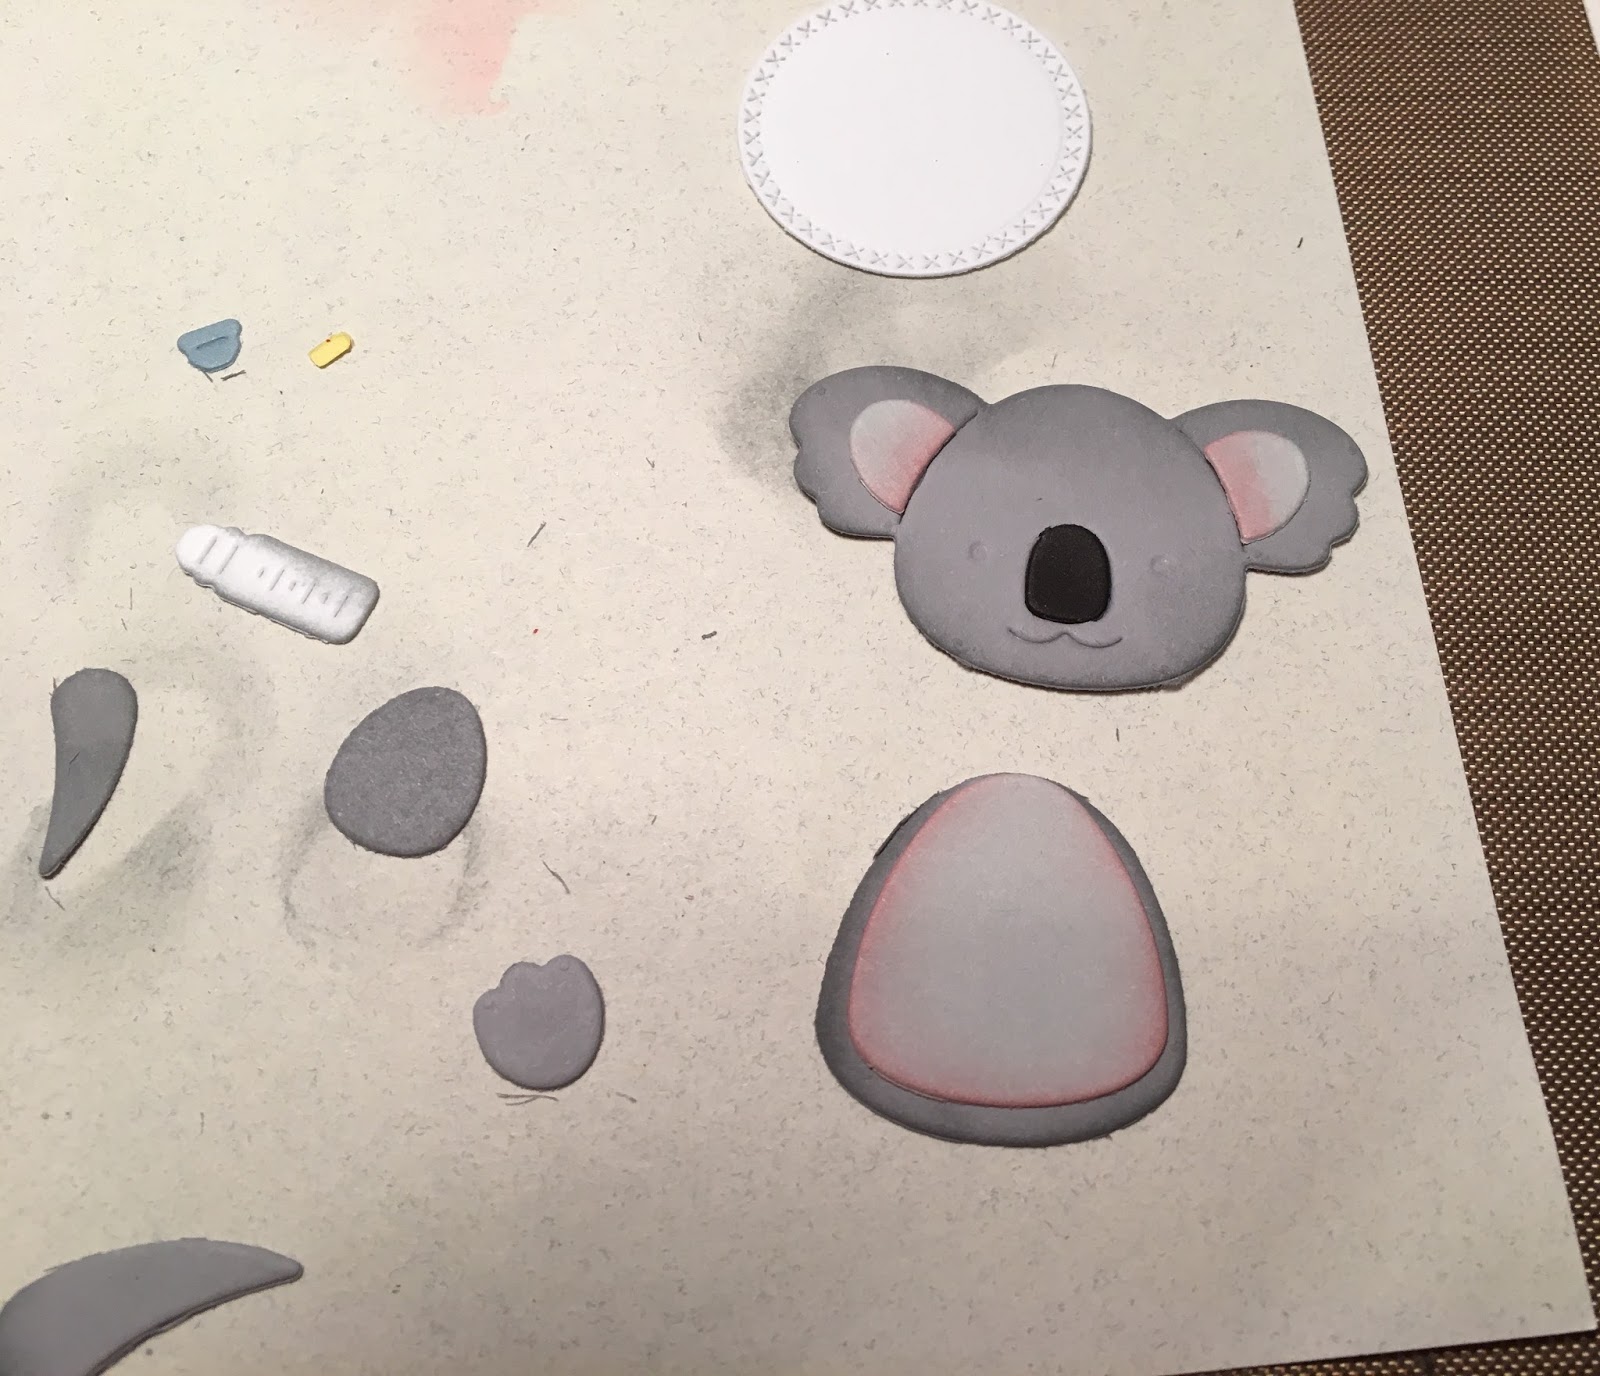
To make this card, follow the instructions below.
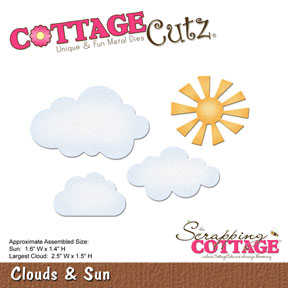
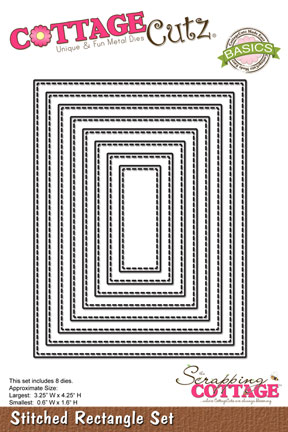
1. Cut a frame with Stitched Rectangle die using the largest die and small die.
2. Adhere it on a card stock a little larger than the frame.
3. Cut clouds, sun , grass baby animals and balloons  from card stock .
4. Colour them with copic markers.
5. Arrange the die cuts as shown.
6. Assemble the animals pieces together. For this , follow the picture given on the package.
7. Stamp a flower and colour it.
7. Add the sentiment.

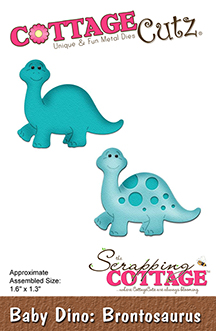
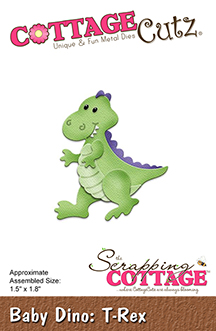
CottageCutz dies used.


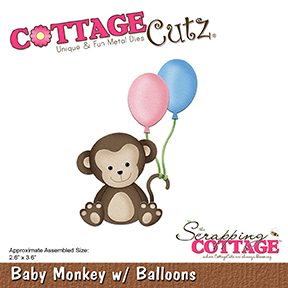
Used the balloons from this die.
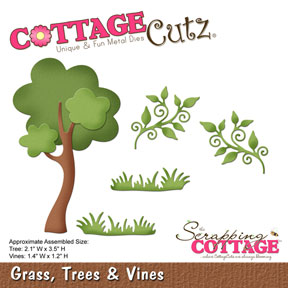

Grass 


sentiment

Do check the store for all the amazing collection. I hope you liked my card.


Thursday, April 27, 2017

Koala Baby!

Good Morning Scrapping Cottage Friends!!

It is Pam sharing with you today.  Spring always brings new life!  It is so much fun to see all of the new baby birds all around our neighborhood.  Plus all of the other new born animals such as the fawn, fox and squirrels!  That is what inspired me in doing this sweet card. I am using one of Cottage Cutz new baby die sets called Baby Koala with Blanket.


Here are my design steps to make this adorable little keepsake!
 1. Use the large Double-Stitched Rectangle Die to cut out the blue designer paper and then cut a slightly larger piece of piece of pink card stock to mat it. Next cut out pink designer paper using the second largest circle from the Cross-Stitched Circle set.  Using white card stock cut out the doily using Tea Time Doily.
 2.  Glue down the pink mat in the center then adhere the blue designer paper on top
 3. Slightly offset the doily and glue down add the pink designer paper circle to the top as shown
 4.  Cut out all the pieces of the Baby Koala with Blanket.  Use dark gray, light gray, black, white, yellow and blue card stock for the pieces.
 5. Using gray, blue and pink ink lightly sponge around the edge of the Koala bear pieces, the blanket and bottle
 6.  Use the second to the smallest Cross-Stitched Circle die and cut a white piece of card stock then stamp on the sentiment
 7.  Assemble all of the pieces by using a narrow tip fast drying glue.  Use small black pearls for the Koala's eyes
 8. Pop up the Koala Bear and the bottle onto the pink designer paper.  Pop up the sentiment on the upper right hand corner add a star button and bow

Cottage Cutz Products Used:


Thank you for stopping by today and I hope you decide to make a new mom very happy with one of these darling new release baby dies!

Blessings

Pam

Wednesday, April 26, 2017

Baby Clothesline

Hello, friends!  So glad you stopped in to visit Scrapping Cottage today!  It is Bev Polen from Guneaux Designs, and I am a guest designer today for Scrapping Cottage.  I have for you a baby card that features one of the new baby dies from the recent release.  If you have yet to check out the baby dies, you can find several adorable ones here.

My card features one of the new baby dies, the CottageCutz Baby Clothesline Die.


To create the card, I used several other CottageCutz dies as well, as you will see below.  To make the card, follow these steps:

Step 1.  Cut out the clothesline pieces and attach them together.  The assembled clothesline is approximately 4-3/4" long.


Step 2.  Use the CottageCutz Lighthouse With Clouds Die to cut out some clouds.


Step 3.  Use the CottageCutz Campfire Clothesline Die to cut out and assemble two trees.


Step 4.  Use the CottageCutz Spring Grass Die to cut out three pieces of grass from green card stock.


Step 5.  Use the CottageCutz Garden Accessories Die to cut out the pieces from white card stock.   (Except for the fence, I colored the pieces with Copic Sketch Markers.)


Step 6.  Start assembling the card by cutting a 5-1/4" x 4" piece of blue card stock for the first layer of the card.  Attach the clouds and trees to the blue card stock.


Step 7.  Attach two pieces of the grass in layers using foam tape on the second layer.  Attach the assembled clothesline with foam tape.  Ensure the giraffe and elephant's feet are touching the grass. (I cut two small pieces from another blue clothesline to extend the first line to the trees.)


Step 8.  Attach the fence to the left and right sides of the piece using foam tape.  Attach a third layer of grass with foam tape at the bottom of the fence.  Color and add the flowers and stems onto the fence.  Cut a 5-1/4" x 3/4" piece of green card stock, tear a small portion from the top, sponge on green ink, and place it at the bottom of the fence and floral stems.


Step 9.  Cut a 8-1/2" x 5-1/2" piece of white card stock, fold in half for the card base, and attach the above piece to the card base front.


I hope you try creating a card with the CottageCutz Baby Clothesline Die.  It will be fun!
  
These are the CottageCutz dies used for creating the card:


Tuesday, April 25, 2017

Dinosaur Birthday Card

Hi, Janja here!

Today I prepared a birthday card with four new dies from CottageCutz - Baby release.
Perfect card for a little boy who loves everything related to dinosaurs.


Supplies:
- CottageCutz dies: Baby Dino - Brontosaurus, Stegosaurus, Triceratops, T-Rex, Mushrooms & Greenery
- white card base: 5.3 x 5.3" (13,5 x 13,5 cm), folded
- white cardstock: 4.72 x 4.72" (12 x 12 cm)
- white and colored cardstock
- Distress ink: Antique Linen, Broken China, Faded Jeans, Mustard Seed, Spiced Marmalade, Mowed Lawn
- Archival ink: Sepia

Start by cutting out the dinosaurs. Use a colored cardstocks. Shadow individual elements with Distress inks on the edges, and assemble them into a whole.


For background trim white cardstock and shadow it. Prepare also two cardstocks, which are wavy cut with scissors. One is colored with Distress ink - Mowed Lawn, on another one add dots with a stencil.


Cut out grass with the die of a green cardstock.


Paste the grass cutouts with glue on the wavy edges of both cardstocks.


Attach dinosaurs with self-adhesive pads on ready background.


Stamp "Happy Birthday" with brown ink, and place it on the card.


Have a lovely day!