Sunday, April 09, 2017

Easter Eggs

Hi! 

It's Anja here. We're one week away from Easter and it's time to make some Easter decorations. I decided to decorate some plastic eggs.


I used:
- Cottage Cutz Dies (Spring Butterfly 1, 3D Flower #7, Spring Greenery),
- colored card stock,
- Distress Inks (Seedless Preserves, Peeled Paint, Forest Moss),
- tools for making 3d flowers,
- flower stamens,
- plastic eggs,
- glue,
- purple acrylic paint,
- brush,
- purple ribbon,
- glitter

First I colored plastic eggs with acrylic paint and sprinkled them with glitter while they were still wet. I let them dry.


I die cut some greenery from green card stock and butterflies and flowers from light violet card stock. I cut only the tree smallest flowers from the flowers die. I used Distress Inks to color the edges of the die cuts.


Then I used tools to make 3d effects and assembled the flowers and butterflies. I put stamens in the middle of the flowers.


When the eggs were dry I hanged it with some purple ribbon. Then I put all the leaves around the top of the eggs. In the end I added the butterfly on one egg and two flowers on the other egg. 


Have a nice Sunday.
Anja Z.

Cottage Cutz dies I used:


Saturday, April 08, 2017

Bumblebee Ben Framed Card

Hello Scrapping Cottage friends! Thanks for taking the time to stop and visit today. It's Mary Marsh here bringing you the Saturday edition of the Blog.

A couple of months ago there was a new release of the cutest little bear stamps & coordinating die sets. Adventures of Chloe & Ben have been featured by many of the Design Team. If you haven't seen them before take a look back on the Blog. I made this card last Saturday.

Today for your viewing pleasure, I am showcasing another one of those dies.  I present Bumblebee Ben. He will be the star of my framed card. So without further delay, let's get started on how I created my card.
Vanilla Card Base: 4 1/4" x 5 1/2"
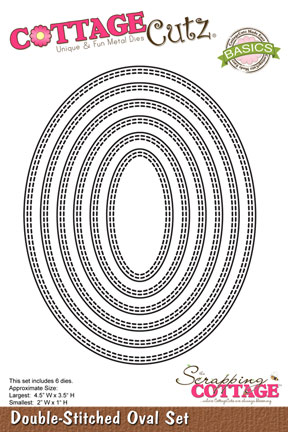
Honey Frame: largest wide stitched rectangle frame die 4 3/4" x 3 3/4"
Image Panel: 4 1/8" x 5 3/8"

Step 1: I used Tuxedo Black (Memento) ink on  X-Press It Blending cardstock to stamp the image. I always stamp 2 just in case I make a mistake in coloring.

Today, I am using both Prismacolor Pencils + Gamsol and Blendabilities Alcohol Markers.
Gamsol is an odorless mineral spirits that helps to move the wax around in the pencils.
Blendabilities used: Melon Mambo (light & medium), old olive (light and medium), navy (light, med and dark )
Prismacolor Pencils: PC1082, PC947 (brown), PC928, PC993 (pinks), PC1060 (gray), Black & White

After coloring I cut Ben out with the coordinating die. It's included in the set.

Step 2: Cut the frame with the pierced wide rectangle frame set in a honey cardstock.  I wanted a honeycomb stencil as the background for the beehive and bee. Used distress ink, stencil and a stencil brush.
Step 3:   With stenciling complete, I cut my background elements. Used an older die set "Beehives" that includes the beehive, bee and tree limb. I thought it worked well with Bumblebee Ben. Used the same honey cardstock for the beehive. Used vellum for the bee's wings and sponged lightly with honey distress ink.
Step 4:  Stamped my sentiment. This is a card of encouragement so I thought this stamp would work well. I used a stamp-a-ma-jig for placement. I laid the card pieces on the background and added the frame to make sure I got the proper placement.
Step 5:  I assembled my card on this step. I used mounting tape to lift the frame from the background. It adds interest to your card. Since the frame was popped up, I didn't need to do that with Ben. Here is a close up shot of the dies. Really a lot of detail in the beehive and bee and in the stitched frame. All of the CottageCutz dies have such great detail.
 
Well, that's it for me for this post. I hope I have given you some ideas on another way to use the Bumblebee Ben die. There is also another stamp and die set in the store that you could use to re-create this card. Maybe you already own it. It's the Sweet Valentines stamp & die combo.
 
See you next Saturday. Until then.........keep on crafting!
 
Dies I used to Create Card:
http://www.scrappingcottage.com/cottagecutzbumblebeebenstampanddie.aspx

http://www.scrappingcottage.com/cottagecutzbeehives4x4.aspx

http://www.scrappingcottage.com/cottagecutzstitchedwiderectangleframesetbasics.aspx


Friday, April 07, 2017

SWEET BABY CARDS


Hello dear friends !!!!

It's Anita here with another post with beautiful CottageCutz products. Did you see the beautiful baby theme dies that have been launched recently. They will surely win your heart... So cute they are!!!!

I have not yet started working with them , but then I am showing some old dies that are so beautiful that I love creating baby theme projects with them.

Here I have made a boy and girl shaker card using CottageCutz dies.

you can check all the baby themed dies here.


To make these cards, cut a card base 7" x 5". 
Adhere matching baby themed pattern papers. 
Cut 2 ovals from the stitched oval die. 
Cut 6 frames using stitched oval die. Adhere the three frames together one, for each card.
Adhere the large oval on the card base. Add sequins and add the transparent sheet cut to oval size. 
Adhere the frames forming a shaker card. Die cut all the baby themed pieces and distress accordingly pink and blue for the cards. Adhere on the card as shown. 
Add sentiment.

It is so much fun and easy to create these beautiful cards with CottageCutz dies.
List of Dies Used.


Do visit the CottageCutz blog and the store for amazing products and inspiration. Thanks for spending time here. Have a nice day.


Thursday, April 06, 2017

Spring Bunnies!

Good Morning to All of Our Scrapping Cottage Friends!

It is Pam with an Easter card to share with you today.  I have created a card using inlays from the die called Spring Bunny Egg.


1.  Begin by cutting the Spring Bunny Egg die and removing all the pieces. Be careful to put them in a place where the piece will not get lost.  I actually place them in a small box until I am ready for them

2.  Trace the egg to make a back so that you can glue down the inlaid small pieces after you are finished coloring them set aside

3.  Mask the top half of the egg using green ink sponge the bottom half of the egg.

 4.   Then mask the bottom of the egg using blue ink sponge the top part of the egg

5.   Gather all the inside pieces and begin coloring them with your copic markers or any coloring tools you may enjoy using

6.  After you are finished coloring glue the back to the egg and then start adding the colored inlay pieces
7.  Next using the largest Double Stitched Rectangle die center a piece 5 1/4 x 4 inch piece of yellow checked paper to make a frame

8.   Using the second largest Double Stitched Rectangle die cut 5 1/4 x 4 inch piece of yellow card stock
9.   Glue the yellow card stock directly under the checked paper
10.  Using the Grass Border die cut a strip of grass and glue it behind the frame on the yellow card stock

 11.  Glue the entire frame to the front of an A2 card
 12.  Center your Spring Bunny Egg in the frame under the grass
 13.  Cut two more bunnies using the Spring Bunny Egg and color them plus cut 3 orange flowers using the Hello Spring die
 14.  Add the bunnies and flowers as shown and for a final touch add a small bow to the top left of the frame
Cottage Cutz Products used:


I hope you enjoyed this Spring tutorial and that you will give it a try!!

Thanks for stopping by today! I am always so glad you did!!

Blessings
Pam