Saturday, February 25, 2017

Easter Cross & Tulips

Hello Scrapping Cottage friends! Thanks for taking the time to stop and visit today. It's Mary Marsh here bringing you the Saturday edition of the Blog.

We have some fabulous new Spring dies in the store. Today for your viewing pleasure, I am featuring the Butterfly Cross die.

 I started my card by using this weeks sketch #633 from Splitcoaststampers. Using a sketch almost always is a good starting point for me. When I saw the layout and the rectangle layer in the circle I thought of using the Butterfly Cross die for that part of the sketch.

Daffodil Yellow Card Base: 5 1/2" x 4 1/4"
Patterned Paper Layer: 5 1/2" x 2 7/8"
Circle Dies: 2nd largest in set
Stitched Circle Die: 3rd largest in set

I wanted the card to be bright to reflect the Spring & Easter season. So I looked through my stash first for patterned paper. I chose this lilac striped paper and decided to pair it with a daffodil yellow card base.

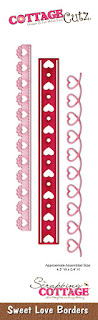
I cut the first elements of the sketch: the card base, patterned paper circle, purple layering piece and the scalloped border. For the scalloped border, I used the Sweet Love Border die. When I placed it underneath the patterned paper, I moved it up just to reveal the scallop edge. For the lilac layer above the patterned paper, I cut it 3/4" x 5 1/2". It's not necessary to use a bigger piece of cardstock to layer in this case.
 
I cut the Butterfly cross in lilac. I decided to add some tulips at the base of the cross. The tulip die is from the Hello Spring die set. This was a 2016 spring release. I cut the tulips in yellow to pick up the card base color. Easter sentiment is stamped in Tuxedo Black ink.

The greenery under the tulips is the snow bank from the Snowman w/Lamp Post die set. I cut it then placed it in the circle die and cut it again to get the rounded edge. Just another way to get more mileage out of the dies you already own.
To complete my card, I added a butterfly. I used the butterfly die from the Fancy Pocket Plus die set. I cut it in with the lilac cardstock and then a top layer of daffodil yellow patterned paper. Finished it off with a couple of light yellow pearls. 

Well, that's it for me for this week's post. Just a reminder that we are having a Design Team call right now. You can get all the info here. So until next time.........
 
Dies I used to create card:


http://www.scrappingcottage.com/cottagecutzbutterflycrosselites.aspx
 
http://www.scrappingcottage.com/cottagecutzfancypocketplus.aspx

http://www.scrappingcottage.com/cottagecutzsweetloveborders.aspx

http://www.scrappingcottage.com/search.aspx?find=snowman+w%2flamp+post
 
http://www.scrappingcottage.com/cottagecutzcirclesetbasics.aspx

http://www.scrappingcottage.com/cottagecutzstitchedcirclesetbasics.aspx


Wednesday, February 22, 2017

Wildflower Sympathy

Hello Scrapping Cottage friends! Thanks for taking the time to stop and visit today. It's Mary Marsh here bringing you the Wednesday edition of the Blog.

We have some fabulous new Spring dies in the store. Today for your viewing pleasure I am featuring some of the new Wildflowers dies. I have used Wildflowers 1 and Wildflowers 3 on my card for today.

Let's get started on how I created this card.

Mint Green Card Base: 5 1/2" x 4 1/4"
Navy Layering Panel: 5 3/8" x 4 1/8"
Patterned Paper Panel: 5 1/4" x 4"

I wanted to use these beautiful wildflower dies to create a sympathy card. My choice of colors today came from the Splitcoaststampers color challenge #622. When I was looking through my cardstock, I found these A2 card bases in my stash that had a watercolor wash. It was perfect for my card idea.

So all I did was cut the A2 card to the size panel that I needed. The card had the watercolor design on the front and back of the base. So now I have another panel to create a 2nd card. I matched it up with a mint green and navy blue panels.
Even though I was creating a sympathy card, I still wanted a splash of color for the flowers. I used the watermelon color for the wildflowers. I thought that would look good against the mint and dark blue of the card front.
 
I stamped my sympathy sentiment on the image panel in navy ink before I assembled my card. I then assembled the panels with double sided tape. I didn't add my die cut images because I didn't want the flowers to interfere with the layering. Sometimes it can through off your eyeballing of getting the layers straight.
 
 
My next step was to add my wildflowers, butterfly and scatter a few sequins to finish off this card. I like to have a sympathy card or 2 in my stash for when the occasion arises. It's easier for me to create a sympathy card when you don't need one. Below is a photo with a close-up view of the dies. You can always click on it to get a larger view.
 
 Well that's it for me for today. Thanks for dropping by today and leaving your comments. I read them all. Until next time.........
 
Variation of card. On this one I used navy blue enamel dots and a dragonfly.
 
http://www.scrappingcottage.com/cottagecutzwildflowers1.aspx

http://www.scrappingcottage.com/cottagecutzwildflowers3.aspx


Tuesday, February 21, 2017

Happy Spring

Hi, Janja here!

Winter has not said its last word, but the sun is already showing its charm.
Today I share with you two cards with the spring flowers.


Supplies:
- CottageCutz set of stamps and dies: Daffodil Flower - March, Daisies Fower - April, Calendar Months, Pillow Box Plus (ladybugs), Fancy Pocket Plus (button), Stitched Square Set, Stitched Wide Square Frame Set,  Stitched Wide Rectangle Frame Set
- white and kraft card base: 5.3 x 5.3" (13,5 x 13,5 cm), folded
- patterned paper: 4.9 x 4.9" (12,5 x 12,5 cm)
- white cardstock: 4.3 x 4.3" (11 x 11 cm)
- patterned paper: 4.8 x 2.2" (12,1 x 5,6 cm)
- white and colored cardstock
- watercolor paper
- Distress ink: Antique Linen, Mustard Seed, Scattered Straw, Wild Honey, Rusty Hinge, Tumbled Glass, Broken China, Twisted Citron, Mowed Lawn, Peeled Paint
- Memento ink: Desert Sand
- liquid pearls: buttercup
- string

Stamp flowers on watercolor paper and color them. Mine are colored with Distress inks.


When coloring is completed, shadow both backgrounds with Antique Linen Distress ink and stamp partly old letter writing.


Cut out the part of frame with a die. Color it with Distress inks.


Cut out March sign with calendar months die. Also, cut out a square frame from kraft cardstock, and another square of white cardstock.


Start by assembling the card. Add a white square on the card front. On the remainding card base add small buttercup dots.


Fix frame and tape, which is cut with scissors to the half.


When the card is completed, it seemed to me that something is missing. I added a button and a bow.


For another card I used a patterned paper.


Add a sentiment and cut out two ladybugs.


That's all for today. Thank you for coming over. 


Monday, February 20, 2017

Ben Up, Up and Away

Lois here today with a card I made using one of the new Chloe and Ben die/stamp sets.  I decided that I wanted to make another card using the layout from last week's Sketch Challenge on Splitcoaststampers, using Ben Up, Up and Away.

Here is the layout from the challenge. . .


. . . and here is my card:


Supplies for my card are:

Red cardstock - 5 1/2" x 8 1/2", folded in half at 4 1/4", three small panels 1" x 1 1/4", scrap for label
White cardstock - three small panels 7/8" x 1 1/8", scraps for Ben and label
Red/white polka dot patterned paper - 5 1/4" x 4"
Scraps of blue, red, green cardstock for balloons
Ink - Memento Tuxedo Black and Lady Bug
Copic markers and White gel pen
Copic Colorless Blender
Word Window punch and Modern Label punch
Foam pop dots, tape runner
CottageCutz dies - Ben Up, Up and Away; Calendar Icons

To begin my card, I die-cut three balloons from the Calendar Icons die, coloring the strings with a black Copic marker.  I then stamped, colored and die-cut Ben.  A little hint for getting the "fuzzy" look to Ben's fur.  After coloring his fur (but before coloring anything else), squeeze a little bit of Colorless Blender onto a piece of terrycloth.  Gently dab it onto the fur.  This will remove some of the color in places, giving it an uneven look.  Should the ink bleed into the white areas, you can "repair" that by dabbing on the white gel pen after the ink is completely dry.  I had to do that around his feet.


After cutting the small red and white panels, I assembled them by gluing the white panels to the red panels and popping the balloons in the centers with the foam pop dots.


I stamped the sentiment onto the white scrap, punched it out with the Word Window punch (as well as punching out the Modern Label from red cardstock) then assembled my card, using the layout as my guide.  It went together quite quickly.  Here again is my completed card.


The CottageCutz dies used on my card are:


Sunday, February 19, 2017

Daisies Flower - April

Hello everyone!

It's Donna here sharing with you another one of the stamp & die combo set. I am featuring one of the new Birthday Flowers sets. This one is the Daisies Flower - April set. This set has two stamps, the flower and the bumble bee.   Please take some time to browse around on the blog, there are some very creative projects using the birthday flower stamp & die combos.

Here is my card, my card is an A2 (4 1/4 x 5 1/2)


Here is a closer look:


 I stamped the image from the Daisies Flower with memento ink and colored it with copics.


I then centered the dies from the Daisies Flower - April set and die cut them with my big shot.


This is how the flowers look when it is die cut.  I then sponged some light blue ink on the Stitched Oval die and used foam tape to pop the daisy image on it.  I then added it to my card.

I used these copics to color all the elements on the flower and bee.

To finish the card, I added the "April" word from the Calendar Month die set.


Dies I used: