Monday, February 13, 2017

Shaker Money Holder

Hi, Lois here with a fun project.  I'm sure we all look for creative ways to give money as a gift.  Last fall during the Splitcoaststampers Falliday Fest, one of the tutorials presented was a shaker money holder.  At the time, I didn't have a Fuse tool; so I used sticky tape.  I received a Fuse tool for Christmas, so I'm trying it again -- this time using one of the new CottageCutz stamp/die sets featuring Ben and Chloe.


Supplies used on this project are:

Plastic page protector
Sequins (black, gold, white)
Ribbon
We R Memory Keepers Fuse Tool  (if you don't have one, sticky tape will work)
CottageCutz dies - Bumblebee Chloe, Sweet Valentines
White and Yellow cardstock
Scor-tape and foam adhesive circles
Copic markers
Wink of Stella
Xyron sticker maker

To begin my project, I cut one corner of the 8 1/2" x 11" page protector down to 6" x 7 1/2".


If you've never used a Fuse tool before, you should probably practice a little bit before attempting a project.  You need to let it warm up for about 10 minutes to achieve the proper temperature.   The tool comes with a 6 1/2" ruler/guide, but I needed to fuse the 7 1/2" side; so I used a longer metal ruler.


This made a pocket, which I folded in half, using a bone folder to make a good crease.


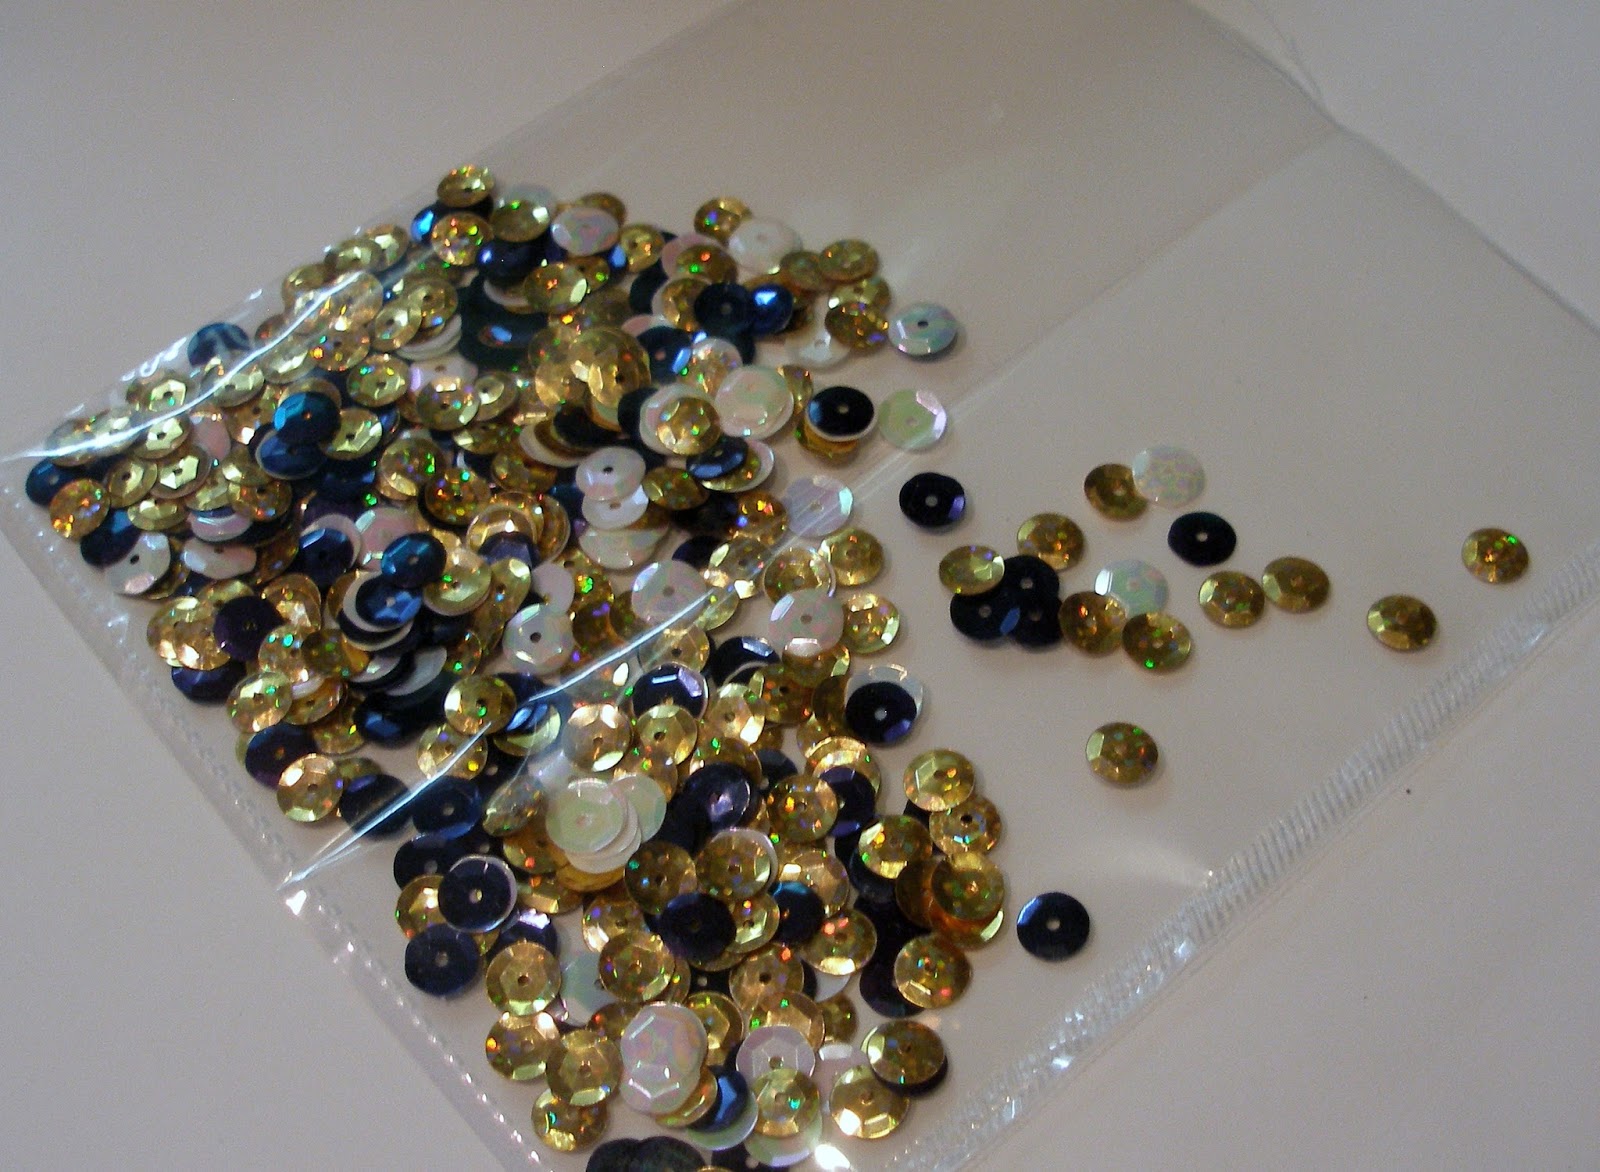
I opened the pocket and poured in some black, gold, and white sequins -- distributing them evenly on both sides of the crease.


Then I folded the pocket back together and fused along both short sides.


It just so happened that I had some ribbon with bumblebees on it.  I cut a piece of ribbon long enough to go around the top of the pocket and lap over slightly.  To make adhering the ribbon easier, I ran a strip of Scor-tape across the back of the ribbon.  Then I applied the ribbon around the top of the pocket, made a bow and attached it to the left-hand side of the front of the pocket.


Now it was time to finish decorating the front of the money holder.  On white cardstock I stamped, colored, and die cut Bumblebee Chloe.  I used some Wink of Stella on her wings to make them sparkle a bit.


Then I ran her through my Xyron sticker maker to make sure she had adhesive covering her entire back.


Again on white cardstock I stamped, colored and die-cut the Honey Pot, Honey Applicator and some bees from the Sweet Valentines set.


I cut a banner from a scrap piece of yellow cardstock and stamped the "Bee Happy" sentiment at the top, then attached the small die-cuts to the banner with foam adhesive circles.  I adhered the banner beneath the bow, using Scor-tape, and the Chloe "sticker" to the right side of the money holder.  All that remained was to put the money in the pocket between the front and back "shaker" sides.

This was a fun project, and I imagine I will be making many of these!  I hope you try one, too.

CottageCutz stamp/die sets used on this project are:


Sunday, February 12, 2017

Lilly of the Valley Flower

Hello everyone!

It's Donna here and I am sharing with you one of the new stamp & die combo set. I am featuring one of the new Birthday Flowers sets. This one is the Lilly of the Valley Flower - May set. This set has two stamps, the flower and the butterfly, plus it has two dies, which is for the flower and butterfly. Take a browse around on the blog, there are some very creative projects using the birthday flower stamp & die combos.

Here is my card, my card is an A2 (4 1/4 x 5 1/2)


Here is a closer look of the flower and butterfly.  I added some wink of stella clear to give the elements some shine.


I used these copics to color all the elements on the flower and butterfly.


I hope I have inspired you to get one of these beautiful birthday stamp and die combo sets!

Also, there is a design team call for CottageCutz going on right now, if you are interested, all the info is here.  This is a wonderful team to be on if you are a very open minded and creative person.

Dies Used:


Saturday, February 11, 2017

February Violets + Colored Pencil technique


Hello Scrapping Cottage friends! Thanks for taking the time to stop and visit today. It's Mary Marsh here bringing you the Saturday edition of the Blog.

We have some fabulous new stamp & die combo sets released. Today for your viewing pleasure I am featuring one of the new Birthday Flowers sets. This one is the Violets Flower - February.  Not only is it a stamp but it has a matching die. So let's get started on how I created my card.

Purple Card Base: 5 1/8" x 4"
Wide Rectangle Frame: 4 3/4" x 3 3/4"
Kraft Image Panel: 4 5/8" x 3 5/8"

For this week's card, I wanted to use Prismacolor pencils to color my image on Kraft cardstock. I  stamped the Violet's image with white pigment ink. I set it aside to dry for a few hours or you could speed up the process with your heat tool.

For my next step I gathered up the Prismacolor pencils I wanted to use. I chose 2 different shades of purple pencils (PC932 & PC1008) for the flowers and 2 shades of green pencils (PC109 & PC989) for the leaves and stems. On the centers I used a yellow (PC916) and an orange pencil (PC1002).
What I like about this technique is that after you color the image the white pigment ink is still there and gives your image that little pop. I used the lighter purple pencil to color the flower and then the darker to add shading. The darker pencils give it depth and define the flower. I did the same with the leaves.

It really produces a soft look by stamping on the kraft cardstock and then using the colored pencils. You definitely should give this technique a try.
Once the image was colored, I decided to cut a rectangle frame in white cardstock and use the new Calendar Months die to cut out February. I thought this would be a nice card to send to someone special to let them know you are thinking about them. Come February we are getting tired of winter and a handmade card always brightens someone's spirits.

The final step before assembling my card was to step the sentiment. I like to use my MISTI tool with clear stamps in case you don't get a good image the first time. With this tool you just re-ink your stamp and try again.  I used a chocolate ink for my sentiment because the card look is so soft. I thought black was a bit too stark.
 
 
To assemble the card, I used double sided tape to secure the layers together and Ranger multi-matte medium to secure the February die cut at the top of the card. 
 
Well, that's it for me for this week. I hope I have inspired you to pull out your colored pencils and give this technique a try. So until next time.........inky hugs!!!
 
 
http://www.scrappingcottage.com/cottagecutzviolets-februarystampanddie.aspx
 
http://www.scrappingcottage.com/cottagecutzcalendarmonths.aspx
http://www.scrappingcottage.com/search.aspx?find=pierced+wide+rectangle
 

Friday, February 10, 2017

CARDS AND MORE WITH ANITA KEJRIWAL

Hello to all!!!

This is Anita Here.

I hope you all are having good fun with the CottageCutz new release dies. They have also come up with new stamp and die combo sets and they are all too good.
You can check them out here.

For my cards today, I am showing two simple yet very pretty cards. Here I have used the negatives of the die cuts as stencils to create a lovely background effect.

Here are my cards.

For the butterfly card,

I used the CottageCutz Spring Butterfly 3 to cut two pieces of butterfly.
Using the negative of the die cut, create a subtle background using distress ink seedless preserve.


Distress the butterflies with Distress inks seedless preserve, picked raspberry and wilted violet.Spritz a little with water.

Add the butterfly on to the card base. Add some sequins and glitter.

Add the sentiment.


For my second card


I have created a lovely sunrise scene using the die cuts. Here also, I have used the negatives of the CottageCutz Wildflower 5

Do follow the pictures to know how I created this card.


Cut a white card stock to size 4.5 inches by 5.5 inches. Use. a circle of a negative die cut as mask for the sun.
Distress the remaining area with distress inks.


Using the negative of the die cut of wild flower, Sponge some shadow effect of the plant. Add the positive die cut.Remove the mask.


 Add a sentiment


The finished card

CottageCutz die used


Do visit the CottageCutz Store to see all the new collection.

I hope you liked  my work. I will be featuring more of the new release dies so stay tuned.

Tuesday, February 07, 2017

Gift set of cards in a folder

Hi, Janja here!

Gift set of cards in a folder which I share with you today are created with new CottageCutz dies - Spring.


CottageCutz dies: doodle bugs, spring butterfly 1, spring butterfly 2, spring butterfly 3, spring foliage border, stitched square set or pierced square set

For the folder we need:
- white cardstock for the cover: 11.4 x 5.3" (29 x 13,5 cm)
- white cardstock for the insert: 11 x 5.3" (28 x 13,5 cm)
- patterned paper: 5.2 x 5.2" (13,3 x 13,3 cm)
- white and colored cardstock

Trim white cardstock for the cover and insert sheet. Fold them on:
- 5.3" and 6.1" (13,5 cm and 15,5 cm)
- 5.3" and 5.7" (13,5 cm and 14,5 cm)


Trim four pockets from white cardstock in the size of 6.3 x 3" (16 x 7,5 cm). Made the folds 0.6" (1,5 cm) from left, right, and from the bottom edge.
Glue patterned paper on pockets, which should be slightly smaller then the size of the pocket.


On each of four pockets glue spring foliage border.


Glue the cover and the insert sheet in each other.


Make a tab in the size of 5.5 x 1" (14 x 2,4 cm). Fold cardstock at 2.4" and 3.2" (6 cm and 8 cm).


Insert two magnets under a patterned paper, which hold a tab in place, when the folder is closed.


Decorate the front cover and attach it to the base.


Supplies for cards:
- white card base: 4.7 x 4.7" (12 x 12 cm)
- colored cardstock: 3.7 x 3.7" (9,5 x 9,5 cm)
- white nad colored cardstock
- Memento ink: Lady Bug, Bamboo Leaves, Tangelo, Dandelion

Prepare four card bases and trim squares from colored cardstock.
Cut out squares with the largest die from white cardstock. Stamp various sentiments on them.


Cut out butterflies.


In addition to sentiments do some smudges. We can use a brush, stamp or ink smooshing technique. Whichever you prefer.
Select colors that match the color of butterflies.
Assemble the cards.


Insert cards into pockets.


That's all for today. I hope you like it.