Sunday, September 11, 2016

Boo!

Hello all,

It's Donna to share the cutest Halloween card.  I don't normally send out Halloween cards, but I just had to make this one.  The "Witchy Ghost" die is so adorable.  and I thought the "Spiderweb" went well with this set.  Both of these dies are from the 2nd Christmas and Autumn dies release. If you haven't been over to the online store, you should definitely go and take a look at all the new goodies.  


Inside of the card.

Here is how I put my card together:

1.  The size of the card is 4 x 4, 


2.  The first layer is die cut from the CottageCutz square set (the largest one) which measures 3 1/2 x 3 1/2,

3.  The second layer is 3 1/4 x 3 1/4,

4.  To make the background of my card, I cut out a 2" circle and offset it on the layer, I distressed some inks to make the background of the card.  I added some distress inks to the moon to give it an eerie look,


5.  I die cut all my pieces and inked some of the edges,


6.  I added the sentiment, cutting it out with the smallest die from the cross-stitched rectangle set,

7.  I added foam tape to the ghost and die cut another spider out and added foam tape behind it.  I wanted it to look like the spider had a shadow going down the moon,

8.  The inside die is from the "Haunted Tree" which is also from the new release,

9.  I finished the inside by adding the sentiment.


CottageCutz Dies used:


Saturday, September 10, 2016

POINSETTIA ON CHRISTMAS CARD

Hello dear friends,

 This is Anita here.How are you all doing?? Can you feel the magic of Christmas in the air.? There has been loads of Christmas inspirations in the market and CottageCutz has released some wonderful dies for you and you can check them out here.

I have used the pretty poinsettia flowers to adorn the card. Poinsettias and Christmas go together. So I found them apt for my card.


Step-by-step Instructions

Cut out all the die cuts from white card stock. Colour them using Zig Markers


Apply Peeled paint distress ink on the craft mat. 
Spray some water and swish the card base to apply colour.


This is how it looks like.


Emboss Wide Oval stitched frame die on a card stock ans cut out the shape.


 Stamp Christmas sentiment and layer another oval frame die on top with foam tape. 


Start layering the flowers and leaves as shown with foam tape.


CottageCutz Dies used.


CottageCutz Holiday Greenery

CottageCutz Stitched Wide Oval Frame Set (Basics)

The CottageCutz challenge #6 is going on at the blog with Holiday theme. Please do take part to win amazing price.


Friday, September 09, 2016

Seasons Greetings with Non-Traditional Colors

Hello Scrapping Cottage friends! Thanks for taking the time to stop and visit today. It's Mary Marsh here bringing you the Friday edition of the Blog.
 
We are still having crazy hot and humid weather here in the Eastern part of the U.S. So thinking about snow, ice and Christmas right now seems strange especially when I am harvesting lots of tomatoes, zucchini, basil and peppers (lol)!!!  
 
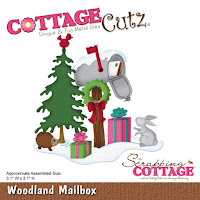
But, the Christmas dies are in the online store and I know you all are looking for ideas and ways to use those dies. So here I am with some inspiration using the Woodland Mailbox die set. This set comes with the mailbox, pine tree, wreath, presents, bunny, hedgehog, bird, snowbank and even letters for the mailbox. It is a super cute set. 
 
You could die cut with white cardstock and then color the images the way you want. Or you could do as  I did and die cut with different colored cardstock. It's your preference and either way it would make for a cute card.
 
I like to make Christmas cards using non-traditional colors as well. On this one I used a soft pink, a soft blue and a wasabi shade of green. So let's get started with some details on how I created this card.
 
Wasabi Green card base: 5 1/2" x 4 1/4"
White image panel:  5 1/8" x 3 7/8"
 
I started this card by sponging my background panel with a soft sky blue and a soft pink shade. I was trying to achieve a soft subtle background for the die images. I used a sponge and a sponge dauber on this background.
 
Once the background I was finished I die cut all my images and adhered them to the card with a combination of glue dots and Ranger multi matte medium. I stamped my sentiment and scattered a few sequins for some additional background interest and that completed my card.
Here is a close-up shot of the dies. I also used some white glitter paper for my snowbank and mailbox snow. Look at the cute little hedgie and also the letters in the mailbox. The white one even has a stamp on it- so cute.
Well my friends, that's my post for this week. I hope my card has given you some ideas of ways to use this new die set.
Just a reminder that our 6th challenge is going on with a Holiday theme this time around. Get info here.
Until next time.......inky hugs!!!
 
http://www.scrappingcottage.com/cottagecutzwoodlandmailbox.aspx
  

Thursday, September 08, 2016

CottageCutz Challenge #6 - HOLIDAY

Hi, Vladka is here!

Thank you very much for all 33 great cards and projects you've made for Challenge #5. Two lucky winners will be announced at the end of this post. So, stay tuned.


And here is time to start new challenge. 
This time theme is HOLIDAY

So, create a card or on any other gift for a Holiday, such as Thanksgiving or Christmas... 

We all love to create holiday cards, don't we? So, grab your favorite Christmas or Thanksgiving dies and create something. But please, use ONLY CottageCutz dies and not any other dies. "Add your link" button is available under the list of used dies. If you are not familiar with this button, please check this post for more explanation.  Challenge will be closed on 30st of September!


So, before I announced the winers, I'm going to show you my project for today. Here is my card:


Basics:

White card base: 5 1/2 x 5 1/2 inches (cut 5 1/2 x 11 inches, fold in half)
Additional piece of white cardstock and some white and red cardstock to cut out the die cuts

Other Supplies:

CottageCutz Dies: Listed Below
Distress Ink: Tumbled Glass, Fired brick, Aged Mahogany, Gathered Twigs, Ground Espresso
Other: Scissors, Paper trimmer, Sizzix machine, Scor-buddy, White watercolor in tube, paint brush

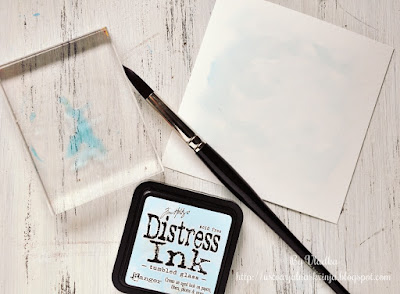
1. Apply some Tumbled glass distress ink on the acrylic block and add also some water. Mixed with the paint brush. Use large paint brush and apply color on the additional piece of paper. Let it dry or use heat gun to speed the process.


2. Mix small amount of white watercolor or acrylic paint with water and flick some droplets of the mixture on the previous colored surface. Let it dry.


3. Cut two Cardinals out of red cardstock and distress the edges with Aged mahogany distress ink. Now cut two more cardinals out of white cardstock and color the beaks and surface around it. Glue these on the top of the red Cardinals. Color also the branch and the Birdhouse with red and brown distress inks. Apply some white paint also on the branches and Birdhouse.


5. With Happy Holidays Notecard die, cut also the expression out of red cardstock. Use scissors to cut of just Happy Holidays part. Glue everything together as shown on the photo. Card is now finished.


-------------------------------------------------------------

And now go back to our challenge a little bit more. As I told you before, two lucky winners will be randomly chosen and will get gift certificate for Scrapping Cottage store.

First one will get gift certificate value of 50$...

... and second one in the value of 25$.

You have time till 30st of September to participate. 
Both winners will be announced in the same post as new challenge (for October) will begin.

All you need to do is take your CottageCutz dies and start creating! 
Please, use only CottageCutz dies!
Have fun and don´t forget to show us all your projects.

"Add your link" button is available under the list of used dies.

-------------------------------------------------------------

And of course we should not forget about the winners for the fifth challenge.

1st Gift certificate value of 50$ goes to Ana S Her card was linked under number 9:


2nd Gift Certificate value of 25$ goes to Mojca. Her card was linked under number 14:


Congratulations!

Please, contact Joanne at scrappingcottage@cox.net to claim your Gift Certificate.

This is it for today. All I want to show you before I left is the list of CottageCutz dies which I used on my project. Here they are:

Tuesday, September 06, 2016

In traditional colors

Hi, Janja here!

Today I share with you a holiday card in traditional Christmas colors. The card layout is simple and will not take us a lot of time.


For the card we need:
- white card base: 4.5 x 5.8" (11,5 x 14,7 cm), folded
- gold mirror paper: 4.25 x 5.5" (10,8 x 14 cm)
- patterned paper: 4 x 5.25" (10,2 x 13,4 cm)
- white cardstock
- red paint with blow-up effect
- Distress ink: Festive Berries, Moved Lawn

We prepare cutouts with the dies: elegant deer & wreath, Merry Christmas Santa, tea time doily, holiday wreath and the largest die from circle set.


Shadow both wreaths with Distress inks. For a super blow-up effect apply an inflatable red paint with handy pen on holly berries.


Fasten red patterned paper on to gold mirror paper and mat them together on to white card front. Add all the cut-outs as shown in the photo.


This luxurious gold paper has a highly reflective surface of the mirror. When taking photo, I had quite a few problems. Wherever I set up, I saw my reflection.


Thank you for watching.