Wednesday, July 13, 2016

Screen Divider Card + Tutorial


Hello Scrapping Cottage friends! Thanks for taking the time to stop and visit today. It's Mary Marsh here bringing you the Wednesday edition of the Blog.

Today for your viewing pleasure, I am featuring dies from both the May "this & that" release & the June "home sweet home" release. I have also created a screen divider card and I will give you all the details on how you can create one as well. You can use your CottageCutz dies in a fun and creative way with this style card.

Card Base: 5 1/2" x 11"
Decorated Panels: 2 5/8" x 4 1/4"

Step 1: Score 5 1/2" x 11" cardstock at 2 3/4", 5 1/2", and 8-1/4" in the horizontal position.

Step 2: To create the Screen Divider fold, fold in half at 5 1/2" score then fold each side back in the opposite direction on the scored lines.


Step 3: Unfold card and lay flat. Using a border punch, create a punched border along the top edge of the card. I used a Martha Stewart trellis punch. I started punching at the 5 1/2" center point and worked my way across the card.
Step 4: To create "legs" at the bottom of the screen you can either use a punch or a die. For my card I used a punch. I worked with half of the card at a time. Keeping the two left panels folded, slide the bottom of those two panels into the punch (only 2 layers at a time will work). Position the cardstock about one-third of the way into the punch and center side to side, then punch.


Step 5: The screen divider is ready for decorating.

I started my 1st panel by sponging in some clouds with a light blue ink using a cloud template.
Die-cut the pieces for this panel using the grass, trees & vines, build-a-house accessories, spring stamps and fancy pocket plus dies. Bike is cut in a coral cardstock, tree in gumball green and matching patterned paper, birdhouse in pool party.
 
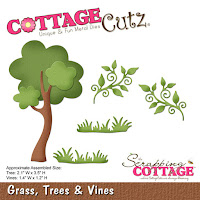
The next panel I used the same light blue ink to sponge the panel and a medium green for the grassy area. The dies are from the same sets listed above.
 
The 3rd panel is using the same dies listed above plus the garden accessories & hello spring dies. I cut a stencil from the clouds & sun die and sponged in the sun in the upper corner. I also added clouds and a grassy area. I wanted some small butterflies so I used a punch for those.


On the last panel I used the spring bloom corner and the bicycle in grass  and the fancy pocket plus dies. I sponged the background in the light blue ink. My corner is cut in coral cardstock and the butterflies in a rich razzleberry cardstock.
 
 
I adhered the panels to the screen divider and to hold in place I used some light blue ribbon that matches the card base.


Here are some other close-up shots of the card panels.


And, that my friends is my card for this week. Thanks for sticking with me till the end of this post. I know it was a long one. Don't forget about our current challenge. This one is Greenery. Get more info here. So until next time......inky hugs.
http://www.scrappingcottage.com/cottagecutzbuild-a-houseaccessories.aspx

http://www.scrappingcottage.com/cottagecutzgardenaccessories.aspx

http://www.scrappingcottage.com/cottagecutzcloudsandsun.aspx

http://www.scrappingcottage.com/cottagecutzgrasstreeandvines.aspx
http://www.scrappingcottage.com/cottagecutzfancypocketplus.aspx

http://www.scrappingcottage.com/cottagecutzspringstamps.aspx
http://www.scrappingcottage.com/cottagecutzspringbloomcornerelites.aspx


Tuesday, July 12, 2016

We've moved

Hi, Janja here!

When we are moving, it is necessary to do a lot of things and one of them is also to notify our relatives and friends about our new address.
The intent of my today's card-notification, it is to do so.


For the card we need:
- beige color card base: 13 x 4.5" (33 x 11,5 cm)
- patterned paper: 6.3 x 4.3" (16 x 11 cm)
- cardstock in different colors
- string and eyelets
- washi tape
- glossy accents
- Distress inks: Festive Berries, Aged Mahogany, Vintage Photo, Iced Spruce

The base of our card-notification is made as a ticket. In the card base make two folds.


For the background select discreet patterned paper, stamp some postal stamps and add a washi tape.
Cut the paper and attach it to the card base. To look more interesting, use tool for adding eyelets and finally rout string.


The central motif is a truck loaded with furniture. With the CottageCutz dies cut out: refrigerator & stove, floor lamp and bookcase, which I turned into a drawer. 


Shadow cutouts with Distress inks. Apply glossy accents on inscription - We've moved and drawers'handles. 


Fix furniture to the truck. 


Finally, another simple invitation.


- white scalloped card base: 5 x 5" (12,7 x 12,7 cm), folded
- brown cardstock: 4 x 4" (10,1 x 10,1 cm)
- white cardstock: 3.5 x 3.5" (8,9 x 8,9 cm)

From a white cardstock cut out a square with a cross-stitched square die (the largest die from the set). With the die home sweet home keys we cut out houses. Use only the upper parts of cutouts. Stamp hearts, add a string and an inscription - Welcome.


I would like to remind you on our 

Have a nice day.
Janja

List of dies used:


Saturday, July 09, 2016

A VICTORIAN CARD WITH ANITA KEJRIWAL


Hello everyone!!!

I hope you all are geared up to enjoy your weekend!! I'm Anita here to make it more creative and fun filled for you. How about some card making ??? CottageCutz has some fabulous new releases and a huge range of dies to get you going. Have you got the Home Sweet Home new release. Do check it out to see how beautiful they are.

Today, I am sharing a Victorian style Easel card with you that has lots of layers and dimension.


I have some close ups to describe the details of the card.


The CottageCutz 3D flower# 4 have been coloured with Archival inks Chrome Yellow and Olive Green and then embossed and shaped. On the base of the card, arrange the die cuts from CottageCutz Lace Border, CottageCutz Butterfly and CottageCutz Large Flourish


 To make the side panel from CottageCutz Stitched Rectangle frame, place the smaller frame in the left hand corner instead of placing in the middle. This way you will get a wider frame base. I have used the  Cottagecutz Stitched Oval frameto make the framed lady.


Arrange the flowers and leaves using CottageCutz Garden Stems and CottageCutz Leaves and stems


 The Complete Card


To make the base of the card, cut a white card stock measuring 12 inches x 6 inches. Score at 6 inches on the longer side . Then further score at 9 inches. Fold like an easel.
I have used a shabby green pattern paper as my mat layer. The base mat layer measures 5.75 inches x5.75 inches and the card front mat layer measures 2.75 inches x 5.75 inches.

Add two lace border die cuts from  as shown on the base of the card.


Have you seen the current challenge at the CottageCutz blog??? It's all about Greenery!!! So do share your work to win some awesome prize.


Friday, July 08, 2016

CottageCutz Challenge #4 - GREENERY


Hi, Vladka is here!

Thank you very much for all your great cards and projects you've made for Challenge #3. Two lucky winners will be announced at the end of this post. So, stay tuned.


And here is time to start new challenge. 
This time theme is GREENERY. 

So, create a card or on any other project and decorate it with some greenery, like leaves, trees, grass...
And please, use ONLY CottageCutz dies and not any other dies. "Add your link" button is available under the list of used dies. If you are not familiar with this button, please check this post for more explanation. Challenge will be closed on 31st of July!


Ok, let's go to my project. I hope this will inspire you a little bit. 

Here is list of all supplies I used:
Cardstock: White Cardbase and Watercolor Paper 
CottageCutz Dies: listed below
Other: Watercolor Set, Paint Brush, water, Sizzix machine


1. First I cut out the Tree, Bench and Cat, Clouds and Sun out of watercolor paper.

2. I did the coloring the same way as with Watercolor Bicycle in this post or in this video. So, all you need to do is, to take watercolors and mixed them with a little water and apply them on the die cuts. You can add more layers of one watercolor if you want, but you need to dry one layer before you apply another one. And you can use heat gun for this. As you can see here, I applied one layer of green on the treetop and here I'm applying new layer of the same green color.


3. To get even more watercolor look, leave some spots white, don't color them. Here are watercolors which I used and all die cuts which I colored:


4. Next step is, to colors also the background. For the sky, apply just some water on the watercolor paper first and then add blue watercolor. Water will spread color around and create sky. Dry it.


5. Do the same with green watercolor at the bottom of the watercolor paper and so, you will create green hill.

6. Now it's time to glue everything together. I used 3D adhesive foam squares for Tree, Bench and some Grass and liquid glue for all other pieces. For finished touch I put the Cat on the Banch and stamp the sentiment. 


-------------------------------------------------------------

And now go back to our challenge a little bit more. As I told you before, two lucky winners will be randomly chosen and will get gift certificate for Scrapping Cottage store.

First one will get gift certificate value of 50$...

... and second one in the value of 25$.

You have time till 31st of July to participate. 
Both winners will be announced in the same post as new challenge (for August) will begin.

All you need to do is take your CottageCutz dies and start creating! 
Please, use only CottageCutz dies!
Have fun and don´t forget to show us all your projects.

"Add your link" button is available under the list of used dies.

-------------------------------------------------------------

And of course we should not forget about the winners for the third challenge.

1st Gift certificate value of 50$ goes to Treebug. Her card was linked under number 2:


2nd Gift Certificate value of 25$ goes to Алёна Шатохина. Her card was linked under number 7:


Congratulations!

Please, contact Joanne at scrappingcottage@cox.net to claim your Gift Certificate.

This is it for today. All I want to show you before I left is the list of CottageCutz dies which I used on my project. Here they are: