Tuesday, August 16, 2016

Deer on a glade

Hi, Janja here!

Calm early morning silence. On a small glade, surrounded by birch trees and snow-capped spruces, deer briefly stop on a morning walk.
These and similar scenes can be created on cards, with the new CottageCutz Christmas dies.


For the card we need:
- white scalloped card base: 5.3 x 5.3" (13,5 x 13,5 cm), folded
- brown cardstock: 4.7 x 4.7" (12 x 12 cm)
- patterned paper: 4.5 x 4.5" (11,5 x 11,5 cm)
- white and brown cardstock
- Distress ink: Iced Spruce, Tumbled Glass, Scattered Straw, Vintage Photo, Shabby Shutters, Moved Lawn, Peeled Paint

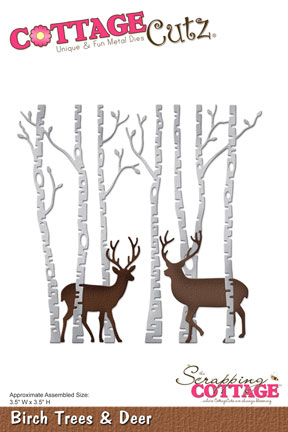
Cut out birch trees and deer with the die birch trees & deer.


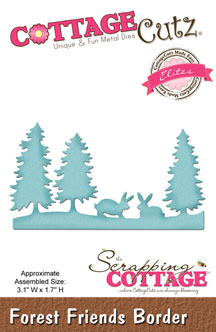
Shadow blue paper and cut out several spruce trees with snowy tree die. Do not discard white cardstock from which we cut the snow. It will be used as a stencil for shading. 


Paste a snow in spruces. Place stencil from white cardstock on the snow-covered spruces and shadow them. 


Apply glitter with a clear glitter marker.


Under the light, I caught a gleam glitter.


When putting a card together, gradually shadow the background with Distress inks, to create depth.


With a green marker emphasize the edge between the snow and the green part of spruces. At the lower and upper part of the background apply white paint with a finger.


I hope you've enjoyed this card. Thanks for stopping by.

I would like to remind you on our CottageCutz challenge #5 - birthday card. Join us.


Sunday, August 14, 2016

Vintage Christmas card

Hello Scrapping Cottage friends!
Thanks for taking the time to stop and visit today. This is Yuliya here). It's  here share some of the new Christmas release with you!
And I will be sharing how to make this Christmas card using the CottageCutz dies.

Here is list of all supplies I usedCottageCutz Dies:
-CottageCutz Ornament Trio
Other: Sizzix machine, glue, patterned paper, cardstock, flower soft, glossy accents
Follow the pictures below for making this card step-by step
1. Size my cardstock - 30 cm*12, 7 cm. Fold it. And size my card - 15 cm*12,7 cm. Prepare patterned paper for base. Size 14, 6 cm* 12, 2 cm (2 pc).
 2. 
 3. Add some volume with the help of chipboard.
 4. 

 6. Assemble the card

 7. 


I hope you have been inspired by my card today.
Challenge #5 is going on at the blog. The theme is Birthday. So do share your entry.


Saturday, August 13, 2016

SNOWY CHRISTMAS WITH ANITA KEJRIWAL

Hello to all !!!

I'm Anita here and I am super excited today as I bring for you my first Christmas card with CottageCutz dies. A wonderful collection of Christmas dies have been recently released and many more are on the way.
These are such beautiful dies with Christmas theme that one can create wonderful cards and other projects with them.
You can find them here
Here is my card for today featuring some of the latest dies.


Follow the pictures below for making this card step-by step.


Distress a 4 inches x 6 inches white card stock with Broken China and Chipped Sapphire


 Stamp images from Snow flakes stamp with Versamark Embossing pad


Cut out wavy layers from white card stock. Apply white embossing powder over stamped image and heat set.


Add the layers at the bottom using 3d foam tape.


Add the die cuts as shown and apply glue over the edges. Sprinkle Distress glitter and let it dry.


Add some sequins and add a die cut with Christmas sentiment on the top left.


Adhere this on a dark blue card stock and cyt leaving 1/4 inch all around. Adhere this on a card base 7.5 inches by 5.5 inches.


The finished card.

Challenge #5 is going on at the blog. The theme is Birthday. So do share your entry.

I hope you will be inspired to see these projects and use CottageCutz dies to create wonderful cards.


Dies used in this card.

Used the deer from this die.


Friday, August 12, 2016

Holiday Bell and Holly Leaves

Hi, Vladka here!

Woho, time for Christmas cards already. New CottageCutz dies arrived and you have to check it, they are great. To warm up, I create this simple card:


Basics:

White card base: 4 1/4 x 6 inches (cut 4 1/4 x 12 inches, fold in half)
Additional piece of white cardstock and some white and red cardstock to cut out the die cuts 

Other Supplies:

CottageCutz Dies: Listed Below
Distress Ink:  Aged Mahogany, Peeled Paint, Forest Moss

Other: Scissors, Paper trimmer, Sizzix machine, Scor-buddy, blending tool

Cut the Holiday Bell and Berries out of red cardstock and Holly and Merry Christmas Ribbon out of white cardstock.


Color the Holly leaves with differnet green ink and use blending tool for that. Distress the edges with darker green distress ink. Curl the edges of all the leaves.


Distress also the edges of Holiday Bell and Berries with Aged Mahogany distress ink.


Cut off the ribbon part of the Merry Christmas Ribbon die cut and use just Merry Christmas part:


Now glue Bell and Holly leaves together as shown on the photo:


To finish the card, flick some droplets of gold shimmer spray and let it dry. Card is now finished.


I hope you like this card. Have fun creating. And don't forget, fifth CottageCutz challenge is waiting for you. This time theme is BIRTHDAY CARD. You can linked your project here. And please, use only Scrapping Cottage dies.