Friday, May 20, 2016

Flowers on distressed background


Hi, is Vladka!

I love to work with Distress Inks, because it is so many possibility to use them and to play with them. So, I used three different colors today to create this card:


I will show you, how to create this background. Let's start!

Basics:
White card base: 5 1/2 x 5 1/2 inches (cut 5 1/2 x 11 inches, fold in half)
Additional piece of white cardstock or watercolor paper (5 x 5 inches)

Other Supplies:
CottageCutz Dies: Listed Below
Distres markers: Peeled Paint, Rusty Hinge, Fossilized Amber
Other: paint brush, water, acrylic block, paper trimmer, Sizzix machine, Scor-buddy,


1. With Doodle Flower Set 1 and Set 2 dies, cut 2 Flowers out from white cardstock. With Leaves and Stems die and Leafy Flourish 2 cut leaves and leafy flourish out from white cardstock. Color the flowers with Fossilized amber Distress Ink and distress the edges with Rusty Hinge. With Peeled paint Distress Ink color all the leaves. I used sponge to do this. But you can also color it with paint brush, distress inks and water, like I did it here. Spray the water on it and let it dry:


2. With Butterfly Kayla die cut the butterfly out with white cardstock and gently colored it the same way as flowers and spray it with water.

3. Flowers and greenery is prepared. Time to do the background. Take additional piece of paper and color the middle part with all 3 Distress Inks: Peeled Paint, Rusty Hinge, Fossilized Amber as shown on the photo.


4. Now spray a water on it. It can be pretty much water, so that flows here and there. Leave it to dry or speed the drying process with heat gun.


5. Take biggest Square from Pierced Wide Square Frame Set (Basics) and cut it out from previous colored piece of paper to get one square and 2 square frames.


6. To get more intense colors on the smallest square, colored it again with the same Distress Inks as before and add some watter drops on it to get this interesting splotches.


7. Now, glue square and both square frames on the card base and glue also flowers, greenery and butterfly on it, as shown on the photo. I also cut out the Best Friends words with Best Friends Expressions die and added to the card.


You really need to try this, because Distress Inks and the water can do magic and using them together with CottageCutz dies is a fairytale. :)

Have fun and thank you!

Before I go, I just want to remind you on our second CottageCutz challenge with theme Hello Spring. Link button can be found here!

Thursday, May 19, 2016

Happy Father's Day


Hello everyone!

It's Donna here with another card made with the CottageCutz dies!  I just could not help myself to use the anchor again for a Father's Day card.  Have you gotten your Father's Day card made? 

I also wanted you to know the new release for May is out and it is 25% off off in the store.  You may want to go check it out!


Here is how I put my card together....
  • A2 size card (4 1/4 x 5 1/2)
  • Black layer is 4 x 5 1/4
  • Blue layer is cut from the Cross-Stitched Rectangled set (I used the largest one),
  • The circle is cut from the Cross-Stitched Circle set (2nd largest one),
  • The anchor is cut with blue cardstock, I cut a piece of black foam and put the blue cardstock on top with adhesive,
  • I added a piece of twine,
  • Cut the "Father's Day" out of red cardstock,
  • The "home" is white embossed.


Very simple and easy card.  I hope I have inspired you to give it a try!


Closer look at the anchor, it is popped up with black foam.


Also, if you have not had a chance to play along with the newest challenge you still have time. The theme is Spring and you have until May 31st to enter. Get all the details here.

Dies used for this project:


Wednesday, May 18, 2016

Skirt Fold Technique


Hello Scrapping Cottage Friends! Thanks for taking the time to stop and visit today. It's Mary Marsh here bringing you the Wednesday edition of the Blog. 

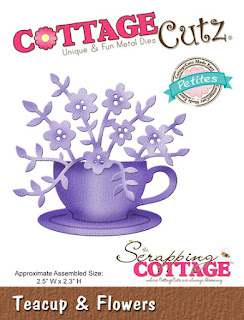
Today for your viewing pleasure, I am featuring a fun card fold and showcasing the teacup & flowers die. This die is the perfect companion to the skirt fold technique that I used on my card.

Let's get started on just how I made this card and the fun fold I used. The skirt fold technique isn't something new but I think it has such feminine appeal. And, a big plus is that it's not hard to do.

Skirt Fold Technique instructions:
Step 1: Start with your choice of patterned paper measuring 3" x 6. You score at 3/4", 1", 1 3/4", 2", 2 3/4", 3", 3 3/4", 4".


Step 2: Your paper needs cut in order to create an angle. Lay the paper on your trimmer with the wider part that is not scored to your right. The 2nd score line should be in the groove of your trimmer. The top left corner of your paper should be at the 1 1/2" mark on your trimmer. It will be at an angle in your trimmer and you just cut from point to point.


click on photo to enlarge to see score lines

 
Step 3: Fold accordion style, back and forth, on your score lines. The finished folded piece will look like this.

Step 4: To hold the folds in place add some adhesive to the back of each pleat.

Step 5: Attach patterned paper to white card base. Base measure 3 7/8" x 5 1/2". At this point I also added my ribbon at the top of the skirt fold pleats. I think it adds a finished look. No photo of this step.

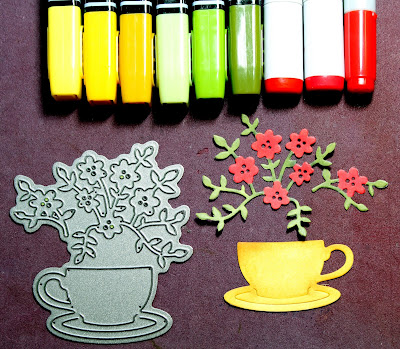
Step 6: Die-cut the teacups & flowers image. I used X-Press It card stock because I colored the image with alcohol markers.
 
 
Step 7: Attached teacup & flowers image to card base.  Stamped a sentiment and added some enamel dots.

 I also added a die cut heart from the brand new fancy pocket plus dies to the bottom of my card. I am giving you a little sneak peek of the new This N That CottageCutz dies that were just released. There is a 25% off sale right now at the Scrapping Cottage store. More to come with these fabulous new dies.


Just a reminder about our newest challenge. The theme is Spring and you have until May 31st to enter. Get all the deets here.
 
See you again next Wednesday Blogger friends! Until next time......inky hugs. If you have any questions about what I have created just ask. I will get back to you with an answer.
 
http://www.scrappingcottage.com/cottagecutzteacupandflowerspetites.aspx
http://www.scrappingcottage.com/cottagecutzfancypocketplus.aspx


Tuesday, May 17, 2016

Gingerbread flowers

Hi, Janja here!

When I first saw the Doodle flowers die, I immediately got an association to gingerbread. And so today I share with you monochrome set (card and notebook) with my gingerbread flowers :).


For the card and notebook we need:
  • light brown card base: 10.6 x 5.3" (27 x 13,5 cm), folded in half
  • dark brown cardstock: 5 x 5" and 3.7 x 3.7" (12,6 x 12,6 cm and 9,5 x 9,5 cm)
  • white cardstock: 4.7 x 4.7" (12 x 12 cm)
  • 2 x light brown cardstock for notebook: 6 x 4.4" (15 x 11 cm)
  • inlay sheets: 5.8 x 4.1" (14,8 x 10,5 cm)
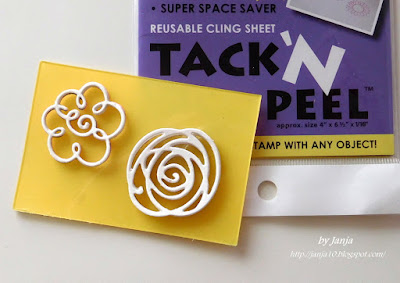
First we prepare the flower background. This I done with homemade stamp, using the die Doodle flowers set 1.
Cut out 6 pieces of flowers and glue them to each other. Apply adhesive across the entire surface. Because the adhesive is almost impossible to apply evenly, first place a flower with a sticky side on a piece of paper. With this, the adhesive is evenly spread across the entire surface and it is only then fasten to the second flower.
Once we have all the flowers glued to each other, place them on a transparent adhesive sheet which holds our stamp on an acrylic block.


With the stamp we prepare a unique background. Flowers can also be painted, or shadowed. Since my card is monochrome, I left the flowers unpainted. 


Now cut out the squares. Attach flowers and leaves to the cardstock, that is cut out with the largest cross-stitched square die from the set. Add the inscription with best wishes, and few sequins.
 

Assemble the card.
 

On the cover of the notebook, fix a frame cut out with a stitched wide rectangle frame die (the largest die of the set). Decorate the notebook like a card.


Covers and inlay sheets tack to each other with your favorite binding machine. The corners are treated with a corner punches.


And don't forget on our May challenge - Hello spring

Dies, which I used at work: 


Have a nice day.

Janja