Monday, January 14, 2013

CottageCutz Inspiration Day!


Hello everyone and Welcome to CottageCutz Inspirational Day! 
While everyday is an Inspirational Day here at the CottageCutz blog with all our talented CottageCutz Designers, we have decided to do a couple of Inspiration Days a month. This will consist of 2 or more designers creations for you to view.

1st up is Cindy Haffner's Beautiful Bird Cage Card here-
Cindy did a beautiful job on the birds and the cage, LOVE the look here. She also added some sewing and beautiful ribbon to her card.
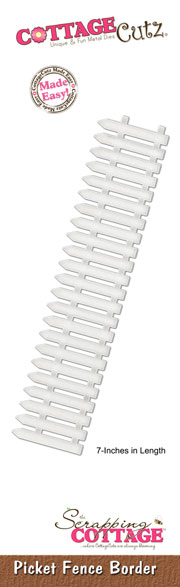
Here is the CottageCutz Die Cindy Used:


*********************************************

Next Up is Me(Cheryl) with a couple of projects
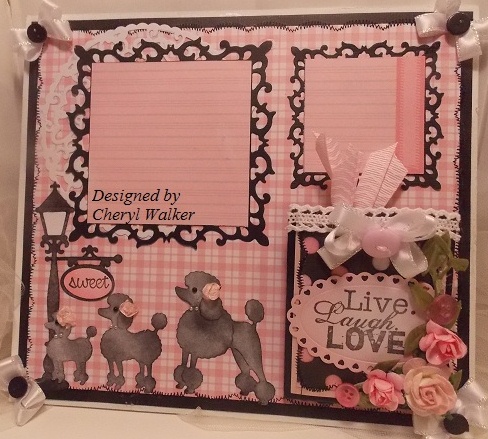
For this Mini Album Page
 I used a few different CottageCutz Dies-


and I also used other CottageCutz Dies as well
I used the CottageCutz Seed Packet for my accordion fold envelope pocket. 


 Blogger is being a Pain, and would not let me load anymore photo's, not sure why. :(


Next up is a Sweet Tea Time card 


Thank you for stopping by and looking, we enjoy your comments and hope you are enjoying all the Designers Postings using CottageCutz Dies!!
Hugs,
Cheryl & Cindy!!

Sunday, January 13, 2013

Flower Shop


Hello everyone!  Kathy here today!  I'm back with my second creation for CottageCutz!  This time I've used the adorable Flower Shop Die to make a cute pink and white shop. 


This was so much fun to make!  I used white, pink, and a little bit of brown cardstock.  I scored white cardstock for the shop base.  I used pink, green, and brown inks to shade the edges of the pieces.  I made the sidewalk using the awning piece with brown cardstock which I think came out kind of cute!  The "trees" in the background are just lace I placed upside down.  The twine is a sample I recently got with an order from RRR...I need to set some more of this for sure!

Here's a closeup of the shop...


Here's a picture of the Flower Shop Die:


Thanks for stopping by today!  I hope you enjoyed my project!


Saturday, January 12, 2013


Wheels

Hi Everyone! 
It's Lisa here!
Today I am sharing a layout I created.
This is I photo I had taken back in the fall when my family and I went on our annual pumpkin patch picking. The farm we went to had their wheelbarrows all lined up like this and I thought it looked really cool!


Once again I have used the beautiful CottageCutz Leafy Foliage Die.
This leaf die has become my new favorite! On this layout I cut the leaf branches apart and placed them around my flowers.

I created my my flowers using the CottageCutz Tropical Flower Die.
I cut three 3 of the large flowers and the sprayed them with a glimmer mist. I crinkled them and used some chalk ink on the edges and folds. I cut 6 layers of the smaller flower and layered them. The innermost one I scrunched up for a very fluffy center. I love working with this die. So many possiblities!

I hope you enjoyed my layout and it inspires you to try out these two fabulous dies!


Friday, January 11, 2013

Be Mine...!

Hello everyone! 
Welcome to The Scrapping Cottage Blog!
 Today It's Frances from becreativebeyou.blogspot.com
 with my first creation for CottageCutz dies.  


I am showcasing a card using
 Flower Layered dies and the

Cottage Impressions Frame 1 Lettering Clear Stamps.


 The base card is 6X6 and the I cut  the circle 
with Spellbinders Classic and Scalloped circle dies.
Birdcage and birds were cut from glitter cardstock.
Sentiment was hand cut and used a white cake paper doily.
I added  flowers and leaves to card front as shown, 
then glued some pretty pink buttons as centers for the flowers.  
Added some red ribbon, pearl swirls and papers from
Bo Bunny that I sew to the cardstock.

For this card I used:


Get creative and have fun!
Hugs,

Thursday, January 10, 2013

Furry Teddy Bear


Hello everyone, welcome to my first post at Scrapping Cottage blog using CottageCutz Dies. Vladka here and I decided to start with this cute Furry Teddy Bear, which reminded me on Valentine’s Day and on a new born baby at the same time. This is the reason that I made two cards, one for each occasion. Recipe for both cards is very simple:  Kraft paper + 4 Scrapping Cottage dies + different Distress Inks for coloring + white tempera + printed words. I really like to work with Kraft paper and both cards are entirely made of it. 
I love to watch how paper and die cuts get the new look, when I'm coloring them with sponge and different inks.
I never did vintage card for a newborn baby before, so I was really curious how it will look like at the end. When I was coloring the bear I got a picture in my mind where he was sitting on a shelf. So I used another CottageCutz Spice Rack & Jars and put teddy bear on a rack and gave three jars on it as well. Each jar is full of 'spices' which newborn baby brings to the world: happiness, joy and smile.
Second card is the perfect way to say someone that you love him/her. Such a cute teddy bear is the perfect messenger :o) Here I used two more dies - Angel Wings and Marker Sign Shape.
Here are the sets, which I used on my projects:

Have a beautiful day!

Wednesday, January 09, 2013

Victorian Fountain

Hello friends and bloggers, it's Carol here today.  Here is a Cottage Cutz creation using the Victorian Fountain and Greenery dies for The Scrapping Cottage.  I tried to create a Sepia color in keeping with a Victorian theme and used Brushed Corduroy Distress Ink for that purpose. 
The Fountain was cut with brown cardstock and white cardstock that was distressed with the Brushed Corduroy on the edges.  The greenery was cut with green cardstock.  The flowers were made with a Marvey punch, white cardstock and distressed with Brushed Corduroy.  Here are the dies used:


Tuesday, January 08, 2013

A Happy Hello

Hello! Judy here with my first post as a member of the CottageCutz team~!

Today I am sharing a valentine I made for my college sophomore daughter. I used Elephant Peeker, Picket Fence Border, and the Scalloped Doily for my dies.
 
My little elephant is a girl, so she has painted her toes pink! I hand cut the little tag, punched a hole, and added a little stamped sentiment ("a happy hello") from Stampin' Up! The ruffled ribbon and twine are from Really Reasonable Ribbon and the felt flower is by Bride's.

My daughter lives 700 miles away, so I hope this little sweet elephant brings her some sweet love and cheer in her mailbox!


Monday, January 07, 2013

Thank You!

Hello CottageCutz fans!  Today I have a Thank You card to share with you using the CottagCutz Elf and Snowman Tag Set die.  I used some of my favorite elements, bold, bright colors, gingham, and who doesn't love a snowman!  I cut the images 3 times with white cardstock, colored the pieces for the snowman heads and then put them together.  I find it easier to color the pieces before assembling, but that is my personal preference.  So here is my card.
The large Thank You sentiment is from Peachy Keen Stamps.  The finished card size is 5"x7".  Have a great week!

Hugs and smiles,
Janice