Tuesday, May 22, 2012

CottageCutz Tea Pot Mini Album

Hello everyone, Cheryl here with a Tea Pot Mini Album designed for The Scrapping Cottage using the BEAUTIFUL  CottageCutz "Tea Time Release"
Today I'm sharing 3 sides done, I will show the other 3 and a video later.

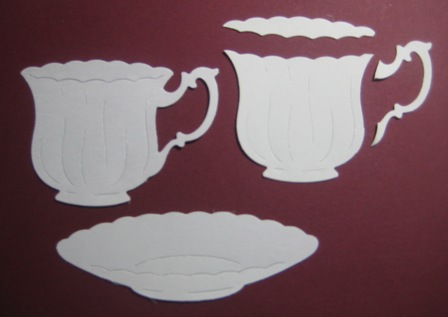
So on my front page here I used the CottageCutz 
 I made a pocket for the tags and the photo matte. The Tea cup and napkin were cut out using K& company dp. I distressed them all. The Oval Doily was distress with Tim Holtz ink, and the spoon was colored with copics. I added a TON of flowers to the front of this tea pot!

 Next we have the backside of the front cover, and I LOVE this page too!!! 
I used the CottageCutz Tall Tea pot on this page, and the mini Tea Cakes and some more Tea Time Tags but cut them down smaller.
I attached a plastic container to this page it houses the mini tea pot album that will hold small photo's. The lace on this page is vintage, and I added a feather,wedding spray,flowers, and a clip to hold the small tags.

Here is the Mini Album open. 


On my 3rd page, I used
CottageCutz-
Tea Time Border

I made a mini 6 month calendar, and then thought you could add photo's to the back side of each month. Also could add photo's behind this calendar in the pocket.


Thank you for looking and have a lovely day!!!
Hugs to all,
Cheryl

Saturday, May 19, 2012

Filigree Teapot Ornament/Favor

Welcome to The Scrapping Cottage Blog it's Carol here today with a 3D creation for you.  Isn't this tea time set spectacular.  I am so in love and so excited with the whole thing.  I love tea themed things and this release has so touched my heart.  All the dies are so feminine and lovely you just can't help but want it all!  The ideas are endless.

So let me tell you what I used to create this:
 

Other: White Card stock, Recollection Pearls, VersaMagic,  Embossing Powder, tiny Prima roses, ribbon, and metallic cording from Michael's (you can find this in the ribbon section at Christmas) and glue.

You can make these in colored card stock if you wish or use your VersaMagic pad to press the die cut on and sprinkle with embossing powder and heat set.  What I did was die cut two teapots and only applied glue at the top outer edge of the tea pot, the top of the handle, and the top of the spout.  Then I shaped the bottom to make it round and glued it to the mini doily.   I decorated with different sized pearls, tied a couple ribbon bows and glued on a small rose.  Just tie the cording at the top to make it an ornament or leave off if you want a simple favor.
Here is how pretty these ornaments will look on your tree.  Notice how the light captures the embossing to make it sparkle and shine.
I left this one plain white.  If you didn't want to make it an ornament-this would be beautiful for a bridal shower or tea party favor.  How pretty this would look sitting in the center of a plate on a set table.  It could be used as a keepsake ornament long after the party.

You could do one for a Silver Wedding Anniversary Party or a Golden Wedding Anniversary Party as well.  How about a little girls birthday party done in pink.  So very sweet and so very cute!
Thanks so much for stopping by to view my creations.  I really do appreciate it.  If you have any questions on how to assemble this just let me know and I will help you the best I can. 


Thursday, May 17, 2012

Shabby Chic Cupboard

Good morning friends.  Today I have a picture tutorial to show how to make this Shabby Chic Pocket card.


Start with an 8 and 1/2 by 10 inch piece of cardstock.  Score at 2 and 1/8 and 6 and 3/8.


Turn horizontally on Score-Pal and score at the 4 inch mark just to the score lines.  Score at 7 inches from top to bottom.  Remove areas marked with X and cut on solid lines to make tabs.  Apply adhesive and fold up to form pocket.  Decorate as desired.
I used several dies to decorate my pocket card.  I used the large bowl from the CottageCutz  Stacking Bowls.  I used the cherries from the CottageCutz Oven Mitt and Stuff for the decorative plates in the cupboard.  I used the CottageCutz Tea Time Border die, the Oval Doily and Frame, and the CottageCutz Strawberry Mini.  If you have any questions about my tutorial, please ask in the comments and I will get back to you.  Thanks so much!

Hugs and smiles,
Janice


Wednesday, May 16, 2012

Strawberry Upside Down Cake


Good morning!  It's Lorie here today to share what I've been up to lately with you, AND... Don't faint... BUT I have a video to share, as well!!!  Truth be told, I don't think I'll mind making them as much as I used to, because I've finally played with my new software enough that it seems fairly easy to me.  Now, the wait to get them uploaded... THAT'S another story entirely!!  Anyway, after what seemed like an eternity, I finally have my video uploaded and ready to share, but first, here's a look at my project.
After our recent blog hop, it was noted that some of you wanted to see more... yes... Copic coloring tutorials, as well as more layouts, so for this, I combined the two.   I have quite a collection of these 6x6 recipe cards, and I LOVE them.  It's such a fun, and creative way to collect and have all your favorite recipes right at your fingertips.  You can either store them in an album, or I've even seen little stands with rings to hold the pages.  For this project, I pulled out what I call and "Oldie, But Goodie", which is the Hamemade Tag CottageCutz die.  To that, I added the Napkin & Decorative Teaspoons die, along with the Strawberry Mini.  The paper is from My Mind's Eye Life of the Party collection.  I sponged the edges of the napkin, and tag using chocolate chip classic ink from Stampin' Up!.  The recipe is computer generated, and OH, MY GOODNESS is it ever delicious!!  Perfect, quick and easy strawberry shortcake, right there!

The strawberries were cut using white card stock and colored with Copics, and as I mentioned, you can see the video below to get all the details on how I went about it and what colors I used.  If you get a chance, please visit my blog, www.thethinkinspot.blogspot.com and join in the Oldies But Goodies Blog Hop.  You'll find out there what it's all about, and I love that I could combine my CottageCutz project with the blog hop today!
So happy you could join us on this beautiful day!  Make it a great one, and Happy Crafting!!!


Monday, May 14, 2012

cupcake 4


Hi everyone Cindy here with another SWEET CottageCutz Design Team card. Today I’ve made a Thank-you note card to give to a dear friend. I hope you like it.


Thank-you for joining me today, I`m so thrilled to be sharing my CottageCutzcreations with you, see you on the May 24th!! I will have a several new dies to show you!!~
Hugs Cindy xoxo


Friday, May 11, 2012

CottageCutz Tea Time Layout to be Framed

Hello everyone, Cheryl here with a Layout!!! I wanted to do a Layout using the DARLING CottageCutz Tea Time Release! I have to say I'm in LOVE!!!!
This Layout will be FRAMED!
 Im not much for the large scrapbooks, since I already have 2 full ones, that are hidden in my house from YEARS ago.....LOL I love making the little mini albums, and I think now Im going to start framing these large 12 x 12's

Ok i'm also LOVING this Tea Time Releaseusing the CottageCutz! They are all my favorite!!! 
CottageCutz Used:
CottageCutzPennants /plain


On the Tall Tea Pot I used a spray for the steam!!!LOL I thought it would be super cute!!

So on my layout I started with DCWV Lace and Linen Paper stack. Next I glued all pieces together using Helmar's 450 Quick Dry glue(LOVE THIS STUFF)

I added lace with the same glue listed above, and just ruffled it as I went along, it dry's super fast so no need to worry about it falling off like other glues :)

The pictures of my daughters were taken when we lived in california back in 2001 seems like just yesterday, but nope that was awhile ago....heheheheh


I LOVE LOVE LOVE the CottageCutz Pennants and MINI Tea Cakes are the SWEETEST lil' die's ever!!!

I just did a little bit of writing on this page. I really just wanted to do up a really pretty piece of art to hang!


Bella Belle was our Chow Chow who passed away in 2006 we miss her sooo much! She LOVE the kids!!!


I hope you all enjoyed my Layout for today!!

Happy Mother's Day to all the mommies out there!!!
Hugs to all,
Cheryl

Thursday, May 10, 2012

Mother's Day Wish


 Happy Mother's Day to all Mom's. Todays card is wee bit of strawberry tea. I used the Cottage Cutz English Doily & Frame die for the vine style frame. I used the strawberries and leaves from the Cottage Cutz Tea Cakes die to add color & dimension to the frame. Each strawberry was added with a foam dot. The MOM came from the Cottage Cutz Lollipop Alphabet. I used the teabag off the die along with another strawberry as a dangle on the ends of the cord.
 I used the Cottage Cutz Teacup with Saucer & Tea Bag die for the cup. To add dimension to the cup I cut several teacups than cut the handle a back lip off. Using foam dots, raised the main part of the cup. I did the same with the saucer, I cut an cut additional piece of the lower section of the saucer and raised it up. The cup really looks like it is sitting inside the saucer.
The strawberry decor on the teacup is from the Cottage Cutz Tea Cakes die. I used a Copic Marker to add a swirl of vine and added the strawberry and leaves. The same was added to the saucer.The Teacup was highlighted in two shades of pink ink.  Red ink was sponged to the edge of the card.

The following Cottage Cutz dies were used for this card
English Floral Doily & Frame
Lollipop Alphabet
Teacup with Saucer & Tea Bag
Tea Cakes

Thank You, Barry