Thursday, September 22, 2011

Happy Halloween

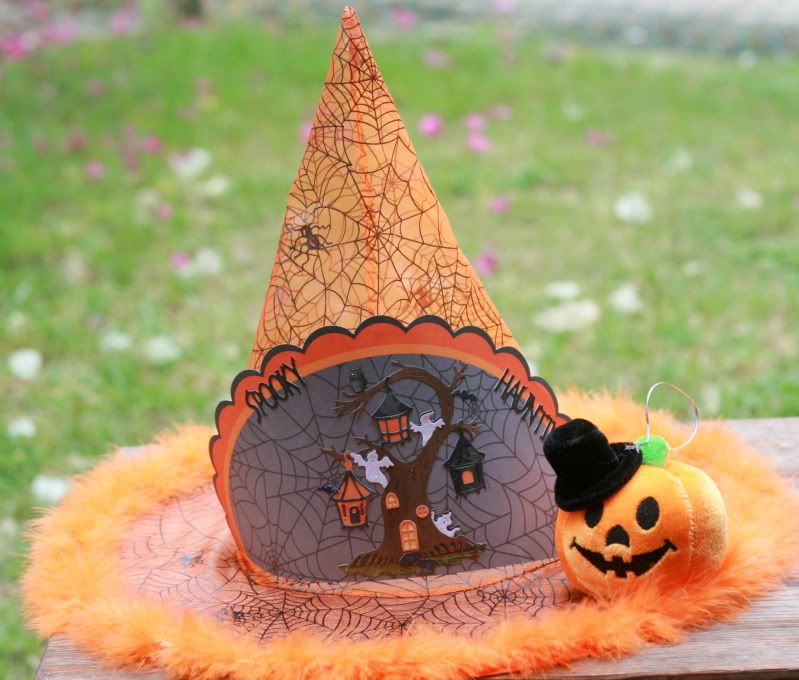
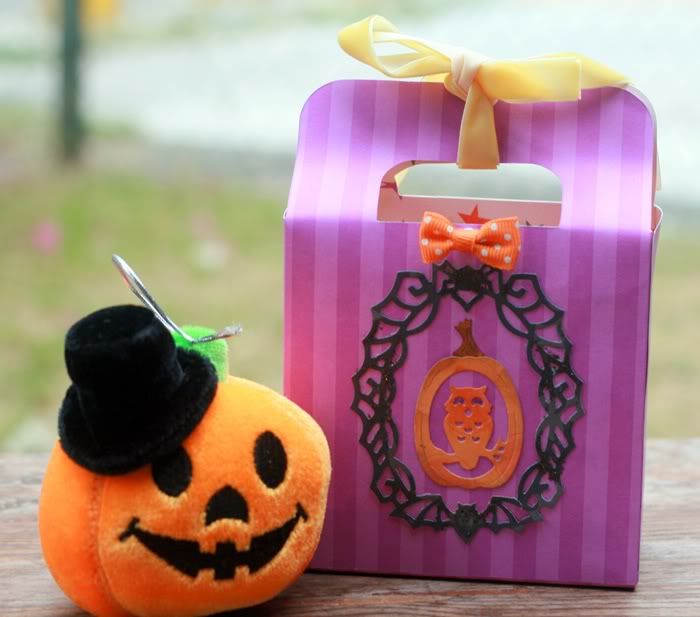
Hello everyone and Happy Thursday to all! Today I wanted to share a card I decorated inside and out, using the DARLING Halloweeen Collection Cottage Cutz.
For my card today I used The Scrapping Cottage die cutz listed below. I'm  LOVING this DARLING Halloween Collection, they are all just tooo CUTE! To see the entire collection please visit The Scrapping Cottage here.
Cottage Cutz I used:
Halloween Stacked Frogs( 1 on the outside 1 inside)
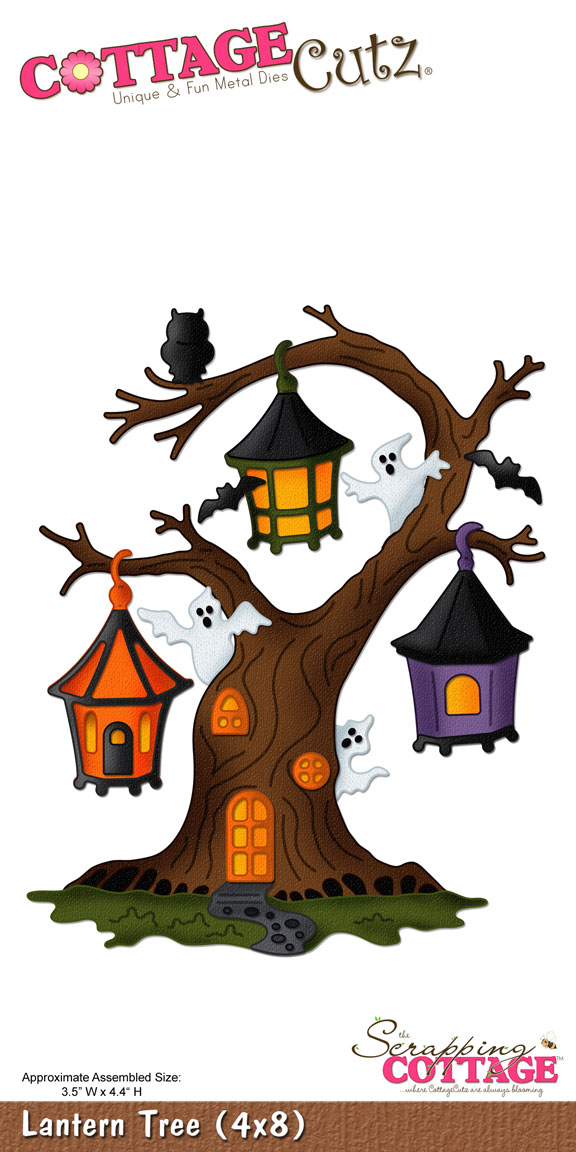
Lantern Tree(for the little Ghost) 

Others- copics, dusting, airbrushing,ribbons,flower, gems, silver frame.

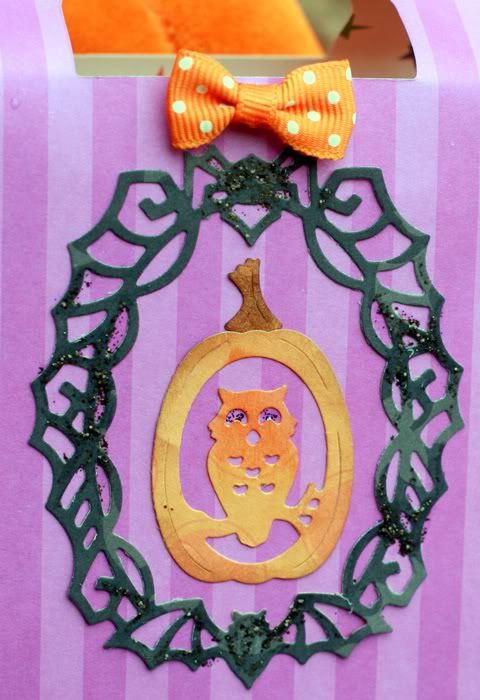
For the frogs I just dusted them with 3 colors of greens, starting with the lightest like I show in my video with the pumpkin. The candy corn was white and I used copics to color the yellow and orange.

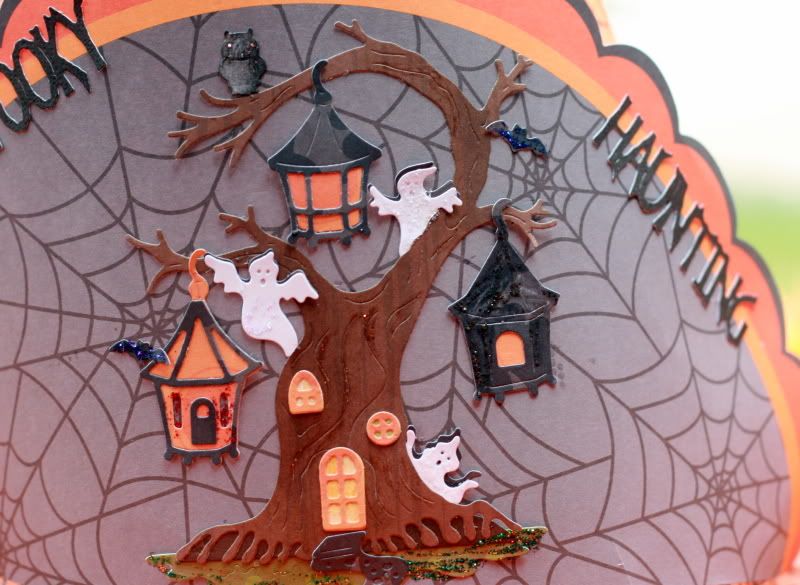
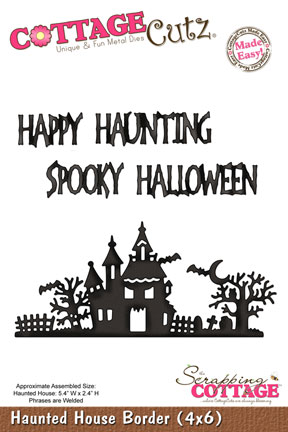
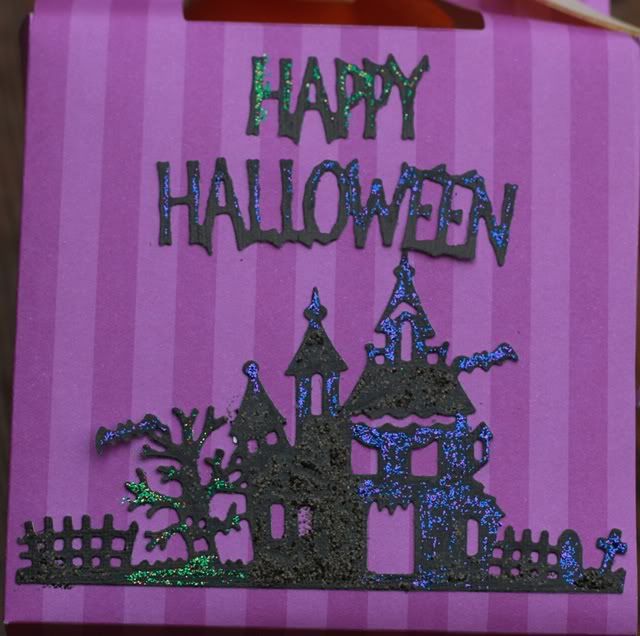
I love doing the insides of cards. On this one I kept it pretty simple. Ive added 1 of the stacked frogs, and used part of the Haunted House Border. The pumpkin is a sticker from My Little Shoebox.com

Thank you for looking and have a lovely day! 

Hugs to all,
Cheryl

Wednesday, September 21, 2011

Spooky Haunting !

Hi again , everyone ! 
Pearl , in Sunny Singapore here .
I trust all our blogging friends have been enjoying 
all the different wonderful Halloween ideas all month long so far.

I have a simple decor idea to share today -
we have a Japanese dollar chain store over here ( called Daiso ) 
and this year they have a lot of adorable Halloween decor / costumes for sale
and when I saw these gauzy hats in different Halloween colors - I just had to bring one home with me to try an altered witch's hat . ;) 
I diecut this Lantern tree using at least
 4 different My Little Shoebox patterned papers 
in the colors I want - some of them I inked in the color I wanted 
to make piecing this come together easier. 


The little Ghouls were shadowed with extra black ones and then given a little textured Stickles treatment.
 To make the little bats stand out more I also stickled them in royal blue. 
Finally I adhered my entire Lantern tree on half a circular diecut from the My Little Shoebox Trick or Treat line. 
The Spooky Haunting sentiment is from our Haunted House border die.
Finally , when I was happy with my outcome I carefully adhered my entire piece around the brim of the hat 

If you've had a great time with us jumpstarting your Halloween projects, 
you will be as thrilled as I am to know that our Christmas release is available 
for pre-order NOW !!! woohoo ! Gotta love them all ! 


Tuesday, September 20, 2011

Build a Jack-O-Lantern

 Building a Jack-O-Lantern, Cottage Cutz has made it so easy to create the Pumpkin in their new Cottage Cutz Pumpkin Carving Die. The Jack-O-Lantern above was made in all orange, but below. .
 I have shown you the breakdown of the Pumpkin on the die. If you start at the top left you will see a android key thing-y. . Well that is the piece of paper that can save you a lot of work. When mounted on the black die cut. . you see it is like a puzzle. It can than be glued under the jack-O-Lantern .  .and WOW!. . .  you have all your shadows in the face of the pumpkin. Cottage Cutz as just replaced eight tiny pieces of paper with two. There is no worry if all your shadows are in the correct place. Just text fit the black card stock that has the yellow and glue on the back. I highlighted the Jack-O-Lantern with Memento Tango Orange Ink and Copic Markers. Orange, Yellow and Brown #YC04, Y17, E77.
Here I used the Cottage Cutz Carved Pumpkin die on a Halloween treat box. I also used the Cottage Cutz Stamp Frame die as my frame/boarder.

Thanks  Barry


Monday, September 19, 2011

A Halloween Display


I bought me one of these trays over a year ago and kept meaning to put something cute inside to display. With all these cute Halloween diecuts from the Halloween release I couldn't resist. I used papers from MLS and cut each paper I chose to size and then added some embellished dies. I love the look of tuelle so added a double bow to the top.
I secured each card piece to the windows using tacky putty so I can remove them and display other holidays in my tray. When Halloween is over I can simply remove the cards and put them in a bag for next Halloween.


I used the Jack-o-Lantern w/Hat die, Broom mini, Potion Bottle Mini, Frog mini, Scaredy Cat mini, Spider mini & Cauldron Peeker dies.
I wish you could see this in person, it's so much cuter!
I also used the ghost from a previous release. The cat and spider are also from previous releases.
I used the Haunted House Silhouette die and the cloud punch out is from MLS.
The pennants are also from MLS.
I used some Glossy Accents to make some things more dimensional even though the picture makes it look kind of white, it's really just shiney...I even used it to make a wart on her nose.

Remember to keep CottageCutz dies in mind for your holiday decor this season!
I'm lovin' this fall weather here in Utah, it really gets me in the mood for Halloween craftiness.
Have a great day!
Kay

Sunday, September 18, 2011

Happy Haunting

Fall is definitely here and with that comes thought of Halloween and Haunting. I'm a huge fan of Halloween so when I saw these new dies from Cottage Cutz, I knew that I'd end up getting all of them. From haunted houses to pumpkins, lanterns to witches, these dies are perfect to personalize any of your Hallween crafts.

Hi everyone, Erika Taylor here today to share with you a "spook"tacular card using the Haunted House Border die. I love the detail in this set and wanted to create a background scene for the little My Little Shoebox bats. I die cut the images from some great Mica Metallic Paper from Paper Temptress to give a little sparkle to the card. Hauntingly delish right?


Isn't that Haunted House beyond amazing??? Love Love Love it!!! Not only can it be used as a border, but you can create great scenes with it. I love versatility when it comes to dies, and Cottage Cutz dies give so much of that. If you haven't seen the Halloween dies yet, make sure you take a look. Also I see some fantastic Christmas ones as well that are simply stunning.

Thanks so much for stopping in today. Make sure you leave a comment with all of the projects on the blog. We love to hear what you have to say.

Until next time
Toodles
Erika Taylor


Saturday, September 17, 2011

"Witch" Way

Good morning friends!  I have a Halloween card to share with you today.

  I used the Spooky Sign post as well as the cat and bat from the Witch Castle Door.  The background paper is from a Recollections paper pad called Midnight Magic.  The journal tag looks like a menu sign when paired with the Spooky Sign Post..  I used some stamps from the Fall-o-ween set by KAndrew Designs.  I hope you like my card!  Have a GREAT weekend!
Hugs and smiles
Janice

Friday, September 16, 2011

More Happy Halloween

Good morning, happy Friday, and Welcome to The Scrapping Cottage Blog!  Lorie here today to share yet another wonderful Halloween card with you.  I swear that I never get tired of creating Halloween themed cards.  It's my favorite holiday to decorate for!  Today I have a card made with several Cottage Cutz dies.  
For this card, I used the Haunted House Silhouette, Jack-O-Lantern w/Hat, Haunted Tree, and the Lollipop Alphabet Cottage Cutz dies.  The beautiful patterned paper is from My Little Shoebox.  This is the Trick or Treat Starry Night paper, and it's double sided.   As you can see, I used both sides of this beautiful paper for this card.  The pennant is from the My Little Shoebox Trick or Treat 3-D Roll Up Flower punch sheet.  I just popped the pennants off of the sheet, punched some holes in them, and strung them on some twine.  Everything was cut with colored card stock, except the Jack-0-Lantern, and he was cut with white card stock and colored with Copic markers.  I sponged the tree with some Tim Holtz vintage photo ink, and the haunted house silhouette was sponged with white craft ink to make them both pop.  

Thanks for dropping by today.  As always it's wonderful to have you, and I wish you a blessed day and happy stamping/scrapping!


-

Thursday, September 15, 2011

Girl's Night Out

I think it's so fun to create a project that has a little surprise about it - this one actually has a couple! I used the Elegant Witches Legs in a different colorway, so it is perfect for a girlie card, rather than a Halloween one. Next, I used an arrow from the Airplane with Banner and Sign to point to the secret tag. The frame from Gothic Frame with Witch was added underneath my lettering to act as a tab to pull out the hidden message. It's so fun to challenge yourself to see how many different ways you can use you Cottage Cutz Dies!

Wednesday, September 14, 2011

Happy Day!!!


Today is hump day of the week and I hope all of you have a HAPPY DAY! I created this card with the  Airplane with Banner Die. Having a little boy in the house you know I had to make two airplanes...one for my card and one for the card he made beside me during scrap time. What precious times.

I also used the My Little Shoebox matching patterned paper ....it all blended just perfect. Don't you love it.

Remember to have a Happy Day and I'll see you soon.

Hugs


Tuesday, September 13, 2011

You're a Peach!

Hi Everyone! Happy Tuesday! Angelica here, and today I'm sharing a pretty CAS (clean and simple) card showing you just how much of a punch this cute Peach die packs!

{click to enlarge} 

This die comes with two clear face stamps by Peachy Keen Stamps already, but did you know you can use any 1-1/8" - 1-3/8" PK face on the peach too? I used the Princess Faces (1-3/8" face in the assortment) for my card today!

After I shaded the peach in a peachy-pink ink (Colorbox), I used chalk to shade her cheeks and used a white gel pen for the whites in her eyes.

The "peach" stickers are from My Little Shoebox and I used "Peapod" twine from The Twinery.


Hope you enjoyed the project today, be sure to stop by Barry's Challenge from Saturday and play along for a chance to win!!

Monday, September 12, 2011

Halloween Mini Album & Video

Hello everyone and Happy Monday to all! Today I'm super excited to share my 1st completed Halloween Album!
My Chipboard Mini House Halloween Album was designed for The Scrapping Cottage using the Halloween release Cottage Cutz die's from the Halloween release, and they are all sooo DARLING! I really had a lot of fun designing this album. 
Most design paper is from My Little Shoebox and so are the Alphabet Stickers as well :)

These are the 1st set of pages on the inside :)
I LOVE designing albums, and this one I have to say was SUPER FUN! I love Halloween and just LOVE all the Cottage Cutz Halloween Dies that were just released here.
Dies I used:

2nd Set of pages
3rd set of pages

I tied my album together with Satin Ribbon and added bows to the ties, most of the ribbon I used is from RRR. I also used the fringed trim that was sent to me in a swap.

The tree I airbrushed with Copics & used Silver Lustre Card Stock.I will try to do a video to show how fun and easy this was to do.

Tags are super fun to make and I LOVE dusting the edges, I think I forgot to mention that in my video below. I did dust the edges of the Happy Halloween tag too.

Back side of album

My Youtube Video showing my album!

Thank you for looking and have a lovely day!
Hugs,

Sunday, September 11, 2011

Happy Halloween Treat Box

It's Sept 11 : I just want to say that even here in Singapore, 
we remember 9/11 . Our hearts and prayers are with America and all our American friends. Praying for  worldwide safety and appreciating the  resilience of America in moving forward with hope and confidence. 
--------------------------------------------------------

Today , I want to share a quick treat box/bag project which can be mass produced in quick time  .
I have decorated both sides of my box to show the scale of some our Halloween dies
on this type of box .  
My assembled Accucut box size is about 6x4" . 
You may prefer to use inexpensive , store bought  ready made bag/boxes . 

For this side of the box , I have used the 4x6 Haunted House Border die 
and I diecut the design using self adhesive cardstock to spend less time applying adhesive. 


I went to town with some stickles here - Black Distressed Stickles - for the rough texture , Blue and Green stickles too for added sparkle and color. 


For the other side of my box , I used the Spooky Frame with Owl . 


I love using patterned paper to die cut in the colors that I prefer for the project . 
Then to add depth I simply ink in the colors I want - in this case I used Walnut Stain distress ink . A little Black distressed stickles and I'm done . 

All the patterned papers used here 
are from the latest Trick or Treat collection from My Little Shoebox. 

Thank you so much for all your comments on our projects here. 
We so appreciate your feedback
 Until next time ,