Thursday, April 11, 2024

B Spring Daffodils and Tulips Table Decor Sign

Hey crafty friends,
So glad you stopped in today! It is my turn to share on the Cottage Cutz blog. So I created this cute "B" sign that will be a part of my table decor.


Here's another view of my sign. I started with a piece of white cardstock measuring 5x7. I then added a mat of some designer paper I created. I then cut out the pretty Trellis background die. I layered that onto some cream cardstock. I cut the B out of some yellow cardstock and then cut out the daffodils, tulips and butterfly from some cardstock and then colored and shaded the various white pieces.  In case you're wondering I used a capital B as that is the first letter of our last name :-).


Here's a closer look at the pretty folk art butterfly. I colored the detail pieces with my yellow markers. However the wings were cut from some red cardstock.

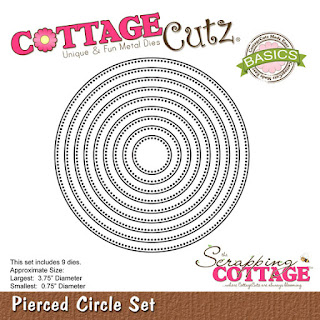
I used the smallest pierced circle die to place a tulip head onto with some of the foliage. All of the leaves started out as plain white cardstock. I just used my markers to color them. I mounted the B onto some foam tape and then onto the mat. This gave it some lift and I thought it made it look very nice.


Here is one last look at my completed sign. I thought it turned out so festive and with a ton of cheerful spring vibes.


Dies Used For This Project

Spring Daffodils

Spring Tulips

Folk Art Butterfly

Pierced Circle Set

Trellis Background


Well, that about covers it for today. Be sure to come back real soon. You will want to keep up with all the beautiful projects the design team is creating.  Don't forget to follow Cottage Cutz on all their social media accounts too! Links are below.
Until the next time, have a wonderfully crafty day!
Melinda


Head over to Cottage Cutz and do a little shopping today!

Get Social With Cottage Cutz

Monday, April 08, 2024

What's Buzzin'?

Hello Friends

It is Pam sharing with you today!

My supply of cards is running a little low so I thought I would make one that could be used for multiple occasions such as thinking of you, miss you, just because and so on.  I did a fancy fold that I have done in the past that I just love.  I am featuring two dies: Bee Gnome and Flowers.

Background photo by FreePiks
Design Steps: (Here is a link to a video that I used to make the base https://www.pinterest.com/pin/443534263317816376/ )
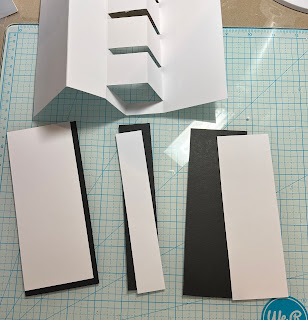
1.  Start with a piece of white card stock measuring 10 x 6 3/4.  Score at 3, 4 1/2, 6, 7 1/2
2.  Fold the flap back along the 6 inch score. Place a ruler at the bottom along the fold and use a pencil to mark small dots at 1/2, 1 3/4, 2, 3 1/4, 3 1/2, 4 3/4, 5, 6 1/2
3.  Place your card into a paper cutter and cut from the dots to the closest score line as shown above
4.  When you have completed the cuts fold as shown below


5.  To cover the panels cut 2 black pieces 6 3/8 x 2 3/4, 2 white pieces 6 1/4 x 2 1/2, 1 black piece 6 3/8 x 1 1/4 and 1 white piece 6 1/4 x 1 1/8
6.  I used a honeycomb stencil to decorate the white panels and 2 colors of yellow ink
7.  I then splattered the panels with the darker yellow ink
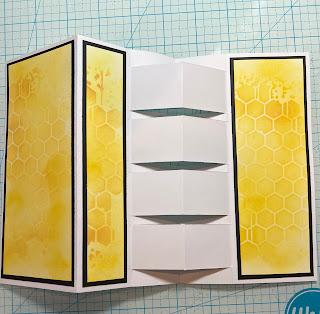
8.  Glue the panels together and then add to the white card base
9.  Glue down the 8 black rectangles as shown above
10.  Use the Flowers and the Bee Gnome dies and cut out the pieces
11.  Shade the pieces and then assemble
12.  Stamp the sentiment and layer onto black card stock.  Decorate with front as shown above.  Cut out the letters in yellow and shade then add to the card.  Finish adding the flowers and bees and your card is complete


We have more inspiration on our YouTube Channel check it out HERE

Thanks so much for stopping by!  And I will see you next Thursday.

Blessings and Take Care

Head over to Cottage Cutz and do a little shopping today!

Get Social With Cottage Cutz

Friday, April 05, 2024

Baby Sleeping on Moon

Hello CottageCutz friends!

Kris here to share a sweet baby card with you today featuring Baby Sleeping on Moon die.


  This card came together very quickly with some cute papers and dies ☺  

I die cut the white circle for the focal image using the Double Stitched Circle set.  I then sponged some clouds using Spun Sugar Distress Oxide ink and spattered some RV81 Copic ink using a small paintbrush.  

 
I die cut a peach mat using the largest of the Nested Stitched Doily Set

I die cut the Baby Sleeping on Moon and the Expressions Baby dies from white cardstock and colored with Copic markers.  

My card base is a landscape A2 card.  I cut some layers from the Bundle of Joy papers (Doodlebug Designs) and layered onto card front.  I then popped up the main focal circle onto card front with foam tape. 


Sweet li'l baby card 


Thanks for looking!!  I hope you're inspired to get crafty with your favorite CottageCutz dies!

~Kristine


Head over to Cottage Cutz and do a little shopping today!

Get Social With Cottage Cutz