Friday, October 27, 2023

Watercolored Fall Tree


Happy Fall Y'all 😊


Kris here sharing some Friday inspiration with you!   My card today features the Fall Tree from the new New Fall Release!  All the individual dies from this release are still 30% OFF for a limited time and there are 15 beautiful Fall designs!

I joined Mary & Pam in the Color Challenge CC971 at SplitcoastStampers this week which is...

Pretty Peacock
Crushed Curry
Cajun Craze
The dessert option is TEXTURE.


(All dies I used are linked at the end of this post)

DESIGN STEPS:

I started with an A2 top folding card and since I was out of the Curry c.s., I used Daffodil Delight and ink blended some wild honey Distress Oxide ink to get the deeper curry color. 


For the background of my focal image I wanted to incorporate some texture so I used some thick watercolor paper and die cut the Leafy Background Slimline die and mounted it on a piece of 3-1/4" x 4-1/4" watercolor paper.  


I then turned it over and cut off the excess.


I adhered this to the middle of my card front.


Next, I die cut the Fall Tree and leaves from the Autumn Ladder from watercolor cardstock.

(I also die cut the wheelbarrow thinking I'd put it at the bottom of my card with leaves in it, but it ended up being pretty large compared to my tree, so I eliminated it.)

I die cut a piece of Mossy Meadow c.s. with one of the Hills Slimline dies and another piece I die cut with one of the Grass Slimline dies. I cut both to 3-1/4" wide and mounted the hill on top of the grass blades and adhered to card front.


I watercolored the tree and leaves with Crackling Campfire, Carved Pumpkin, Wild Honey and Vintage Photo Distress Oxide inks and set aside to dry.

Next, I created a frame from the Pretty Peacock c.s. by layering the 2nd largest Wacky Stitched Rectangle Die inside the largest Scalloped Rectangle Die and die cutting it.


I added foam strips to back of frame and adhered to card front.


I adhered my tree and leaves onto card front.

For my sentiment, I used this pretty teal watercolor Deco Foil to foil my sentiment onto the Cajun Craze cardstock.  To do this, I printed my sentiment on the Cajun c.s. using a laser printer, then added my foil on top and ran it thru my Minc (like a laminator, but made for foiling).


Here are the results up close:  
I love how it incorporated the peacock, yellow and green ☺


and done!


  I hope you are inspired to get crafty with your favorite CottageCutz dies!  

More inspiration and tutorials on our YouTube channel here. 

♡  ♡  ♡

~Kris


Thursday, October 26, 2023

Swing into Fall

Hello Friends 

It is time to show off our new RELEASE!  It is our Fall Designs for 2023.  Perfect for those Thanksgiving cards and fall birthdays. The new dies are in the online store.  There are 15 designs and they are currently 30% off! 

I am sharing a card using the Fall Branch w/Swing and Autumn Friends

Design Steps

1.  For the base use a cream A2 size. Using largest Wide Pierced Retangle Frame die cut out 2 in teal,  cut a piece of leave rust DP 4 1/8 x 5 3/8 and use a piece of cream cut to fit inside of the rectangle frame 3 1/4 x 4 1/2.  Use some teal ink and blend it on the cream colored rectangle
2.  Glue the leave DP to the card base.  Glue the two teal frames together and then add dimension tape to the back of the frame.  
3. Glue the inked paper to the center of the card and then pop the frame over the top
4.  Using the Fall Branch w/Swing and the Autumn Friends die cut out the following colors of card stock: rust, cream, teal, yellow, brown, and dark brown
5.  Place some dimension squares to the back of the branch and swing.
6.  Pop the branch and swing to the card as shown.  Add dimension dots to the back of the little fox and then pop him onto the swing.  Add the leaves to the tree branch and a few to the bottom of the frame.  Stamp your sentiment then layer onto yellow.  Glue the sentiment to the frame as shown below and your card is complete


We have more inspiration on our YouTube Channel check it out HERE

Thanks so much for stopping by!  And I will see you next Thursday.

Blessings and Take Care


Wednesday, October 25, 2023

Let Us Give Thanks

Hello CottageCutz friends! Thanks for taking the time to stop and visit with us today. It's Mary Marsh here bringing you the Wednesday edition of the Blog.

It's new release time!!! We have our Christmas 2023 release in the online store that has 40 designs. It's an old-fashioned Christmas theme. You can pick up the individual dies at 30% off for a limited time.

We also have a new Fall 2023 release in the online store with 15 designs. You can also pick up these individual dies at 30% off for a limited time.

Today for your viewing pleasure, I am featuring the new Fall Wagon Wheel, Autumn Friends (Fox) and the Fall Barrel (Sunflowers) dies and I created a Thanksgiving card. So, let's get started with some details of how I created my card. 

Design Steps:

I started my card this week using the colors from the Splitcoaststampers color challenge #791. We are to use pretty peacock, crushed curry and cajun craze for the color trio. As a plus neutrals are always allowed. 
crushed curry, pretty peacock, cajun craze

I cut my images in the challenge colors and some neutral shades. . 
I had designer paper in the pretty peacock color so I used that for my background. It's from the Stampin' Up "come to gather" collection. I stamped my Thanksgiving sentiment on the image panel in the cajun craze ink color.

Pretty Peacock card base: 4 1/4" x 5 1/2"
Designer Paper Layer: 4 1/8" x 5 3/8"
Espresso Panel: Largest Stitched Square die - 3 1/2" x 3 1/2"
Image Panel: Largest Square Set die - 3 3/8" x 3 3/8"

I am now ready to start card assembly. I attached the images to the kraft panel with clear drying glue and dimensional adhesive. 
Attached the designer paper to the card base with double sided tape.
 
To complete my card, I attached the image panel with double sided tape. I also added a pair of acorns from the Autumn friends die. I didn't like the green stem that's holding the sunflowers so very carefully I was able to lift the images and add a new stem cut in pretty peacock. I placed it over top of the green one. I like it better.
Well, that's it for me for this post. See you again next week.


Tuesday, October 24, 2023

Easy Snowman Die Cut DIY Card

Happy Tuesday crafty friends,
Today I am sharing a cute, quick and easy card you can easily recreate. It features a super cute snowman die cut from the new Cottage Cutz release. Here is my card.
It is a standard top folding A4 card. It is a very easy card that you can recreate and make several for the upcoming holiday season.
I started by cutting out some base dies and some corresponding mats from some patterned paper. The paper is from an Echo Park 6x6 paper pad. I used the Pierced Circle Die set and the double stitched rectangle die set for the die cut bases and then cut some mats from the patterned paper to fit. For the circle, I used the next size down in the die set. The base of the card is a white cardstock cut at 4.25 x 11 and folded at the 5.5 mark to make it a top folding card.


I then went to work on that super cute snowman. I cut him out in all white cardstock. My typical MO. I then colored him in with corresponding colors to the papers I chose. I love doing this method so I can come close to the colors and not have to have so many different paper colors. After coloring the snowman, I assembled him and added him on to the card top I then cut out the stay warm from one of the pieces of paper, You could just as easily  use a stamp or another die cut for a sentiment.

Here's a view of the card standing up and slightly angled. I think it turned out super cute and very clean.


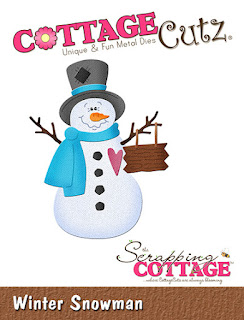
Winter Snowman


Double-Stitched Rectangle Set


Pierced Circle Set

Well that about covers it for today. Be sure to keep stopping back by for some more creative inspiration and the holiday crafting season gets heated up! Also, stop back by this Wednesday as I showcase a super cute project I created for an Instagram Hop I will be participating in! You don't want to miss it!

YOU WILL WANT TO JOIN THE FUN!
You could win 1 of 2 great prizes!
1 $50 Prize from La-La Land Crafts
1- $50 Prize from Cottage Cutz!
Winners will be chosen over on Instagram.

I will also have a full post on my blog with deets on my project! I can't wait to share what I created!

Until then, have a wonderfully crafty day!
-Melinda