Sunday, January 09, 2022

Winter Banner

Happy Sunday Scrapping Cottage friends! 
Melinda here with another fun project. Today's project is this super cute Winter themed banner!

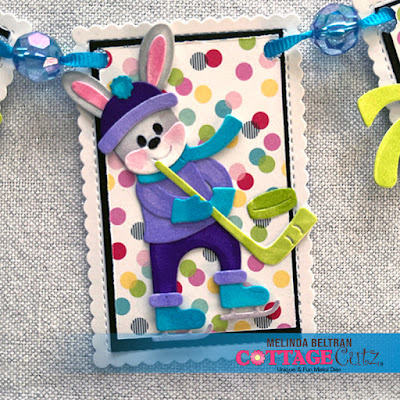
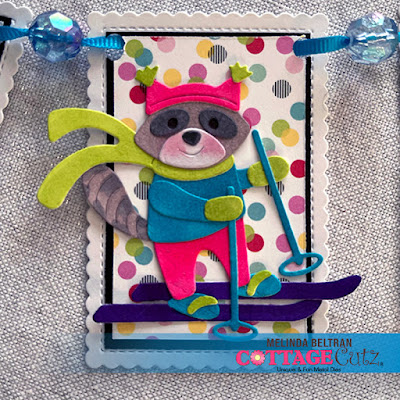
Here is a look at my finished project. I used several dies from the 2021 Winter collection. I used five of the dies to create these adorable winter characters. I cut and assembled them and then mounted them onto some patterned paper and black cardstock mats. I then mounted each of those onto the scallop stitched rectangle mats. I used my markers to color them all in. 


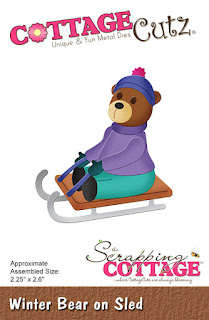
Here is a closer look at the cute little Winter Bear on Sled


Here is a closer look at the Winter Hockey Bunny


Here is a closer look at the Winter Penguin Snowboarding


Here is a closer look at the Raccoon on Skis


Here is a closer look at the Winter Fox Skating


Once each panel was done, I punched some holes in the top corners. I strung them together with some ribbon and beads and then hung it up. It will make the perfect addition to my winter themed entrance décor.

The Dies I used to create these projects:


In case you didn't hear, The CottageCutz YouTube channel is up and running. We are featuring videos every Wednesday. Drop by and subscribe so you don't miss one and give us a thumbs up on our videos.

Until the next time, have a wonderfully crafty day!
Melinda Beltran

Saturday, January 08, 2022

Love You with all my Heart

Hello CottageCutz friends! Thanks for taking the time to stop and visit with us today. It's Mary Marsh here bringing you the Saturday edition of the Blog.

IT'S NEW RELEASE TIME! The Winter Release with 15 new designs is in the online store. They are perfect for creating cards for all your winter celebrations. You can pick them up on a limited time 30% off sale.

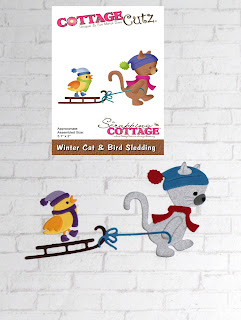
Today, I am using the new Winter Cat & Bird Sledding and the Winter Ski Trip dies to create a scenic mountain lake with pine trees and sledding slopes. This will be a Valentine's card. 

I like to make non-traditional cards for this holiday, and I thought this image would work great as a love style card. I am not sure who I will give this card to as yet. Maybe my hubby or our precious little granddaughter. So, let's get started with some details of how I created this card. 

Design Steps:
I started off my card by cutting the images. I cut the cat & bird in bright colors. For the cat I used somewhat masculine colors and the little bird in more feminine colors. 
The mountains are cut in a dark gray cardstock and also a very pale blue for the snow caps. The pine trees are cut with the Mountains & Trees Slimline die. I cut the pine trees in a dark green cardstock.
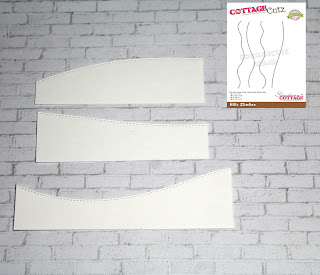
For the sledding slopes, I used the Hills Slimline die.  
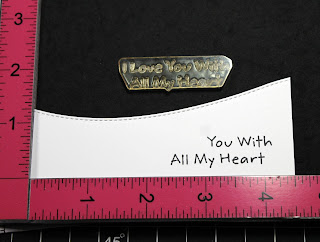
Next, I stamped my sentiment. I masked off the words I didn't want to use. I used my MISTI since this is a photopolymer stamp and sometimes, they don't stamp well with just one inking. I had to double stamp this one. 
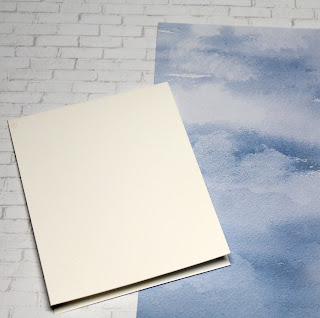
Now that my elements are prepared, I am ready to start card assembly. I used a white card base and for the sky background I used designer paper. I didn't need a full background for the designer paper since the slopes would cover it. 
 
White Card Base: 4 1/2" x 5 1/2"
Designer Paper Layer: 3 1/8" x 4 1/2"
I attached the sledding slopes and the designer paper with double sided tape.  
Next, I attached the pine trees and the mountains. I positioned the mountains to give the appearance of a mountain lake. It reminded me of Lake Tahoe. 
The images are attached with dimensional adhesive. This little pair is so cute and I love how they look placed in the mountain scene.  
To finish off my card, I added my Love phrase. It's cut from cardstock using the Love Shadow die. I added a couple of enamel hearts and this card is finished. I hope I have given you an idea for a way to use these dies for Valentine's Day. See you next Saturday. 
Reminder: Our YouTube channel is active again. Check out the latest video and we are having a giveaway for subscribing, liking the video and giving it a thumbs up. Click here.

dies I used to create card:


Friday, January 07, 2022

Happy New Year Winter Easel Card


Good afternoon Cottagecutz Fans, I hope you’ve had a wonderful week. Happy Friday! It’s Wendy bringing you the blog today and i am suer excited to bring you a card using the new winter dies. They are just adorable and I struggled to choose which one to use so I used quite a few :-)

I thought I’d make an easel card to mix things up a bit. Cut a Piece of 12’ x 5’ and score in half so 6”. Score again on the card at 3”. Cut another piece of card 6” x 5” and attach the bottom of the card to the folded design again at the bottom


To create the main part of the card I took the ‘Clouds Slimline’ die to create a background. I find it easier to start part way up the card with my clouds and build it up to the top

Next I cut the line for the cable cars, then the cable cars in different colours. I added them onto the card with 1mm foam pads

I then  cut out the mountain from the same die (Winter Ski Trip) and added part way down the card


The next part of the card was to cut some snow using the ‘Hills Slimline’. I cut the snow out twice and layered it on top of each other with 1mm foam pads. Next I cut the ‘Winter Chalet’ and assembled. I just used the chalet and the fire from this die. I then cut some trees from the ‘Winter Whimsical Village’ to add to either side of the card


To finish I cut out the ‘Winter Moose’. How cute is he. I added some pink chalk for his cheeks as it would be cold out in the snow


To ensure my easel card stood up I used the Snowboard from the ‘Winter Penguin Snowboarding’ die and attached it to the card with 2mm foam pads. So the card folds completely flat which is great to pop in an envelope

I really hope you have enjoyed the card and are looking forward to a crafty weekend.
Enjoy, hugs
Wendy


Dies I used:


Don’t  forget to check out our YouTube Channel for more crafty fun:


Thursday, January 06, 2022

Valentine Bicycle

 Hello Scrapping Cottage Friends

I hope all of you had a great time celebrating the New Year!  Last year went by so incredibly fast.  

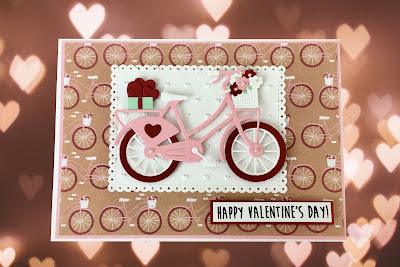
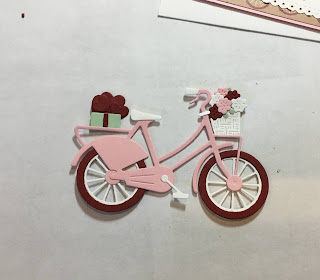
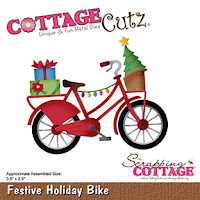
Believe it or not I am starting my Valentines cards.  I am repurposing a Christmas die for this card.  I am using the Festive Holiday Bike.  As you can see I changed up just a few things to make it a Valentine.


Design Steps:

1.  Using the Festive Holiday Bike die cut out the pieces using, deep red, pink, white, and mint green


2.  Assemble the bike with a fine tip, clear drying glue
3.  For the card base I used a 6 x 4 1/4 white card stock, 5 3/4 x 4 pink card stock, 5 1/2 x 3 3/4 Bike DP and a white rectangle cut with the Scallop Nested Rectangle die the second for the largest 
4.  Run the scalloped rectangle through a heart embossing folder.  Then using dimensional dots pop the bicycle onto the rectangle

5.  Glue the pink card stock to the white card base, then glue down the bike DP and finally glue the rectangle with the bike.  Stamp your sentiment and add a few tiny pearls and your card is complete

CottageCutz Products


I am so excited about getting a head start on my Valentines!  I hope to see you back next Thursday! And don't forget to check out our YouTube Channel! Lots of fun ideas!

Take Care and Blessings
Pam

Wednesday, January 05, 2022

Feel Better Card Featuring Winter Mouse

Hello friends! It's Theary here; first of all, I want to wish each one of you a Happy New Year! I hope you all had a wonderful holiday season. 

For my first blog post of the year, I wanted to share a video tutorial over on the CottageCutz YouTube Channel featuring some fabulous dies from the new Winter Release


This card gives me all the feel! With it being flu season, many of us feel under the weather. This card is perfect for sending to someone you love.


For this card, I used Winter Mouse by Woodstove die along with Winter Pine & Birch Tress die. Added some patterned paper, ink blending, and Copic coloring made the card come to life. 

 Please join me here to see how this "Feel Better" card came together and find out who won the last giveaway! 

I hope to see you there!
 Theary


SUPPLIES USED