 |
| granny apple green, daffodil delight, melon mambo, bermuda bay |
Tuesday, April 13, 2021
Father's Day Gnome Sleeping in Hammock
Sunday, April 11, 2021
Spring Showers
It's Anja here. I have a Spring card for you today.
For this project I used:
- Cottage Cutz dies (Spring Showers Buddies),
- Distress inks,
- white card base (15x15 cm),
- blue card stock for background (14,5x14,5 cm; 12,5x12,5 cm),
- patterned paper for background (13,5x13,5 cm),
- green card stock for background,
- water color paper for background (12x12 cm),
- white card stock for die cuts,
- black pen,
- white pen,
- plastic stencil (clouds),
- white acrylic paint,
- baby wipes,
- heat gun,
- water spritzer,
- Glossy Accents,
- paper glue.
First I cut and colored the creatures.
Next I started on the background. I used watercolor paper and smooching technique. I dried the paper with the heat gun.
Then I did the clouds using a plastic stencil. I used white acrylic paint and baby wipes for coloring.
Then I trimmed all the background papers.
Last I arranged all the background papers and cuts on the card base and added rain drops using Glossy Accents.
And my card was done.
And that's all from me for today. Don't forget to stop by on The Scrapping Cottage online store and check out the Anniversary Sale.
Have a nice Sunday and see you again next week.
Anja Z.
Cottage Cutz dies I used for this card:
Saturday, April 10, 2021
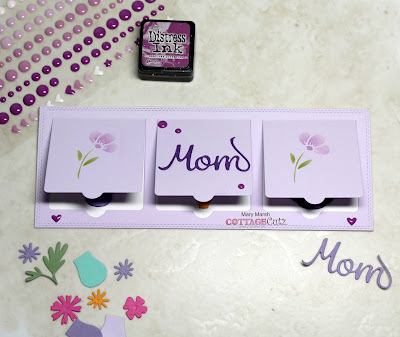
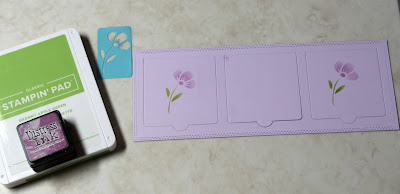
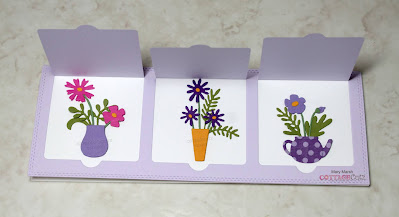
Mom's Slimline Lift Flap Card
Friday, April 09, 2021
Sending Hugs Slimline Card
Happy Friday! I'm so excited - there is a new release of SLIMLINE DIES! These are wonderful, basic dies that should be a part of every card maker's collection. My card today utilizes several of these dies along with an adorable mouse from the Spring release.
Here is how I created the card:
I started by using the second largest of the Stitched Rectangles Slimline dies to cut two panels - one from white and the other from green cardstock.
I then used one of the Grass Slimline dies to cut a strip of grass. By cutting the grass from the Stitched Rectangle first the stitching continues around the whole rectangle when they are glued together.
I then used the Clouds Slimline to make three stencils for my background.Using a blending brush and Distress Oxide ink I stenciled the clouds.
I glued the grass to the background making sure I only glued the bottom and side edges (so I can slip my image under the grass.) I stamped my "sending" sentiment and adhered the Hugs Phrase. I placed a self adhesive sheet on the back of Hugs before die cutting to make this easier to place on the card.
Next I cut my image using the Mouse w/Flower Cart die. The image is colored with a combination of Distress Oxide inks and Copic markers.
I wanted to use this yellow flower paper for my panel to cover the card base. Because it was so lightweight, I cut a panel from lightweight white cardstock using the largest of the Nested Rectangles Slimline dies. I cut the floral from the largest of the Stitched Rectangles and glued them together.I tucked my mouse and cart under the grass and adhered the image panel to my floral panel. This all was glued to a card base.
I hope you've enjoyed my card today. These slimline dies allow so many creative possibilities for your card making. They are on sale for a limited time (52% off the bundle or 25% off individual dies) so please visit the online store. There is also an Anniversary sale with up to 60% off select dies!
Dies used:
Thanks for visiting today! I hope you have a fun and creative weekend!
Thursday, April 08, 2021
Soaring High! NEW SLIMLINE RELEASE
Hello Scrapping Cottage Friends!
WE ARE CELEBRATING 19 YEARS IN BUSINESS! SO WE ARE PASSING ALONG OUR THANKS TO YOU! Save up to 60% on select CottageCutz dies. DURING OUR BIRHTDAY CELEBRATIONS!
AND TO CONTINUE THE PARTY WE HAVE A NEW RELEASE OF SLIMLINE DIES! THERE ARE 9 DIES WITH A SPECIAL BUNDLE PRICE OF 52% OFF!
Today, I am excited to share with you one of the new slimline dies called Clouds Slimline. I combined it with one of our Spring Release dies which are also still on sale. The die is the Fox in Airplane.
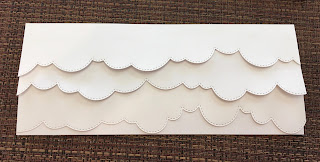
1. I started with the Fox in Airplane die and cut out all the pieces with yellow, red, green, blue, silver, tan, brown and vellum2. I assembled the pieces using a fine tip glue and a small pair of tweezers3. My base is a slimline white card measuring 8 1/2 x 7 scored on the 7 side 3 1/2. Using the Clouds Slimline dies I cut the clouds using all 3 different dies
4. Glue the clouds to the card leaving the bottom of the cloud with no glue so you can tuck in the next cloud just below it
5. Create your little banner, I just did it free hand. Pop your plane to the front of the card and then add clear sequin and you card if complete
CottageCutz Products


