Hello
Scrapping Cottage friends! Thanks for taking the time to stop and visit with us today. It's
Mary Marsh here bringing you the Saturday edition of the Blog.
We have a brand new release of dies in the online store. It's our
Spring Release with 22 new designs. Everything you need to create Spring, Easter, Birthday, Mother's Day, Father's Day, Thinking of you cards and so much more.
The Design Team has been showing samples using these new dies. So if you haven't seen them check back on the blog for lots of great ideas. The dies are currently on sale at
25% off so check all the new designs in the
online store for some great selections. The
Safari & Circus releases are still available at
25% off as well.
Today for your viewing pleasure, I am featuring the new
Bird w/Bluebells die. I created an Easter card with this sweet image and also a new to me fun fold technique. So let's get started with some details on how I created my card.
Design Steps:
I started my card this week with the layout. I found this cute fun fold technique on YouTube and thought I would give it a try. I will be showing photos and panel sizes but if you want to see a YouTube video from the stamper who created the idea-
click here.
Panel sizes:
Lemon-Lime card base: 4 3/8" x 5 5/8"
Heather layer panel: 4 1/4" x 5 1/2"
White inside sentiment panel: 4" x 5 1/4"
Designer Strips: 3/4" x 4"
Left panel: 3 1/2" x 4"
Designer Paper: 3 1/4" x 3 1/4"
Right panel: 3" x 3 1/2"
Designer Paper: 2 3/4" x 2 3/4"
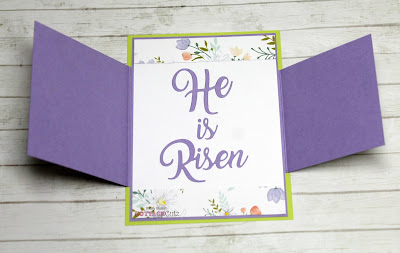
I cut my white sentiment panel and adhered the 3/4" strips of designer paper to the top and bottom of panel.
I was thinking of stamping a Happy Easter Sentiment then decided on this phrase from the 2019 die -
He is Risen Cross die. I cut it in the highland cardstock that coordinates with the designer paper I used.
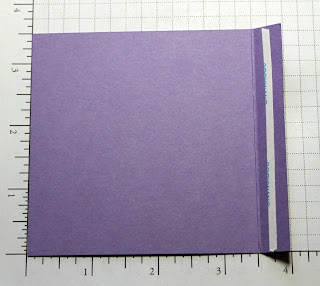
Next, I cut the side panels for my card. Sizes are above. The idea is to make the panels a square so you make the one side a 1/2" larger for the flap. I scored the left panel at 3 1/2" - it created my flap and now it's a square.
I scored the right panel at 3"- again the score created my flap and also the square panel.
The designer paper is attached with double sided tape,
and for the flaps I used Scor-Tape. It's a stronger adhesive and I want to be sure the panels won't come off in the mail.
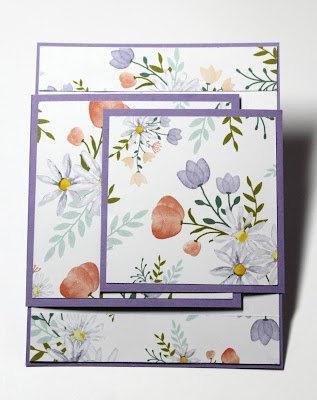
Now, I am ready to attach the side panels to the card base. The left side is attached first then the right side is centered and overlaps the left panel.
Next, I cut my bird & flower images. I used cardstock that matched the designer paper.
I was going too add the images directly on the cardstock but the background was just a bit too busy. So I cut a white square at 2 1/4". I didn't want to cover up all the designer paper on this panel because its to pretty. The images are attached with Ranger multi medium matte. I used dimensional adhesive on the little bird. The lemon-lime base panel was added to cover up the panel flaps on the rear of the card.
Here is the card inside.
Well, that's it for me for this week. I hope I have given you an idea for a fun way to use this new die. See you next Saturday.
die I used to create card:


