Friday, September 06, 2019

Bluebird of Happiness

Hi!  It's Jeanne sharing today.  We've had bluebirds in our yard recently and they inspired me to make this card.
I love this chubby little bird who started off as a cardinal but ended up as a bluebird.   I used the Jolly Cardinal and the Christmas Floral # 1 dies to cut the bird and leaves in white cardstock.
Distress Oxide inks and a sponge dauber were used to color the pieces.

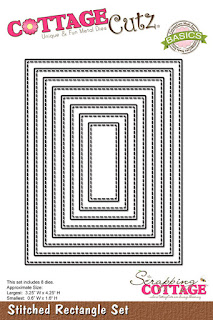
I cut three panels - one 4.25 x 5.5 inches and two using the second and third largest of the Stitched Rectangle dies (I love these dies - they are SO useful!)  I also cut a strip of patterned paper 4.25 x 1.5 inches from striped designer paper.
I embossed the large panel using a leaf pattern folder that coordinated with the die cut leaves.
I centered the stitched panels on to of each other and adhered them together.  I glued the bird down by placing the glue mainly in the center and leaving the edges unglued.  This allowed me to tuck the leaves under the bird.  I cut apart one of the leaf branches so the I had a little more variety.  The bird was placed high on the panel to leave room for the sentiment.
The sentiment is heat embossed in white and popped up using foam dots.  I started by thinking this would be a birthday card, but it really could be for any occasion.  This little cardinal is so cute and just by changing his colors you can make him into many birds - think robin, canary, sparrow.....

Dies used:
http://www.scrappingcottage.com/cottagecutzjollycardinal4x4.aspx
http://www.scrappingcottage.com/cottagecutzchristmasfloral1.aspx
http://www.scrappingcottage.com/cottagecutzstitchedrectanglesetbasics.aspx


Thanks for stopping by today.  I hope you have a fun and creative weekend!


Thursday, September 05, 2019

Fun Flip and Fold Birthday Card!

Good Morning All!

It is Pam sharing with you today!

I was watching a YouTube video on fancy fold cards and came across this cute Flip and Fold card by Janie.  This is the link for that video if you would like to watch it.  I thought it was such an adorable card and it would give me a chance to use the Birthday Cake with Pedestal die and a bunch of bright and happy designer paper.
Designer Steps:

 1.  Cut a piece of yellow card stock 4 1/4 x 11.  Score at 2 3/4 and 5 1/2
 2.  Cut a piece of green card stock 3 1/2 x 10. Score at 5
 3.  Cut 4 pieces of DP 2 1/2 x 4 1/8.  I did 2 flower pieces and 2 pink polka pieces.  Also cut 2 more pieces of DP a flower one 5 1/4 x 4 1/8 and a pink polka dot piece 3 1/4 x 4 3/4
 4.  Open the yellow card and glue the large piece of flowered DP to the inside
 5.  Fold the front flap in half and then close the card glue one of the smaller pieces of flower DP to the front flap
 6.  And glue the other piece of flowered DP to the back of that fold
 7.  Completely open the card and glue the 2 strips of pink polka dot paper to the inside of the folds
 8.  Glue the green card to the inside of the open yellow card as shown noticing how it opens the opposite directions
 9.  Close the green card and attach the larger piece of pink polka dot paper as shown
10.  Open the green card and tuck the folds from the front flap under the green card
 11.  Cut out all the pieces in white card stock using the Birthday Cake w/ Pedestal die 
 12.  Use your favorite makers to color all of the pieces
13.  Assemble the pieces.  I cut a few more flowers and one more cupcake to decorate the inside of the card
14.  Using the Expressions Happy Birthday cut out 2 sets and glue them together
15.  Pop dot the cupcake to the front of the card and add the sentiment and additional flower in the corner
16.  Open the card and add the sentiments and addition flower and cupcake.  Your card is complete and is ready to send to someone special!

CottageCutz Products 


Praying for all of those devastated by the terrible hurricane Dorian.
Blessings
Pam

Wednesday, September 04, 2019

Congratulations On Your New Home!

Hello! This is Sukie and I'm back for my design team post. The Magical Garden release has inspired me to create a stash of house warming cards.  I used the Stone Fairy Door and the Tree with Tire Swing for my card.
I pulled out my inks and watercolored all of the elements of this card. The die cuts were colored with a fine water brush to enhance all of the details.  I hand cut a couple of steps to create an entrance for the Stone Fairy Door.
A larger water brush was used to create the background with a mix of the 3 colors of ink.  It's best to move quickly with broad brush stokes for this simple background.
I stamped a sweet sentiment on a speech bubble shaped cork sticker. The sentiment is from the Scrappy Moms (retired) Countless Occasions stamp set.
I began building the scene of my card by strategically placing the Stone Fairy Door to the right side of my card base, leaving enough space for the Tree with the Tire Swing.
The sentiment was anchored perfectly above the scene creating a cohesive look between the die cuts and cork sticker.
A bit of Twisted Lime Trendy Twine was tied along the top edge of my card as a finishing accent.
Here are the die sets used on my card, available in the shop:

Tuesday, September 03, 2019

Party Animal Bus

Hi, Janja is here with you.
Today I would like to show you another birthday card.


- CottageCutz dies: Party Animal Bus, Fancy Happy Birthday, Stitched Wide Rectangle Frame Set
- white card base: 4.25 x 5.5" (10,8 x 14 cm), folded
- colored cardstock
- colored ink pads
- cloud stencil
- glue, double-sided adhesive tape, self-adhesive foam pads

Start by die-cutting the bus from colored cardstock. Additionally color edges with colored pads.


Also die-cut a sentiment and two strips. I used the largest die of the set.


Create a cloudy sky background with a stencil, ink pad and brush.


Cut a white frame with two rectangle dies. The size should match the size of the cloudy sky background.
Now all we have to do is put together a card.


Have a nice day. 
Janja