Saturday, April 27, 2019

Been Dragon My Feet (new die)


Hello Scrapping Cottage friends! Thanks for taking the time to stop and visit with us today. It's Mary Marsh here bringing you the Saturday edition of the Blog.

We have a new release of dies in our online store. If you haven't seen the Magical Fantasy release yet, you have to drop by the store and check it out. These new dies are all so cute and whimsical. There are 27 new designs and I am in love with everyone of them.

A friend asked me if I could make a card that would say "sorry" for something she didn't get done as promised. Well, I just happen to have one of those "punny" sentiments mentioning a dragon and our new sweet dragon die. So, today I am featuring the new Magic Dragon die.  Let's get started on some details of how I created this card.

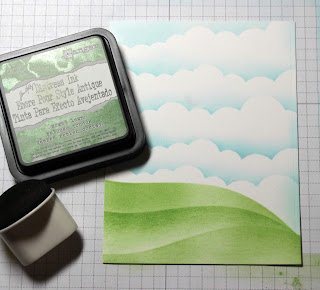
Step 1: I decided to sponge a cloud and grassy slopes on the background with distress inks. I used a stencil for both. On the clouds I used tumbled glass distress ink and on the hilly slopes I used mowed lawn distress inks.


Sponged Image Panel: 4 1/8" x 5 3/8"

Next, I cut the dragon from 2 shades of green and mango cardstocks.
I wanted my sentiment on the top right of the image panel. I used a cucumber ink and with the help of my MISTI it stamped perfectly.

Step 2: Now that everything is sponged, cut and stamped, I am ready to start card assembly. I decided to add some cucumber thick bakers twine to the image panel. Just for a little added interest.
To attach my cute little dragon I used dimensional adhesive. I wanted him lifted off the image panel a bit and have his feet just touching the grassy slope.
To finish off my card I added a small twine bow with a epoxy heart and scattered a few enamel dots. The epoxy heart is clear and didn't show up very well in the photo. But irl you can see it so I will leave it on the card. Attached the image panel to the cucumber card base with double sided tape.
I hope I have given you an of a way to use this magic dragon die. We have been showing samples of these new dies all week so if you haven't seen them look back on the blog. We are also on Facebook, Instagram and Pinterest.

See you next Saturday!

die I used to create card: 


Friday, April 26, 2019

I Believe in You

Happy Friday!  It's Jeanne today with a card of encouragement.  Unicorns are so much fun to use since they lend themselves to all manner of sentiments.
For this card I also used a sketch I found on Splitcoaststampers.  Sketches make creating a card easier in many respects since some the the design decisions are already made!  For this sketch I rotated and flipped it.

I started by cutting all my pieces from the Flying Unicorn and Rainbow with Clouds dies out of white card stock and then coloring with Distress Oxide Ink using sponge daubers and small foam eye shadow wands.
For the rainbow, I glued all the stripes to the rainbow backing by covering it completely in glue first, then carefully laying each stripe down.
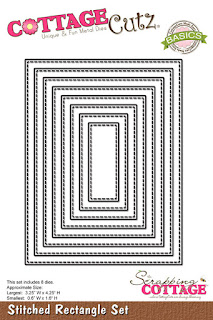
For my sky panel, I used a stencil and DO ink in a light blue to create clouds on a 5 1/2 x 4 1/4 inch piece of white card stock and then cut out a stitched rectangle using the largest of the Stitched Rectangle dies.
I glued that to a white panel cut using the largest of the Nested Scalloped Stitched Rectangle dies.
To complete the sketch, I used an A2 top fold card base in purple with a 5 1/4  x 4 inch white panel and a strip of gingham paper 2 inches wide.
I stamped the sentiment in purple on a piece of yellow card stock I cut using the second smallest of the Stitched Rectangle dies.  I glued the rainbow and clouds directly to the front.
When it came time to add the unicorn I was not happy with the colors I originally chose - they were too pastel and the grey shading a bit too dark.  It was very easy to cut and color a new one in brighter colors.  I've saved the other one and will use it on another card.
I used foam dots to pop the unicorn up off of the front of the card.
My final step was to add Wink of Stella to the mane, horn, wing and tail and then add some sequins for more sparkle.  When making a card with unicorns, you really can't have TOO much sparkle!

Dies:
http://www.scrappingcottage.com/cottagecutzflyingunicorn.aspx
http://www.scrappingcottage.com/cottagecutzrainbowwithclouds.aspx
http://www.scrappingcottage.com/cottagecutzstitchedrectanglesetbasics.aspx
http://www.scrappingcottage.com/cottagecutznestedstitchedscalloprectangleset.aspx

Thanks for joining me today.  Make sure to visit the store where the Magical Fantasy dies are 25% off for a limited time.  They are a wonderful collection and offer so many creative possibilities!

 I hope you have a relaxing and creative weekend!


Thursday, April 25, 2019

Fairy Dust!

Good Morning Scrapping Cottage Friends

It is Pam sharing with you on the blog!

Today, I am sharing another whimsical die from our new collections call Magical Fantasy!  This group of dies are so much fun to work with because you can really let your imagination go wild!  I have created a fun bokeh background for my fairy.


 Designer Steps:
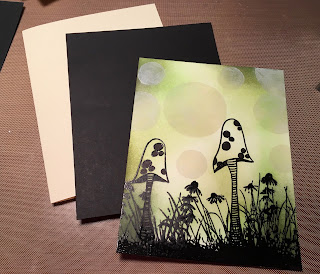
 1. Use a 4 x 5 1/4 inch piece of smooth white card stock. Before I stamped I used an embossing buddy to remove any oils on the card stock.  Next stamp the mushrooms with Versa Mark ink. I used black embossing powder and heat set
 2.  On the bottom of the card I stamped a field of flowers and grass with Versa Mark ink.  Then I used black embossing powers and heat set
 3.  Using 3 different colors of green ink to create the background by sponging it on
 4.  Get some unwanted card stock and the Cross-Stitched Circle dies to create your 3 different size circle stencils
 5.  Use white opaque ink and a dabber to ink inside the different size circles.  I just placed the circles randomly on my background
 6.  Using the Magical Fairy die cut out the fairy in black then trace her dress to back it with black card stock
 7.  Stamp your sentiment and layer it onto black card stock

 8.  Use a cream colored A2 card base and a slightly smaller piece of black.  Glue the black to the card and then add your stamped background.  Place your fairy on top of the tall mushroom add the glitter to the wings and mushroom stem.  Then add the sparkle stars and white dots to the sky.  Glue down your sentiment and your card is complete
CottageCutz Products


Make sure and stop by our sale this brand new collection is 25% off!  You really don't want to miss out on this fantastic sale!

Blessings
Pam


Wednesday, April 24, 2019

Have a Magical Day Card

Hello!  This is Sukie and today I'm sharing a project for my design team post.  The new Magical Fantasy dies are perfect for making all kinds of unique creations.  I love all of the whimsical designs from this release.
I found this scrap of confetti paper left over from another project in my scrap box which inspired the colors of my card.
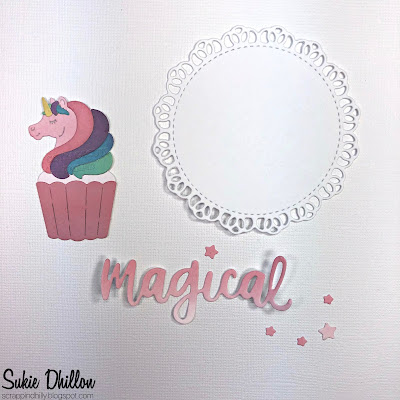
I die cut the Unicorn Cupcake in white card stock and shaded it with my Oxide Inks and adhered all of the pieces.  I die cut the sentiment from the Magical Unicorn Dreams set and shaded it to coordinate with the cupcake.  The gorgeous doily is from the Nested Stitched Doily set.
I created my A2 sized card by layering the tiny checkered pattern with the confetti strip and white card stock.
Next, the doily was placed on the top half of my card with the unicorn centered on top of the doily.
The oversized sentiment was anchored on the white card stock along with the tiny stars from the same die set.
To finish off my card I stamped a partial sentiment from the Scrappy Moms (retired) Countless Occasions stamp set and pop dotted the pieces to create the phrase.
Here are the dies I used on my card available in the shop: