Friday, December 14, 2018

Christmas Friends

Happy Friday!  It's Jeanne posting today and I have a Christmas card for pet lovers.  It features a die from the new pets release and two from this year's Christmas release.
I cut most of pieces from colored cardstock and used white for the hat trim, holly and kitty's inner ears, paws and nose.
 I used Copic markers to color the inner ears, noses and holly. I sponged the edges of the fence boards with brown ink to age it.  Then I glued all the pieces together.
Next I cut a panel from snowflake paper and 4/14 2 inch panel of white.  I then free form cut a snowbank.
I used self adhesive backing on red cardstock, cut the sentiment and using scissors cut off the "tree" portion.
I adhered the the sentiment to the top right hand corner.
Then I placed all my images on the panel to see how they fit.
Since the dog looked like he was sitting a little high, I decided to cut down the snowbank.  I trimmed it so that it was 1 3/8 inches high.
This allowed more room for the dog and cat.  I glued all pieces to the card and popped up the dog face with foam dots.
Dies used:
http://www.scrappingcottage.com/cottagecutzpeekingpuppy.aspx
http://www.scrappingcottage.com/cottagecutzsantahatcat.aspx
http://www.scrappingcottage.com/cottagecutzmerrychristmastreephraseelites.aspx
Thanks for visiting today.  Don't forget to stop by the Scrapping Cottage for some great deals on dies during the Almost Christmas sale!

I hope you have a fun and creative weekend!


Thursday, December 13, 2018

Waiting on Santa

Hello Scrapping Cottage Friends!

It is Pam creating with you today

I am getting so excited Christmas is almost here!  I look forward to spending time with my family.  My cards are almost done.  I have mailed most of them out already.  For the card today I combined one of our older dies with a new one and I love how it turned out!


Designer Steps:
 1.  Use an A2 white card base cut a slightly smaller piece of red and glue it to the card. Cut a piece of  DP slightly smaller then the red and glue it to the red.

2.  Cut a piece of green 1 1/2 x 4 then run it through the embossing machine for texture.  Glue it to the bottom of the DP
3.  Use DP and cut out the chair using the Puppy & Kitten on Chair die.  Shadow the chair using black ink
4.  Cut out the puppy using the Puppy & Kitten on Chair die.  I cut the pup out of light brown and dark brown card stock
5.  Using dark green and brown card stock cut out the tree with the Rustic Tree and Sign die
6.  Glue the tree flat to the card front and then pop up the chair with the pup
7.  Decorate the tree with rhinestones and add the sentiment layered on red
CottageCutz Products


Thanks so much for stopping by and there is still time to shop at our store for that perfect gift for your crafty friends or maybe you!!
Blessings

Pam


Wednesday, December 12, 2018

Sending Holiday Cheer

Hello!  This is Sukie and I'm sharing another project for my guest designer post today.  For my card, I used the Elf's Clothesline die set. When I saw the adorable clothes, I couldn't wait to create a project!
When I work with tiny die cut pieces I use a paint tray to keep everything in one place.  All of the pieces were inked on the edges for added dimension.  A glitter water brush was used to accent all of the red pieces for a sparkly finish.
I went with a neutral color palette for my card base and added a pop of red.  A hand cut border was lined along the top edge with some Diamond Stickles.
I inked up the white card stock with with 3 different inks to create the night sky.  To add additional details, I splattered the background with some white paint.  The tree pieces were were glued together to form the trees.
The next step was to adhere the snowy border to the bottom edge and stamp a simple sentiment on my card base. The sentiment is from the Scrappy Moms (retired) Merry Kissmas stamp set.
The clothesline was secured at an angle between the two trees.  The whimsy elf's clothes were arranged along the clothesline with the tiny clothespins.  
Here is the the sweet Elf's Clothesline die set available in the shop:

Monday, December 10, 2018

Quick Christmas Card

Hi, Lois here today with my Monday post.  Sometimes you need a really quick Christmas card in a hurry.  That's what I have for you today.  I think it took me all of about 25 minutes to make.  For me that's pretty quick!  I have a friend who just loves cats.  Even though she has only one at the moment, she refers to herself as that "crazy cat lady."  I think she would like my card.


To start, I cut Miss Kitty from the CottageCutz new Pets release from white card stock.  


In addition to Miss Kitty, I cut just the holly leaves and berries from Dakota the Husky, replacing the flower on her hat with the holly leaves.  I then colored all the pieces and constructed my cat.  I wanted the paws to stick out a bit, so I ran a stylus around the back of them and stuck tiny foam pop dots on the back.  I think you can see the dimension.


To reduce a little time, I used a pre-cut card base and then cut a piece of Christmas plaid paper 1 1/2" x 5 1/2" and die-cut the Merry Christmas from a pre-glued scrap of red card stock, which I had previously run through my Xyron sticker maker.


I just glued the plaid paper across the card, added some foam pop dots to Miss Kitty to pop her up, and adhered the sentiment.  I was done -- 25 minutes, start to finish!


CottageCutz dies used on my card are:

http://www.scrappingcottage.com/cottagecutzmisskitty.aspx

http://www.scrappingcottage.com/cottagecutzdakotathehuskyexclusive.aspx


Sunday, December 09, 2018

Festive Cats

Hi!

It's Anja again. Today I have a cat themed card for you. When I saw the latest pets release I first spotted all the cats dies. My best friend has a big cat, named Franček (Francis in English). I often babysit him, when she and her husband go on holidays. And he has this big cat tree. So I used the cat and the tree for inspiration and gave Franček some company :)


For this card I used:
- Cottage Cutz dies (Fancy Feline, Santa Hat Cat, Fluffy Buddies),
- Distress Inks (Worn Lipstick, Mowed Lawn, Fired Brick, Black Soot, Pumice Stone, Scattered Straw, Vintage Photo, Peacock Feathers, Hickory Smoke),
- craft card base (15x15 cm),
- patterned paper (14,5x14,5 cm),
- craft card base for background (11,5x11,5 cm),
- white watercolor paper for background (11x11 cm),
- white card stock for die cuts,
- sentiment stamp,
- acrylic block,
- black pigment ink,
- black pen,
- white pen,
- paper glue.

First I cut and colored the cat tree.


Then the cats. I used black pen for the eyes.


Then the second cat. I used greenery from the first die to decorate the tail.


The I cut the papers for the background.


I don't have a lot of sentiment stamp in English. I found one that seemed quite appropriate :)
Cats bring a lot of joy and peace.


And the I just glued everything together. Ant my card was finished.


I wish you all a peaceful and joyful Sunday.

See you again next week.

Anja Z.


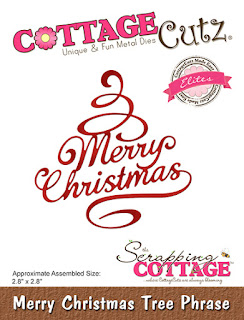
Cottage Cutz dies I used:
http://www.scrappingcottage.com/cottagecutzfancyfeline.aspx


http://www.scrappingcottage.com/cottagecutzsantahatcat.aspx